
sideblog for the knit bits and other fibre art stuff, main wehavecometoanend--maybe |she/her| self-taught everything | ravelry: elliestrickt
1061 posts
Committed2the-knit - Ur The To My - Tumblr Blog

Vintage Wool Fish Rug by Canvello

Antique sewing kit circa 1870
Photographer unknown - found on Pinterest. Please dm me if you know who to credit 🤍

Was looking through my photos and found this jean patch I did a couple years ago :)
Do you think the people who design modern sewing machines in plastic cases ever feel insignificant because of it? knowing that they're making machines with the lifespan of a dog when they could (if they'd been born a few generations earlier) be making machines with the lifespan of a Galapagos tortoise?


Corset
c. 1900
Silk, cotton, metal & potpourri (I’m not sure what the potpourri means, does anyone have an answer for this?)
FIDM Museum


16 frame shooting star animation. January 2022-September 2024 Needlepoint
Frames from my shooting star gif. 16 frames total. Each frame is 8x6.5 inches on a 10” mesh. Designed and animated in photoshop and needlepointed by me. I started drafting this 1/14/22 and finished animating it 9/25/24. It took approximately two years and eight months to finish. This is one of the largest projects I’ve ever worked on and I’m very happy with how it turned out.


I've been sitting on this pattern and tutorial for a while now! so time to finally share it with you! I was lamenting that the jellycat pip and sugar mice were long retired and difficult to get your hands on unless you are willing to pay much more than they retailed for each mouse, so i decided to try and eyeball a pattern and make some myself! they're not exact as i only used constructed visual references but they're close! please note that this pattern set is intended for personal use only. Rough tutorial under the cut!
This pattern is for printing onto A4 but you can check your scale with the measurements I've provided or just play around with how big or small you want to try and make them! i didn't really get any wip photos of pip mouse but it's method is largely the same with the nose being the major change, which i will detail in text in the instructions below.
for sugar mouse i would recommend using polar fleece as it will act the right way for the ears to do their squishy marshmallow looking thing. but minky should also work or other similar fabrics! for pip mouse if you can find a similar curly looking fabric with a thin backing that'll be ideal but fleece will also work well, you just wont get the furry texture, you want a fabric with a little bit of stretch to it. i however would not recommend fabrics like felt or non stretch cotton for these guys as it's likely to not take shape the same as there's no give to the fabric.

once you have printed out the pattern and cut the pieces in your fabric, you'll want to sew the ears up and turn them inside out, then put them aside for later. just leave them as is for now but here you can see i was playing around with pinching the turned through ear into shape.

Then moving on, sew the back pieces together along the spine and front of face. you then want pull the bottom open ends apart gently and place the open sides flat up against the base piece so that they're aligned, it can be good to pin this in place so it doesn't shift.

then, get your tail rope, and tie a knot at either end, placing the base of it inbetween the seam at the butt so that it'll sit in the right place, then sew the seam up directly with the tail in place, make sure you sew through the rope to secure it and make sure it doesnt shift. Sew around the bases seam leaving a hole in one side so that you can then turn your mouse through.

once turned through you will want to stuff your mouse with polyfill quite a bit so it takes shape! i like to put weighted beans in mine for extra effect, you can use dried rice or wheat too, just sew a little circle pouch a bit smaller that the mouses base with scrap fabric and fill and seal! then insert into the turning hole while you stuff. once stuffing is done you can sew the hole up with a ladder stitch. the weight from the beads will allow your mouse to sit up quite well.

next you will want to get those ears you put aside, take each corner and bring the ends together in the middle. then sew them gently together at the ends with one or two stitches in about the same spot. you want them to look 3d so dont sew the ends to the back of the ear, just end to end so they meet in the center.

Then pin the ears in place on the head

then you need to ladder stitch the ears in place while they're pinned so they dont shift around, go all the way around the outside edge of each.

now you're almost done! next they just need a face! sugar mouse only needs embroidery by way of a french knot for both the eyes and nose (you can find good video tutorials on how to sew a french knot online), pip mouse will also need a french knot for the eyes but has a separate process for it's nose. (for the pip mouses nose you will need to leave the marked nose hole open and then stitch the nose fabric to the square nose backing in line with the dotted direction on the pattern, (it should look kind of baggy when it's unstuffed) sew it up completley with no hole, then cut a tiny slit in the backing and add polyfill there before closing with a basic stitch, then you ladder stitch the nose directly to the marked nose hole)
in order to hide the embroidery anchor knots i find the best way is to start by going down through the middle of the ears and then coming back up where you want the eye to be, and then going back down and up through the ear for the finishing knot, as it creates a very easy cover for them and looks nice and clean!
then you have yourself a little buddy!

haha they're great to squish! if you use this pattern i'd love to see your results!


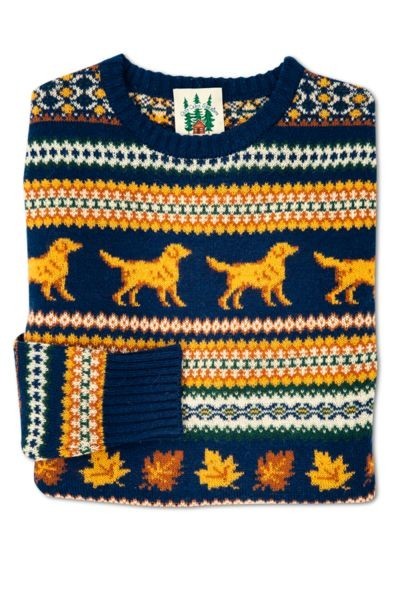


KJP Sweaters

I finished the body of this cardigan so now lengthening the sleeves & it feels like an absolute breeze knitting a sleeve circumference after knitting a body circumference for like 30 rounds


I went too many days without recreating this goddess among us
(Sign up my for mailing list if you want to buy Moo Deng, in this size or in miniature)

Molly Upton Watchtower (1975) Quilt
The struggle of starting a project to use up scrap yarn and then running out of said yarn and having to buy more to finish the project.....


made a sock. now the hard part - the second sock.
(the pattern is Kesäyön kulkija by Lumi Karmitsa)
i think its fun and good that people pick an internet name for themselves these days but i kinda miss when u had some fuckass username and ppl just extrapolated from that i used to be on a star wars forum where my handle was ProfessorMug and ppl just called me prof. u know like there was a guy w vader in his handle so he was just vader


I LOVE to make curtains!!!!!! So relaxing and fun!!!! 💚🏡🌳🏡🌳🏡💚🥰


Dredge-inspired embroidery I did last month !
I used some glow-in-the-dark yarn where I could. It's my first time doing something more "artsy".
(Dredge is a cosy horror fishing game, it's great, you should go play it)


Robe à la française, 1750-60
From the Metropolitan Museum of Art


Embroidered Collars // Burcinsiya

I'm done with the first square! 😭😭😭 34 more to go!
I'll take a 2 day break, just, so my wrist doesn't hate me jshejdhsandb

I'm following this pattern here! I found it on Pinterest and fell in love with it!
realising how much yarn it takes to make anything


Madeleine Kemsley Illustration and Embroidery

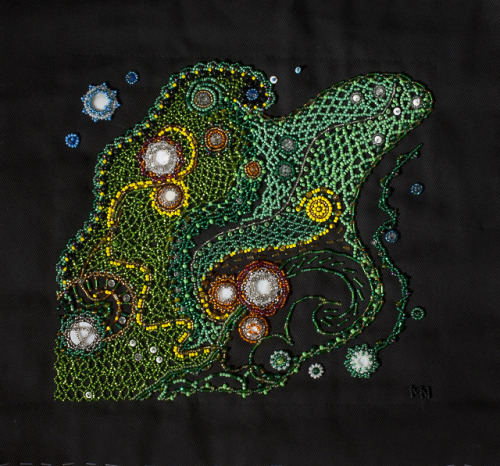
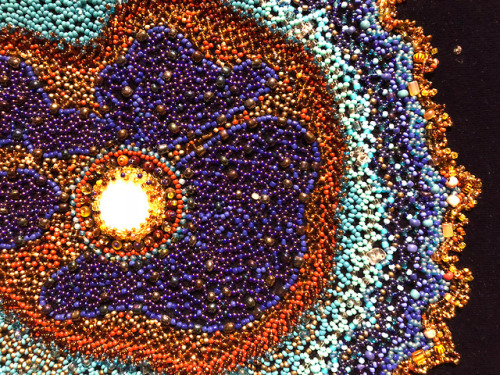

The Stunning Astronomical Beadwork of Native Artist Margaret Nazon
Margaret Nazon has spent the past decade building intricate beadwork depictions of outer space. The colorful artworks balance representational and stylized aesthetics set on black fabric backgrounds to depict galaxies, planets, nebulae, and other astronomical phenomena.
Initially inspired by Hubble space telescope images, Nazon’s celestial renderings are part of a lifelong interest in beading. In an interview with Glenbow, the artist shared that she began beading at age 10, but found the density of traditional beadwork to be tedious.
The abstract nature of celestial images allows Nazon to be more interpretive and incorporate different materials like caribou bones and willow seeds that have location-specific or cultural significance. Nazon is Tsiigehtchic, part of the Gwich’in community in what is now the Northwest Territories of Canada. The artist explained that because she is retired, she is able to dedicate significant time to beading, and often rises at 4:30am to begin working. Nazon plans to continue experimenting, including merging her abstract beadwork with her seamstress skills to create artfully embellished apparel.
Nazon’s artwork was most recently exhibited at Glenbow in a group show, Cosmos, and A Beaded Universe at Prince of Wales Northern Heritage Centre. You can read more about her in the Glenbow interview, and explore Nazon’s portfolio on her website.
source article: X