
Woooooorrrrrrddddddddsssssss (Check out my art tumblr at hey-art-is-cool-I-guess)
304 posts
Daxiushan () Tutorial
Daxiushan (大袖衫) Tutorial
Here are the basics on how to draft a daxiushan, or large sleeved robe.
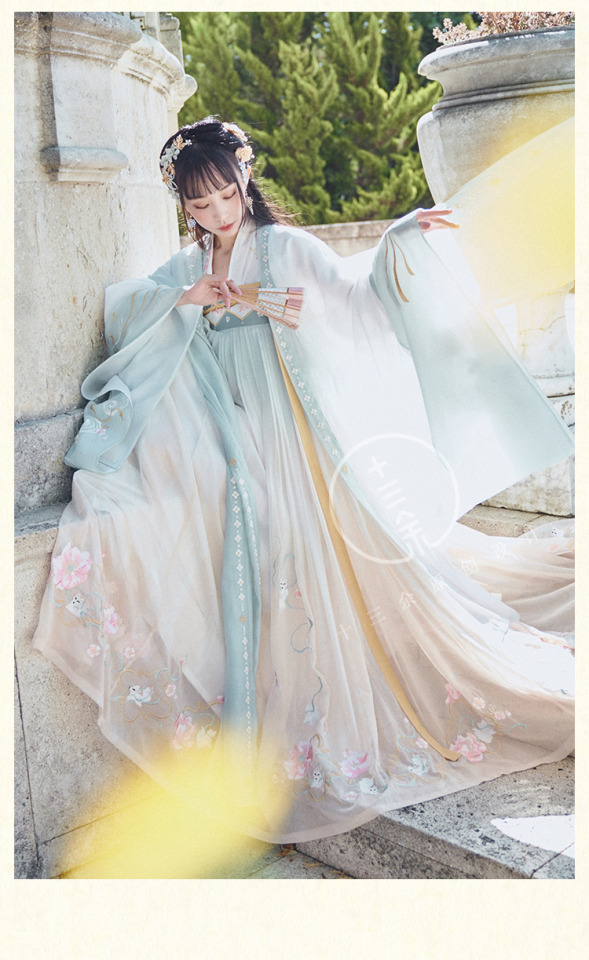
Daxiushan were summer garments made popular in the Tang Dynasty. They are made from light and airy fabric and known for their broad sleeves. Worn by noble ladies and courtesans for special occasions, the daxiushan has become a staple in modern hanfu for its voluminous and ethereal effect.
I recommend using extra lightweight fabrics such as organza, chiffon, or georgette to achieve the proper look. Contemporary daxiushan can even be made from sequined fabric or non-woven materials if desired.
This garment was worn by women and commonly paired with ruqun. Please see @ziseviolet‘s tag for a better explanation and examples.
Note: this garment requires a lot of fabric and is quite wide, if you want to make a proper pattern to save for later, make sure your paper is very large! Image from (x) (x)

Since they are loose fitting, they are very easy to size for.
Next, let’s look at a technical flat.

The robe consists of:
Main Panel x2
Sleeve x2
Collar x2
Like all hanfu there is no shoulder seam, so the front half flows across the shoulder to the back as one piece.
The hardest part to draft and sew is under the arms. Because the panel extends out from the body and connects to the sleeves, it’s quite a tight curve and requires delicate sewing to help it remain smooth. I always recommend French seams when sewing hanfu as well as careful clipping and notching.
The daxiushan has side slits or vents that help it flutter and move around the wearer. The height of these slits is up to the designer, but they usually start around hip level. The rest of the garment has a slight flare, but not too much since the garment is so wide to begin with.
Because this garment is quite large, the measurements in this tutorial will be given. If you need to alter them to fit your body type please do. Giving “standard” numbers makes it easier for me to make the tutorial, and less measuring work for you!
Please do not Repost. Click for better quality.


Remember these tutorials are meant to give you a starting point in creating your own hanfu. They might not be perfect, so please bear in mind.
-Jaz
-
 dngrcpckwithmurdericing reblogged this · 7 months ago
 -
 slujactivist reblogged this · 8 months ago
 -
 demoncircus liked this · 8 months ago
 -
 whattheduck94 reblogged this · 8 months ago
 -
whattheduck94 liked this · 8 months ago
-
 en-theos liked this · 8 months ago
 -
 zomsaurus reblogged this · 8 months ago
 -
 wrenling reblogged this · 8 months ago
 -
zomsaurus reblogged this · 8 months ago
-
 smoothiecas liked this · 9 months ago
 -
 woozioveralls-archive reblogged this · 9 months ago
 -
 secretlyscribbled liked this · 9 months ago
 -
 star-cunning liked this · 10 months ago
 -
 abloodygoodmess reblogged this · 11 months ago
 -
 enter-the-singularity liked this · 11 months ago
 -
 spasticg33k liked this · 11 months ago
 -
 gravity-hasfallen reblogged this · 1 year ago
 -
gravity-hasfallen liked this · 1 year ago
-
 bean-in-dice liked this · 1 year ago
 -
abloodygoodmess liked this · 1 year ago
-
 plopifuee liked this · 1 year ago
 -
 ancestherustu liked this · 1 year ago
 -
 icewuerfelchen reblogged this · 1 year ago
 -
icewuerfelchen liked this · 1 year ago
-
 moitt liked this · 1 year ago
 -
 skeren reblogged this · 1 year ago
 -
 tickerbee liked this · 2 years ago
 -
 xfairydrawing liked this · 2 years ago
 -
 absentanimedad liked this · 2 years ago
 -
 lunadiane liked this · 2 years ago
 -
 thevoiceofmadness liked this · 2 years ago
 -
 frogsoda liked this · 2 years ago
 -
 algo-rithms liked this · 2 years ago
 -
 flouryrat liked this · 2 years ago
 -
 maximumpainterheart liked this · 2 years ago
 -
 seraphichana reblogged this · 2 years ago
 -
 sakuraaeris1497 liked this · 2 years ago
 -
 kirunee liked this · 2 years ago
 -
 perfectlypanda liked this · 2 years ago
 -
 loveofasia liked this · 3 years ago
More Posts from Desolate-rose
Qun (裙) Tutorial- Part 2
This is additional instruction on how to construct the waist band with the middle slit for the ties. The method requires only a sewing machine and creates a finished edge within the waistband that won’t unravel.
Find Part 1 Here!
Please do not Repost. Click for better quality.


Then you can assemble the waistband to the rest of the skirt like any other garment.

If you can’t reblog this, unfollow me now.
I think the best thing about Amok Time is that it is canon that satisfying the Pon Farr is equivalent to marriage on Vulcan. Usually this is done with sex, and since T’Pring challenged the winner would have gotten to marry her via sex while the loser would have been dead…
but since Jim didn’t die, spock satisfied his Pon Farr with him, AND he did no frickle frackle with T’Pring, for all intents and purposes, Jim and Spock are canonically married by Vulcan law.
And idk I just picture that the next time T’Pau calls spock she’s just like “and how fares your husband” and spock is just like “hold up what husband.”
T’Pau: “your husband. James Kirk.”
Spock: “gRANDMOTHER THE CAPTAIN IS NOT MY HUSBAND. YOU ARE MIXING UP THE ENGLISH WORDS AGAIN.”
T’Pau: “You rolled with him in the sands and did not die. He lives and therefore he is your husband. You rOLLED WITH HIM IN THE SACRED SANDS GRANDSON. Also your father and mother believe he is. Your mother has knitted him sweaters.”
Hi there! Your resources have been incredibly useful to my Hanfu research. Might I ask you a few more specifics to construction? I haven't encountered yet anyone talk about seam allowance and finishing. Is the drafting net with allowance added during cutting or are they built into the drafting? How much allowance is typical and how are they finished? I understand that many of the garments are lined but what of single-layer ones that go through a lot of wear like Zhong Yi? Is it all French seam?
Hi there! Thanks for the questions and I am sorry this took me so long to answer.
I will go through and answer your questions one-by-one :)
Is the drafting net with allowance added during cutting or are they built into the drafting?
Seam allowances are added AFTER drafting. I do this because of two reasons. First reason is that I’m trained on making Western clothing, and adding seam allowances is done after the drafting is completed. That’s just how it’s done. Second, it gives the designer the ability to choose their own seam allowances afterward without having to factor the measurement in first. Depending on your sewing skill level and type of fabric, you may need larger or smaller seam allowances.
How much allowance is typical and how are they finished?
I put recommended seam allowances on my tutorials, but I do not know if they are historically accurate. This is super hard to find out without dissecting a garment, and I have no way of doing that currently… I simply choose standard seam allowances we use now. Hemlines are usually double rolled.
What of single-layer ones that go through a lot of wear like Zhong Yi? Is it all French seam?
Yes French seams and flat seams are your friends! But I will not judge if you want to serge the insides for simplicity's sake. Sometimes we have to take shortcuts when needed. The hardest part to sew is under the arms and around the neckline. I find the best way to French seam the under arm is to narrow the seam as small as possible around the tightest part of the curve and then return to the normal seam width at the hem and cuff. This way the armhole has enough ease so it doesn’t tug and look strained from the outside.
I hope this helps!
-Jaz
Taking Measurements
Hello!
Today let’s talk about measurements! To draft accurately, it’s important to take accurate measurements with a flexible tape measure. Some measurements can be completed on your own, but many require a second pair of hands.
When drafting Hanfu, much of the silhouette is oversized. That gives the designer a lot of flexibility and convenience because they are not trying to fit the garment tightly to the body using darts, style-lines, etc. However, it’s important to take accurate measurements of the body in its natural state without increasing those numbers. We can compensate for a fuller silhouette later.
Below is the measurement chart that I use along with a guide that identifies where to measure. You can measure a dress form that is close to your size or measure directly on your body with the help of someone else.
Not all Hanfu will use all of these measurements. Many only need a few select ones, but it’s nice to have accurate and consistently updated measurements for the model you’re using. You never know when you need a specific measurement, so it’s better to get it all done at once.
This exercise should take about 15-20 minutes. Write down all the measurements with their corresponding numbers and descriptions. This is the base on which you can start drafting.
When measuring:
Wear semi-fitted clothing. A tank top and leggings is fine.
Eat before measuring
Use a flexible tape measure that’s at least 75 inches (190cm) long
Don’t pull hard on the measuring tape. The tape should not stretch.
Stand up straight, but please don’t suck you tummy in or try to make yourself smaller! I promise your natural body is perfectly fine!
Have someone on hand to help. Many of these measurements are impossible to do on you own.
Please let me know if you have any questions! I know not everyone will understand some of these measurements. I cannot post pictures of every detail, but I’d be more than happy to help identify a troublesome measurement.
Please do not repost onto other sites. All figures and drawings made by @hanfu-asks.
-Jaz


