Cc-referenceblog - A Place For Pretty Things - Tumblr Blog

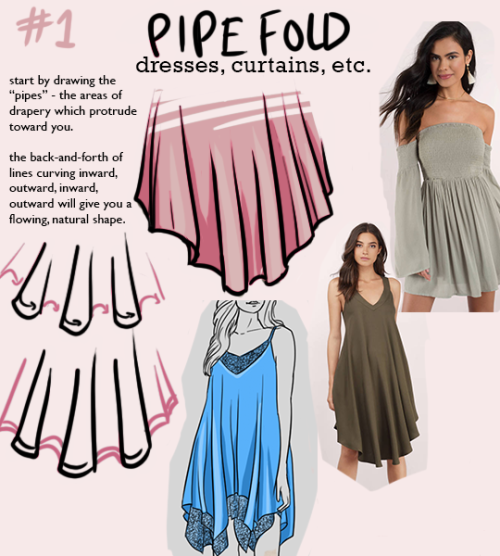
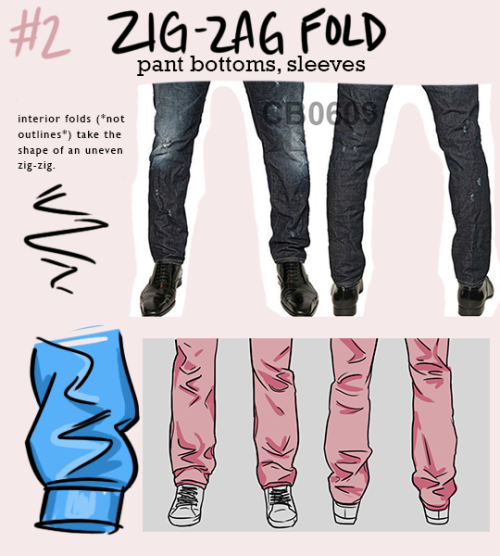

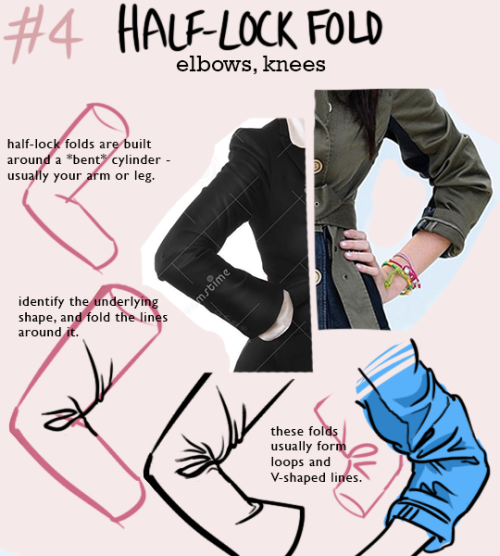
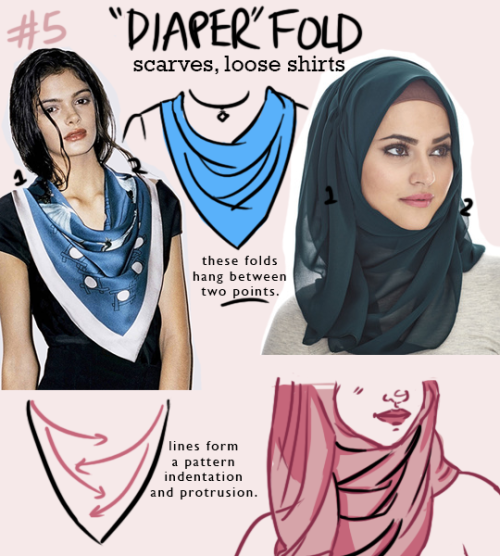
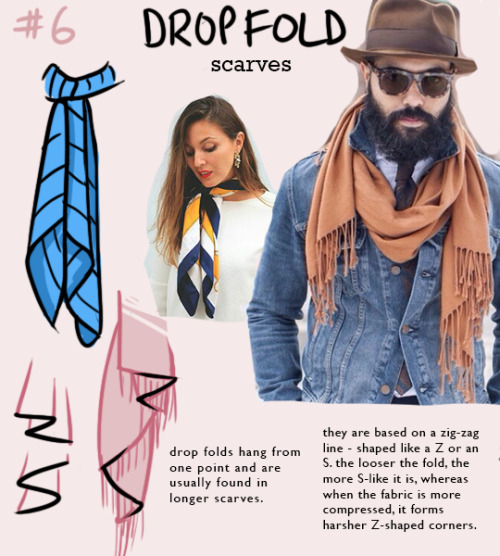
NOTE: one type of fold will rarely appear on its own - they interact with each other quite a bit! for example, spiral folds might define the outline of a pant leg, while the interior folds might be zig-zag folds.
i’m trying to re-learn how to draw clothing, so i made this little guide to the most common shapes of folds that appear. hope it helps someone else too!


Itsy Bitsy Hems
When hemming super sheer and delicate fabrics, I am always reminded of that quote from Futurama, “When you do things right, people won’t be sure you’ve done anything at all.”
I learned this technique from Vicky, one of my frequent co-workers on shows, who is honestly far too modest considering all of the amazing costumes she has made over the years. (She doesn’t really have social media etc.) I forget the exact reason it came up, but she said it was a favorite technique she would use on delicate dresses she made for Coleen Atwood films. The key is adding machine paper (Like from an adding or cash register machine) a nice roll of almost computer-paper weight paper, nothing fancy like the shiny chemical reactant kind. This method is a little time consuming, but with practice you can get amazingly clean hems that are 1/8” - 1/16 on even the most difficult of fabrics.
For this tutorial I documented sewing the skirt of my Evelyn Cosplay, because the skirt is one continuous piece of fabric (about 5 yards) I really wanted the hem to be as clean as possible, and this technique is perfect for that. The Top two photos were Taken by Eric Anderson, or my finished costume at the Exposition Rose Gardens in Los Angeles.
Step 1 - Lay your fabric/hem edge on a flat surface, like a big table or the floor. It is important to let the fabric sit as you want it to be hemmed. So if its bias and you want the hem stretched out/ to ripple, stretch the fabric gently. If you want it natural - lying relaxed and so on. pin the adding machine paper under the hem, keeping the desired hem tension. On curved areas tear and angle the paper. Basically you are using the paper to “block out” the desired hem once sewn.
Step 2 - Stitch about 1/2” from your cut edge, as shown. (I had a 1/2” Seam allowance on my pattern) Once it’s all stitched to the paper, take out your pins and go to the iron. Using the paper as an anchor, use the iron to press the fabric on the stitch line so the seam allowance folds over onto itself. You want a clean sharpe fold. Remove the paper gently. I find it easiest to tear one side free, taking advantage of the stitch perforations. The second side will fall away much easier; any lingering little bits can be gently wiggled loose with a pin.
Step 3 - Stitch a second line of stitching next to the first/now the folded edge. If you stitch 1/8” your finished hem will be close to 1/8”, 1/16 will be 1/16” etc. I find I get a nicer result if I *very* gently pull the fabric taunt while sewing this second line. Using very small scissors (I have a curved pair I like for this) trim off the seam allowance as close to the second line of stitching as you can. Press.
Step 4 - Folding the hem one more time on the second stitch line (or as close as you can get it) stitch through all layers. Again, I find I get a nicer result if I *very* gently pull the fabric taunt while sewing. Trim off your thread tails, press it again and Viola! Done.

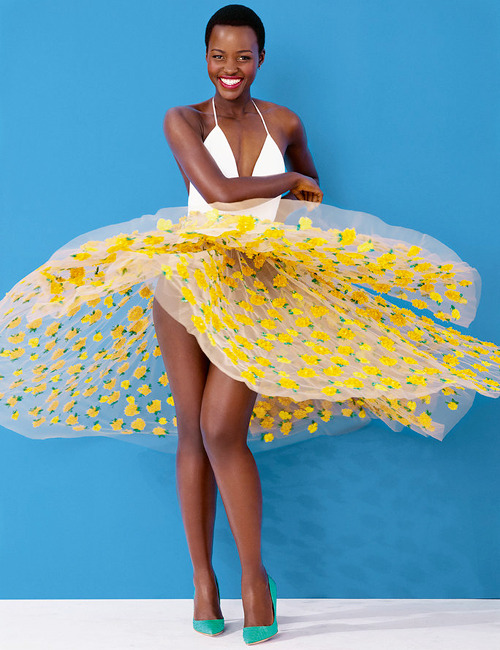

Lupita Nyong’o photographed by Alexi Lubomirski for Mujerhoy Magazine
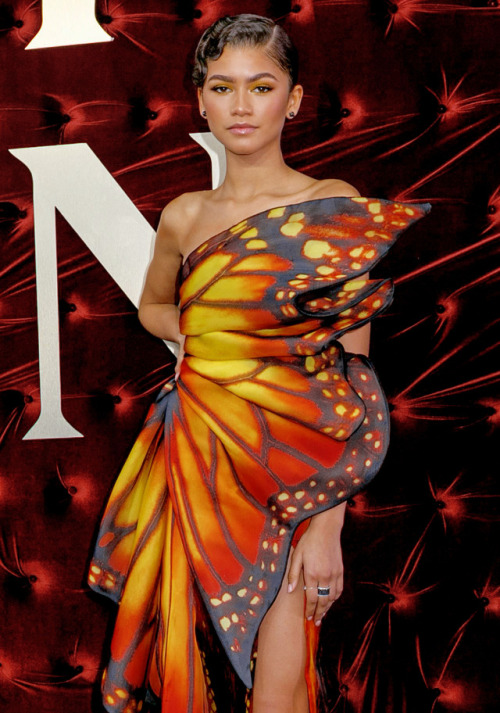
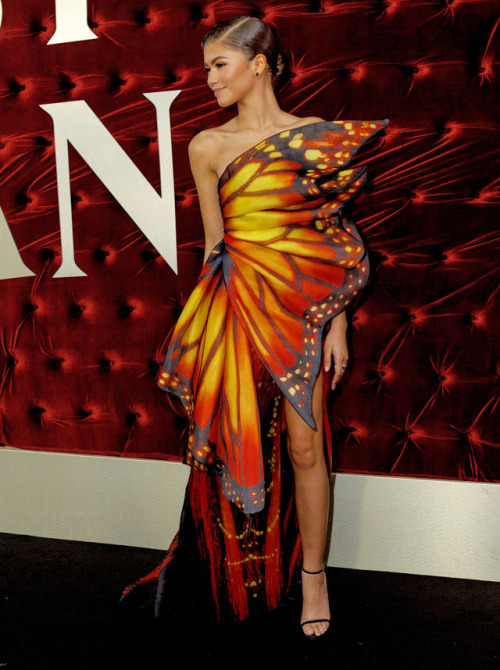
Zendaya Coleman at The Greatest Showman Red Carpet in Sydney 12/20/2017
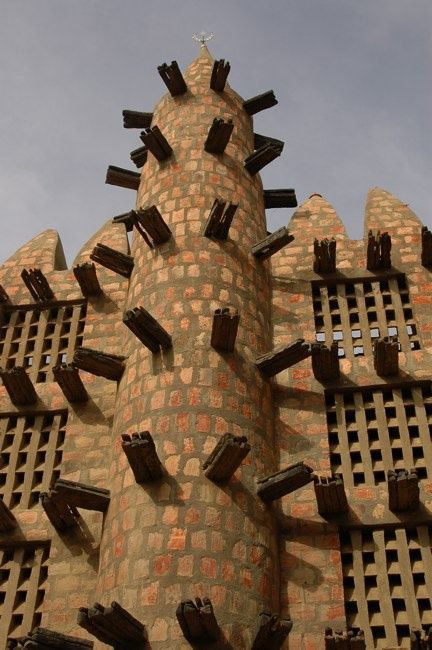
some really beautiful african architecture because honestly this site is so western-centric

mako

unknown

cameroon
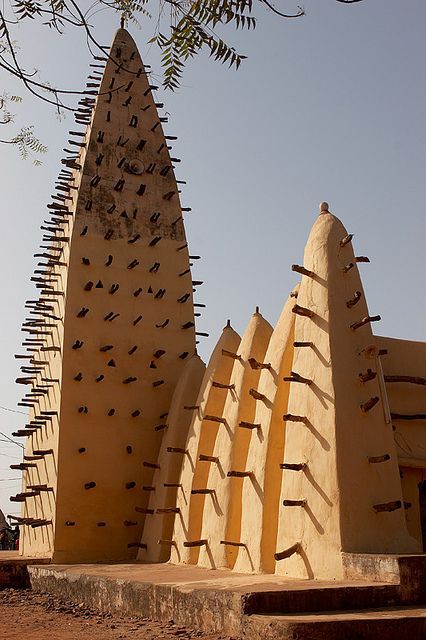
burkina faso
mali

Ndebele
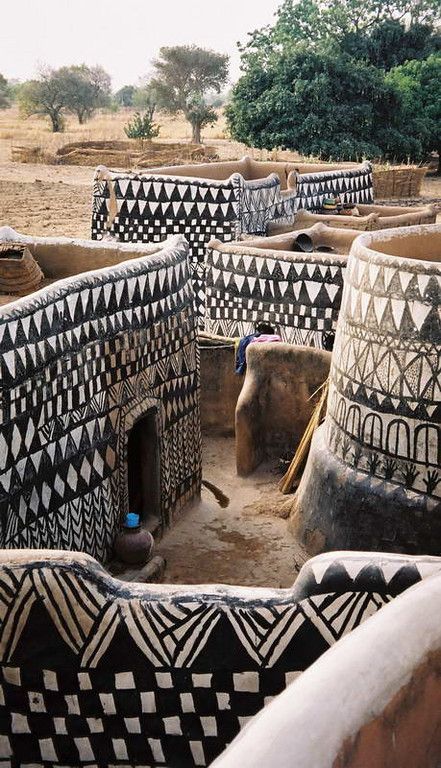
burkina faso
please add more if you can!
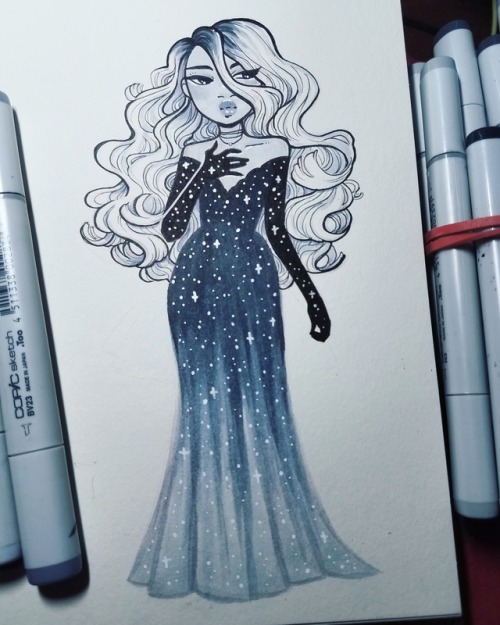
starlight dress 2, drawn with @copicmarker


Check out Color Supply! The site has inspirational colour palettes from designers & illustrators around the world!
It’s got some tips and tricks about picking colours. They also have a Hex Colour Palette Generator!

(Thanks to @magnetholic for showing us!)

Thorn collar by Thierry Mugler

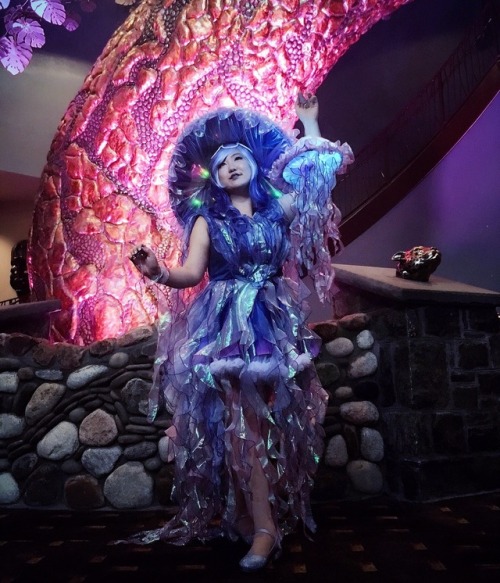
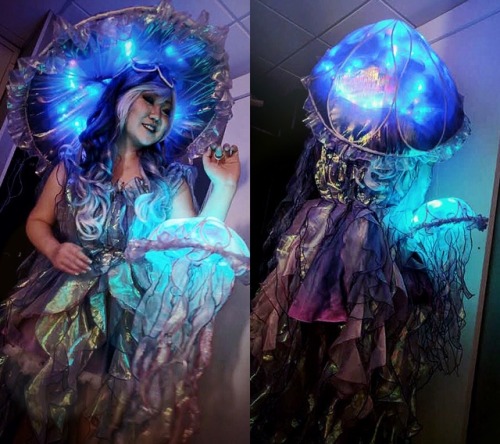
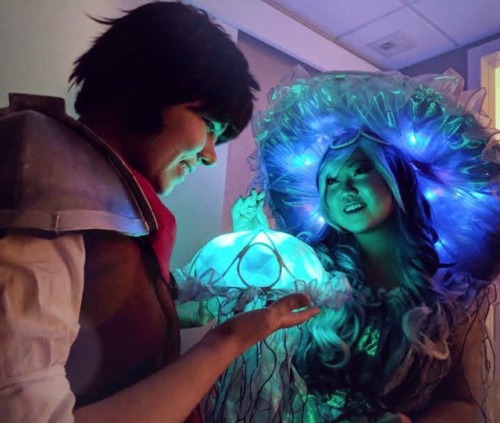
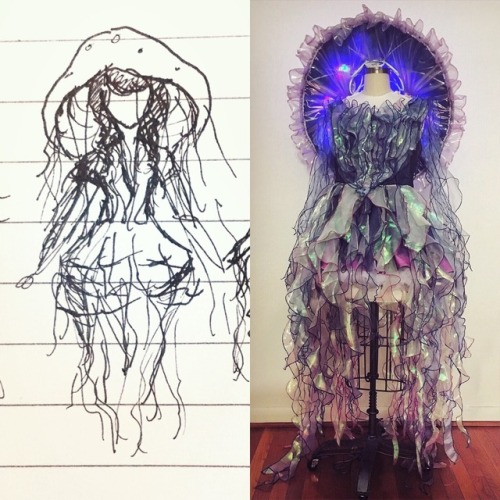

I was told by several friends and tumblr users that my Fisher the Voidfish cosplay from The Adventure Zone was being shared uncredited via pintrest and tumblr, so I hurried to put out my big compilation post faster than I usually do. I would very much appreciate it if everyone could reblog this version of the post, instead of any other post floating around that doesn’t correctly credit the costume back to me!! As an artist and a fan, it was incredibly hurtful that this happened. Although the original reposter has apologized profusely for this and properly credited me afterwards, it’s incredibly difficult to undo the damage that results from the reposting any uncredited image in a large fandom.
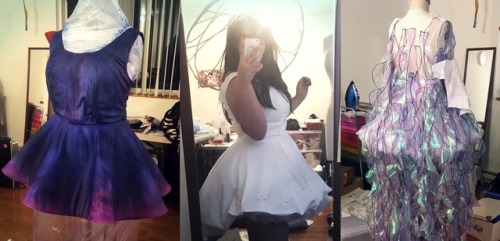
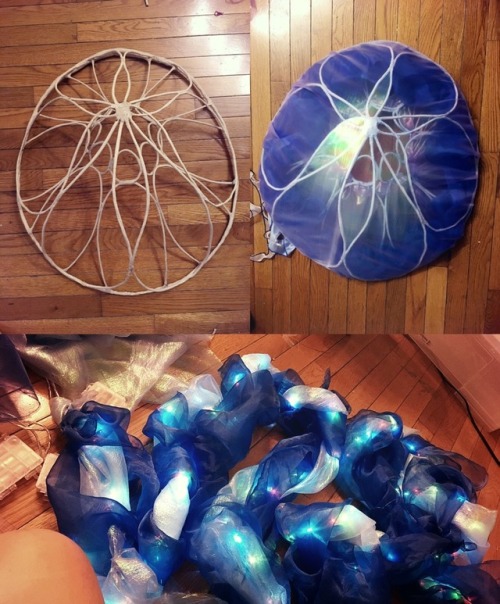
All photos in this post are taken by either myself, scribblesafterdark, or by cowbuttcrunchies!! My darling Magnus is the other half of cowbuttcrunchies. I would also like to take this time to shoutout to my friend automb, who provided endless support with this costume and helped me with cutting and trimming all the tentacles on Fisher’s dress, They also made Junior for me under my guidance, while I was going nutso over the rest of the costume.
Thank you again to everyone who commented and tagged me on the other post, and I hope that everyone reblogs this version instead!!! As usual, more information about my work process will be under the cut, so if you’re interested in that kind of thing, read on! 💙
Keep reading
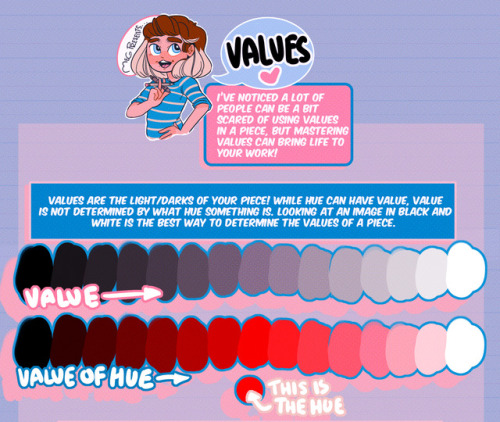
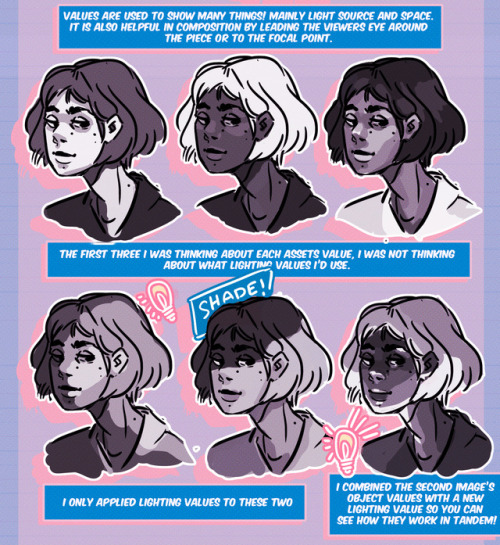
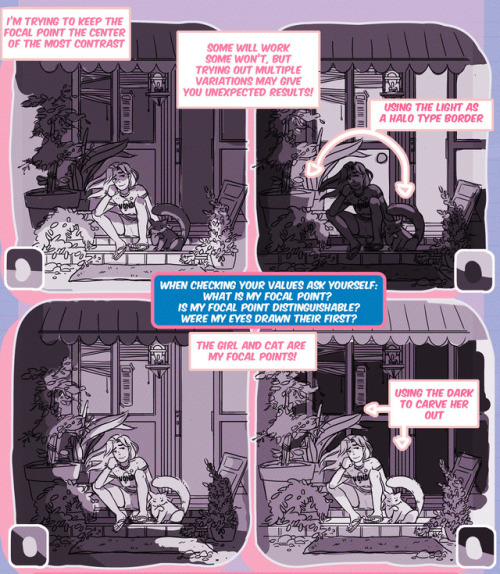

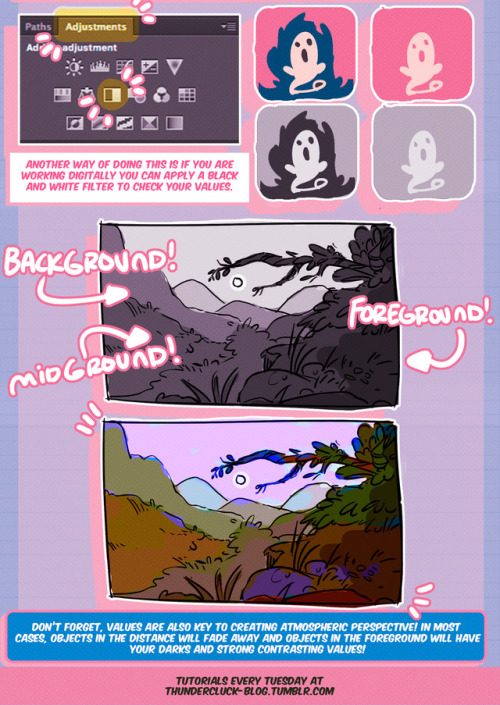
Hey friends, Meg here for WOOPS IT’S WEDNESDAY! Today we’re taking a look at how to study values and the importance of knowing how to use them! It’s not all about color, you know. If you have any tutorial recommendations send ‘em in here or my personal. Now go forth and I’ll see you next week!


