
please read pinned before following! | 19y | he/she | destroyer of eridan ampora's juicy trollussy
187 posts
Grubuckets - Lia's Homiesuck Sideblog


-
 amuser-96 reblogged this · 5 months ago
 -
amuser-96 liked this · 5 months ago
-
 1susel1 liked this · 5 months ago
 -
 zxmbiegutz liked this · 6 months ago
 -
 isselesu reblogged this · 6 months ago
 -
 princeveigar liked this · 6 months ago
 -
 rageandtrash reblogged this · 6 months ago
 -
 monarchenwinter reblogged this · 6 months ago
 -
monarchenwinter liked this · 6 months ago
-
 idliketogetoffthemrboneswildride reblogged this · 6 months ago
 -
 grubuckets reblogged this · 6 months ago
 -
 pumpkinpyre reblogged this · 6 months ago
 -
 scholarlyhorticulturist reblogged this · 6 months ago
 -
scholarlyhorticulturist liked this · 6 months ago
-
 lileewink reblogged this · 6 months ago
 -
 raffaellosanziodaurbino reblogged this · 6 months ago
 -
 g-rp-echibi reblogged this · 6 months ago
 -
 ardentguilt liked this · 6 months ago
 -
 mcmadcanvas reblogged this · 6 months ago
 -
 dreamsofjianghu reblogged this · 6 months ago
 -
 somnambulistsedge liked this · 6 months ago
 -
 foxxfaggotry reblogged this · 6 months ago
 -
 geminidoomed reblogged this · 6 months ago
 -
 kinectcorn reblogged this · 6 months ago
 -
 samstarium liked this · 7 months ago
 -
 marahsarie liked this · 7 months ago
 -
 doombrigade reblogged this · 7 months ago
 -
doombrigade liked this · 7 months ago
-
 fuckthisshitbykarkat liked this · 8 months ago
 -
 verakeras liked this · 8 months ago
 -
 not-someone-who-matters reblogged this · 8 months ago
 -
 pooptologist liked this · 8 months ago
 -
 reroscherries reblogged this · 8 months ago
 -
 bluephoenixprincess reblogged this · 8 months ago
 -
 bluephoenixquill reblogged this · 8 months ago
 -
 bobigleux liked this · 8 months ago
 -
 waffleswithketchup reblogged this · 8 months ago
 -
 ineffable-gallimaufry liked this · 9 months ago
 -
 meanbutchvriska reblogged this · 9 months ago
 -
meanbutchvriska reblogged this · 9 months ago
-
 lesbedilfvriska liked this · 9 months ago
 -
 jadedharleys reblogged this · 9 months ago
 -
 lilyinluuv liked this · 9 months ago
 -
 homestuck2018 reblogged this · 9 months ago
 -
 shakooo liked this · 9 months ago
 -
 sewncross reblogged this · 10 months ago
 -
sewncross liked this · 10 months ago
-
 trashytrannypanace liked this · 10 months ago
More Posts from Grubuckets
where the fuck is that erisol cybertruck video i miss it


How do u make your horns?
I use paperclay (ignore the cherubplay notif lmao) over aluminum foil for small horns and insulation foam or styrofoam for big horns. For styrofoam you want the kind made out of bubbles, not the crunchy kind.


(Also comes in pink and purple, you can find insulation foam boards at Home Depot or Lowes or places like that. They’re very big so if you have a tiny car like me you’ll have to snap it into manageable chunks in the parking lot to fit it in and you’ll have everyone stare at you)

Here’s an aluminum foil base. Sorry about the gross carpet s:


Here’s insulation foam bases. To make these you cut out the shape of your horns and hot glue several layers together (if you’re using thin layers) then sand them into shape. You do the same thing when using styrofoam except you can’t sand that I think? Granted I never tried, I just used scissors or an xacto blade and hacked off chunks.

Stick your clay on and don’t worry about making them super smooth or anything, it doesn’t matter. Just don’t put on a ton of clay; the less clay the better because it means the horns aren’t as heavy. Ideally you want the finished product to be a few millimeters thick, with the tips of horns being thicker to prevent breakage. Let them dry, don’t sand until they’re fully dry.

Also another important thing. Don’t do that thing where people don’t add enough clay to the bottoms of their horns. Rounded bottoms don’t look good and look fake af. That’s not how actual horns grow so make sure you add extra clay to the bottom. When you’re done with these you don’t want the horns to taper at the bottom; the bottom should be your thickest point and it should be flat.

When they’re dry I take an xacto blade and cut off any lumps to help make sanding go by faster.
Sanding is the most important part, it’s how you get nice, smooth horns. I start off with 60 grit sandpaper and sand until smooth, then I add on more paperclay to any uneven parts, cracks, dents, and areas that are too thin. If there’s aluminum foil or foam showing through, cut some of it out then refill with clay. Wait until dry, resand, and repeat as necessary until the horns are perfect. It’s very tedious and annoying but boy is the final product Noice. After that I sand them with 360 grit sandpaper to remove the marks left by the 60 grit (360 grit is super fine while 60 grit is rough.)

^^^ the same pair of horns, post sanding. Next to them is the insulation foam core before I sanded it into shape. At this point you can poke a hole in the bottom of the horns and hot glue in a screw anchor.

Here’s a pile of sanded horns ready to be painted. After you sand, the last thing you need to do is angle the bottoms (Some horns won’t need to be angled, like Terezi horns.) If the bottom isn’t properly angled your horns will stick out badly. I cut off just a tiny bit (I start off with around ¼ to 1/8 of an inch) to get the horns to point more inwards/backwards/wherever they need to go, you don’t need to lop off a ton. Start off with a little, it’s easier to cut off more than to re-add more clay because you cut off too much. Every time I cut some off I screw them into the wig to see how they stand up. This is also a good time to say that once you’re completely done with your horns it’s probably a good idea to replace the screw anchor since it could be pretty stripped. You might not screw yours into a wig to test them as much as I do, and if not then you might be fine.

Your horns should be ready to paint at this point. Wipe them down with some damp toilet paper to remove any dust first in order to prevent lumps in the paint.


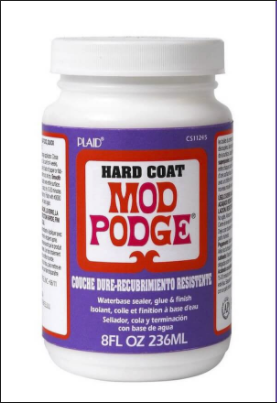
I use cheapo acrylics to paint my horns. I like my yellow to be thick but my orange and red to be thin to paint on layers easier, but it all depends on how you like to paint your horns. If your paint is too thick you can simply water it down. I also like to GENTLY sand off any bumps in the paint with my fine grit sandpaper between layers. Once they’re painted, seal them. I use Krylon aerosol sprays to seal them but I heard from someone that you can use Mod Podge hard coat as well? I like sprays because there’s no brush marks, but if you use those spongy brushes that could be a good way to eliminate brush strokes with Mod Podge. I’ve never tried it so don’t take my word for it.

If you want shiny horns get the spray in gloss. I use two different sprays, both matte finish, but one says dries in minutes and the other says clear latex finish (look where the red line is). I apply the latex one first and the dries in minutes one after.


I use the screw method to install my horns. Horns on headbands looks downright awful. I used to use cardboard to stick the screws through but I use wonderflex now (the white stuff) but use whatever you’d like, so long as it’s sturdy. Make sure to use a washer (the donut looking thing) so the screw doesn’t push through the cardboard/wonderflex/whatever you have. For Captor horns I use a single piece of wonderflex per side because it’s a lot easier to screw them in if they had separate pieces per horn instead.

Screw anchors WILL get stripped eventually from screwing and unscrewing horns (you can tell when because your horn is no longer stable on your head and it wiggles around everywhere.) Just take some pliers and yank them out then hot glue in a new pair.


^ Screw anchors look like that.
For Nitram horns and tall horns like Makara horns, I screw them in as well but I also stabilize them with wire. I don’t exactly remember which gauge wire I use but I think it’s like… 14 or something??


Make sure to shape them to your head. Not too tight or else you’ll get a wicked headache while wearing your wig and horns. I make a hole in the wonderflex next to the screw hole and also a hole in the horn to stick the wire through; I screw the horns in first then shove the wire in. For Nitram horns angle the wires up to account for the weight of the horns so they don’t droop on your head. You’ll be able to angle horns whichever way you need if there’s wire in them.


(Ignore the yellow text.)
The pictures above were for a pair of tall horns, just stick one side in and bend the wire at the middle to get the other side in then rebend to its original shape.

This pair was specifically requested to be on a headband (which I don’t do anymore) but the ONLY time I will put horns on a headband is if they’re MONSTER HORNS that need more support.


The headband goes UNDER the wig and the screws stick out of the wig, then you can screw the horns on that way. I do this for Dammek horns, ancestor horns, or big fantroll horns where wire support isn’t enough to keep them up.

Sometimes horns break, but they’re easily fixable. (God, a lot of these next pictures are of old horns and the paintjob sux, gomen)

This is a picture of Dammek’s horns when they broke while being sanded. I removed all the broken clay and added new clay. This was also during a stage where I was repairing thin spots.

That’s what they look like fixed. Notice the different colors from the patch job. Sometimes when I’m in a rush I’ll bake the horns to speed up drying but ONLY do that if your core is made of aluminum foil DO NOT bake your horns if the core is made of foam, it’ll melt. The darker clay is from when I baked it and the lighter clay is the patch job.


This is from when someone at a con snapped one of Dammek’s horns right in half.
Cut away any hanging bits and sand away some paint around the edge of the hole, then add some paperclay and let it dry. Sand it and repaint and reseal and they’ll be good as new. If there’s a crack, superglue it shut and fill in any gaps and paint over it.

If you get a huge dent in your horns (This is one of my Tavros horns, which tend to be a little more fragile due to their size) Just cut away the clay and do what you’d do for horns made of foil. When transporting Nitram horns please please bubble wrap the hell out of them, especially if you’re flying. Airports are not kind to your luggage and this is the result of someone tossing my luggage around really badly when I hadn’t bubble wrapped my horns.

This is the horns mid-fixing after discovering that huge dent. I smack these against everything when wearing them so I fixed other dents and holes while I was at it.
If there’s anything else you need to know feel free to ask me!
