
Kai - Texas | | personal tumblr | | Soul Seep | | relaxation | | tags | | FAQ | | Valecny inspiration | | Valecny art/writing
928 posts
Vilify - Fresh Hot Problematic Faves - Tumblr Blog


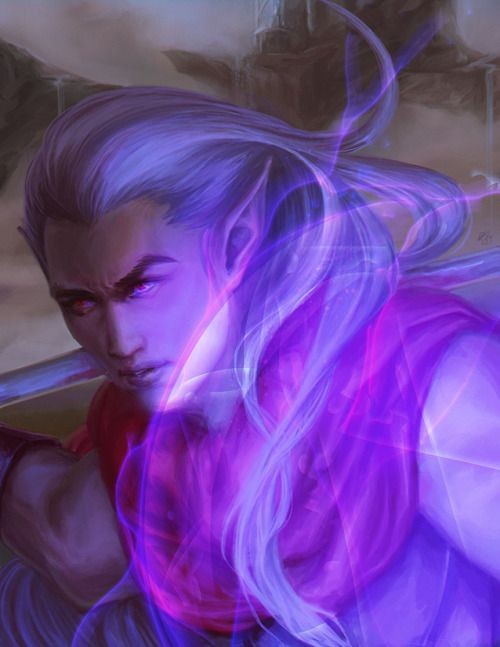
spirits of the sands


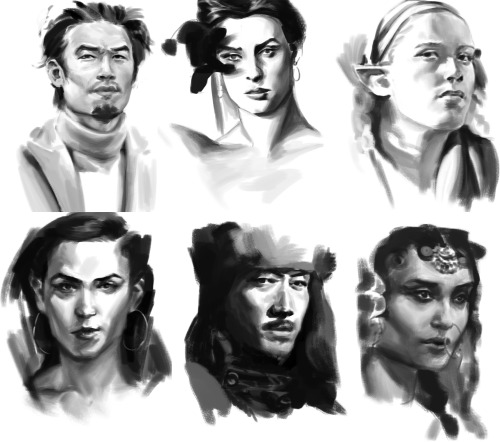
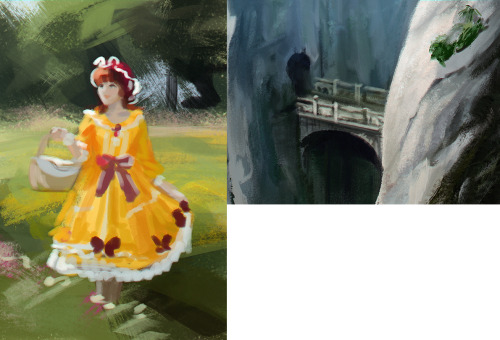
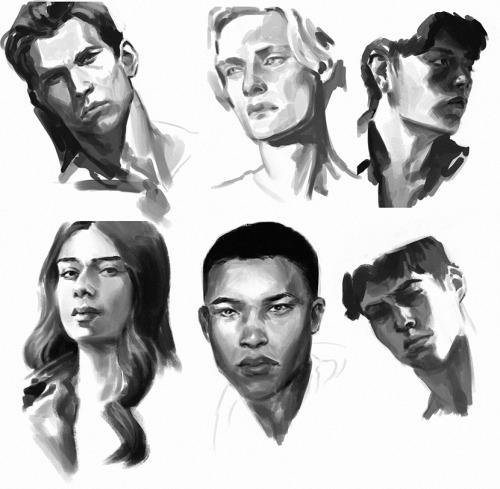
oc rendering/lighting practice portrait doodles


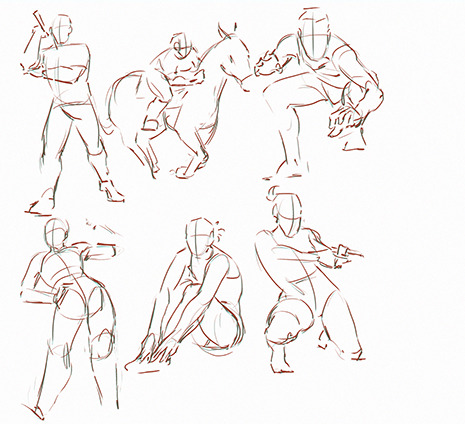
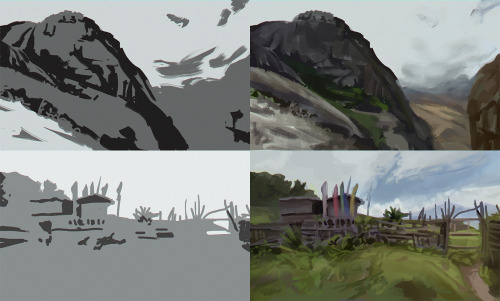
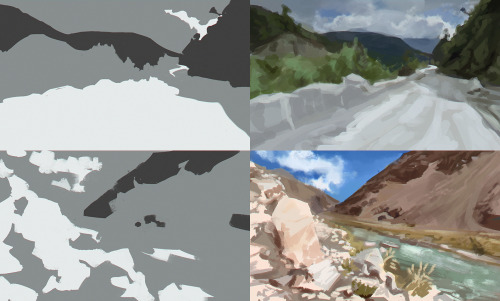
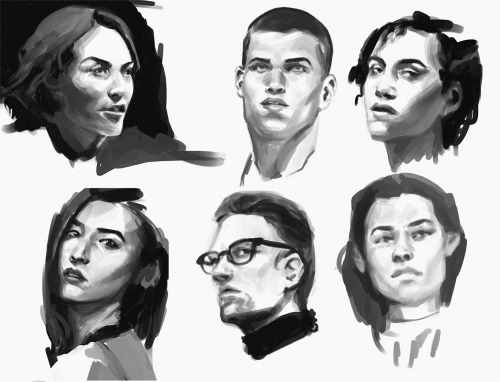
more assorted studies, most on a 20 or 30 minute interval except for the quicker figures

sure the venn diagram of people who want to see LTT fanart and people who think the characters would look great in that 90s Clamp style has pretty much just me in the center but that’s the good thing about only drawing fanart for myself these days


I'm glad we're talking about this, because if there's one thing that I feel like I see my fellow white folks fail to understand in every conversation about white-washing, the goal isn't just "don't white-wash." The goal is "to depict darker skintones accurately and beautifully." White-washing is the main error that occurs because folks don't know how to make darker skin look beautiful, or don't believe it is. We often think of only the latter as the core issue, but the first is one of the bigger sources of white-washing among less experienced artists. Accidental white-washing out of ignorance is just as big of an issue as people who do it intentionally, and it’s the one we can actually easily address because people who simply don’t know can learn, whereas those who can’t step outside their racist biases aren’t going to learn.
Since there's fewer resources in art education and in television of darker skintones being lit and exposed well, a lot of less experienced artists are going to be working mostly from imagination (or will lack the knowledge needed to interpret their refs!). I'm sorry that this is already a long thread, but lighting and skintones are a topic that we rarely do justice to when we're just angry and accused/accusing. To start off, a bit on light itself - things in the light (even if their original local color is dark) will often be lighter than things in the shadow (even if their original local color is light). This is sometimes why folks get confused on if something is depicting darker skin well - if you sample from a brightly lit area in a screencap, and don't depict the hues/values in the shadows correspondingly, you're going to probably have lightened the appearance of the character's overall skintone, even though the hue/value in the light isn't off. Skintones have so much variation, so lets demonstrate this with flat planes that just have one color, so we can see how much what’s in light and what’s in shadow end up changed: the black shirt is now lighter than the white paper in places. These are flat, bland, simple colors, nothing like skin, and they’re already changed so much. But our eye can still tell what they’re meant to be, because we can see how bright the paper’s color is in the light and how much more relatively dark the shirt is in the shadow!

(Image borrowed from http://gurneyjourney.blogspot.com/2008/05/black-is-light-white-is-dark.html - everything on Mr Gurney’s blog is great reading for artists. Two other great resources courtesy of Mr Korwin, whose twitter threads are some of the few that I find informative for all skill levels - especially advanced artists. If you’re a beginner or intermediate artist, don’t be afraid to read and reread them a few times. If you’re still confused or don’t know how to apply it yet, give it some time, and keep thinking about them in relationship to how you work with light. It will come to you, and if you start thinking about these things now it’ll help you better understand things the more you learn, you’ll have solid fundamental knowledge instead of tricks and tips that apply in just a few areas like most guides for beginners).
So, now that we know light can change values by a lot (but that they stay *~relative~* in the light and shadows, remember) I'm going to now borrow OP's swatches. Swatches are great but you have to select them specific ways for them to be useful, and I think a lot of less-experienced artists struggle with skintones because they don't understand how to compensate for where they're selecting them from. Viv's skintones in that image are really interesting (they look a bit warmer than in other places in the game), so interpreting them is necessary to using them well. (Obviously video games are trying to depict a stylized version of reality, so I'm not going to talk necessarily about what the engine is doing with the light, but rather the real principles of it from real life that it depicts) I could do this with all of them because for instance the Isabela one seems to be selecting at one point from an area lit by a secondary or ambient light? That’s going to throw you off a lot if you don’t use it in the same way, but Viv’s were the ones where I think I can show my point best.

That super-bright highlight on her nose and a bit on the cheeks is a specular highlight ( https://twitter.com/devinkorwin/status/1232754407248420864 ). Darker skin tends to be more reflective, so don't be afraid to use speculars more dramatically than on lighter skin, but be mindful that they are located typically where the face is more smooth or oily (nose is a big source of them) and that they are SMALL. If you're putting a big dot there it's going to look ridiculous, and if you're making your overall highlights that color it's going to depict the skintones very inaccurately and it's going to diminish the beauty of the other colors.
Next up is that very saturated tone on the cheek and nose. Noses and cheeks tend to have a warmer tone than the rest of the face, and midtones in general tend to have more saturation. Keeping midtones saturated eases transitions between colors, it makes skin look alive, and most importantly it tells the viewer the real value of the skin! In most lightly set-ups, midtones are going to show us the colors we think of as the true color of an object. If you work in a simpler style, this is a good starting place for flat colors (not... exactly this one, as I selected it at it's most saturated, but a color AROUND this value is good - if you select around her face in the transition from light to shadow you'll find that most of the midtones are close to this brightness value).
What're those other ones down there? They're in the shadowed area, just a bit darker and less saturated than the midtone. Those are also pretty good shades to use if you're looking to go with flatter colors. Those are pretty close to the ones OP picked out, you say? They sure are! But the reason I'm re-sampling stuff is to show you why if you're looking to make the skintones read well with any style that uses more than two colors you may want to watch where you're getting the colors from. Viv's skin, with the ones OP sampled, wouldn't have any vibrancy at all in warmer areas, which is why sometimes you can grab skintones and say "well it's ACCURATE," and yet, it isn't quite.
So, lastly, to put it all together - down at the bottom is OP's swatches vs how I'd paint Viv's skin in this lighting, and how the same swatches as OP has would turn out. It's not to say that those aren't correct, but depending on your style and lighting, they're clearly a lot more limited in value and saturation range (which is going to make something look less like a focal area). They don't have the band of warmer hues or the specular highlight, and the shadows are actually quite a bit lighter, because all of those selected tones are midtones and lighter shadows. They provide less information overall about the skin - which, depending on the simplicity of your style and your lighting - isn't wrong! But in some styles or lighting set-ups, as you can see, it’s going to look a lot duller and flatter.
But what about STYLE? What can folks who use lineart do to avoid the lines becoming only a bit darker than the darkest shadows on dark skin? I tend to go with two choices, myself - the first is to color the lines themselves in lit areas, so that they're always only a bit darker than the areas under the lines. This makes the loss of contrast look more gradual. The other is to lean into it! Even in photographs you tend to lose a lot of information in the shadows (unless, like in the second guide up there you're building all the contrast in your colors around the shadows)! Don't be afraid to have a loss of contrast between your lines and the darkest shadows in the skin - if anything it should just remind you that putting sharp and broken-up detail in the shadows looks less like photographs and the eye see the world!
Making darker skin ashy and washed out isn't a good response to the problem, because it's also going to diminish the beauty of darker skintones. We owe it to real people with skintones like this to depict characters that look like them well - and that doesn't mean just picking darker tones than the white-washers and calling it a day, it means taking the time to learn how skin looks in light. Even tv shows and photographs of darker skin are often poorly lit and poorly exposed!
With that in mind, it's worth noting tv/film and video games that have received notice for lighting and exposing darker skin well have done so by using ways of selectively brightening it. Why is this good, instead of bad? Because the enemy here isn't a nebulous "skin-lightening" effect, it's depicting darker skintones poorly. In a darker scene, to depict darker skintones well, you're going to have to use a contrast where you're not losing essential information viewers need to see expressions and faces! While white-washing characters is linked with racist histories of media and cultures preferring light skin, on the other hand, there’s a very racist tradition of dropping all contrast on darker skin-tones and letting them look worse in media than lighter skin. Duplicating that effect in the name of “not white-washing” is also a terrible idea, and most guides on not white-washing totally ignore the problem! The trick is to light and expose with regard to the higher reflectivity that greater melanin provides skin! Is Miles "white-washed" here? But why not? Because that band of midtones on the side of his face are providing us sufficient information for us as a viewerf to correctly guess what the "true" or local color of his skin is! The highlights don't confuse us because the exact same highlights are present on his hair and costume!

Just read some of the articles covering the lighting in HBO's Insecure to see what I mean - https://petapixel.com/2017/09/14/look-hbos-insecure-lights-black-actors/ https://www.theguardian.com/film/2017/sep/21/its-lit-how-film-finally-learned-how-to-light-black-skin - from the latter: "Lighting should be used to sculpt, rather than bleach, an actor’s skin, a technique championed by Charles Mills in Boyz N the Hood in his night-time exterior shots."
Okay, but again, most folks on tumblr work in a stylized use of color, so what does that mean for them? The thing about stylized art is that it's about picking and choosing what you want to be there and what you don't, what you want to exaggerate and what you want to diminish, so that's up to you! Remember, the midtones carry the true color of the skin, so if you want to just use them? That's fine, it will still be readable to the audience as a result. If you want to use midtones + highlights (and no shadows), try dropping your midtones down to being closer to where the shadows would be, and then use the highlights very sparingly or only to depict reflected light! If you want to use midtones + shadows, don't be afraid to drop the shadows darker than OP had there, drop them into the darkest values you find on your ref, and move your midtones into more saturated tones to breathe a bit of that life back into the skin! More saturated tones sometimes look lighter, so don't be afraid to use a shadow that's as deep as your ref goes to enhance how viewers see the form and the skintones. Even though most artists these days start with stylized art, it is harder to do well than just copying what you see, so don't be afraid to experiment, but don't lose track of what is really there either. Darker skintones usually have a wider range of values on them than lighter ones, so selecting a couple that are very close will just flatten it out, and mimic the effects of bad photography. Don’t be afraid to look at the work of artists who you think handle it well and sample what they’re doing to figure out why it looks so great!
So, to sum it all up - lighting is the most important thing in any depiction of color and value in art! But lighting is under your control, as an artist, and as a result it's your responsibility to keep it consistent throughout the piece so that viewers can accurately see what you've depicted. Film, photography, and art have a long-standing history of doing a terrible fucking job with darker skin, and we owe it to real people with those skintones to depict them just as well as we do lighter tones - so if we have less experience and training on them, that means we need to step up our game there! A lot of artists also try to "correct" white-washing by making everything in the picture darker, too and that's a mistake because then we'll just read it as lighter skin in a darker scene! When you have a reference, be mindful of where you're grabbing those tones from, and think about how they look overall.Depicting darker skin well isn't just about going darker than white-washing, also, because making all dark skin dull and unreflective is fundamentally doing it a huge disservice too.
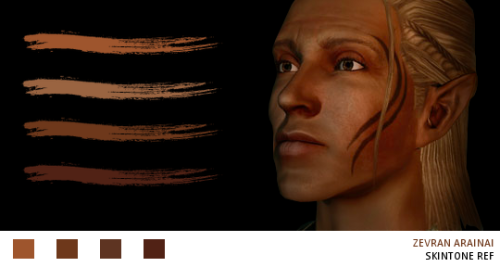
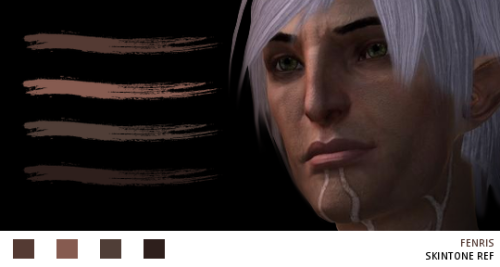
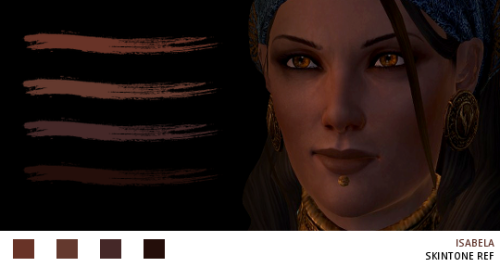
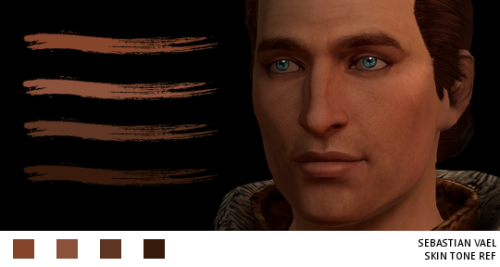
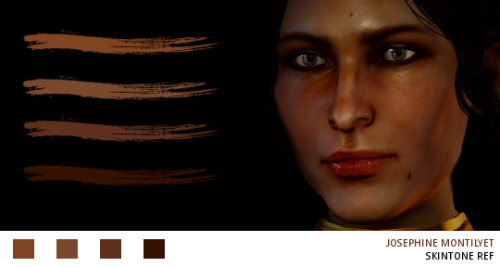
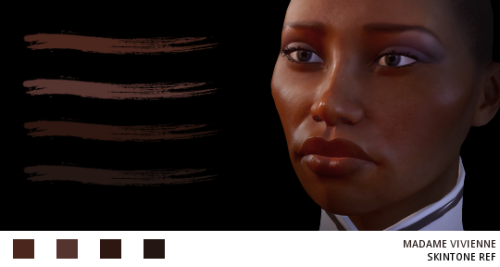
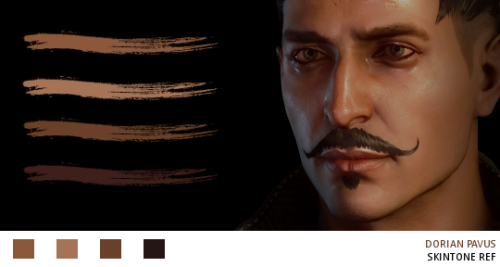
Skintones for POC companions in Dragon Age
Whitewashing is a huge problem in every fandom, and DA is no exception. All of the characters above are whitewashed and have their skin lightened on a daily basis.
There is no excuse when someone whitewashes a character. Take your appropriate swatches if you must, and make sure you are staying true to the characters actual skin tone. Use these colours if you’d like - they were more meant to prove a point. You are certainly welcome to use them as a base.
Stop whitewashing POC. Stop lightening skin, stop slimming down features, and stop blaming whitewashing on lighting. You know better than that. You can do better than that.
Do not take swatches from the lightest part of the face - all the light colours shown here are meant for highlighting purposes. They are the highlights of the face, to be used to display light bouncing off the surface of one’s skin.
Every image of the characters except Josephine was taken from the dragon age wiki site and was only altered to fit and blend with the pictures. All other graphics are mine.

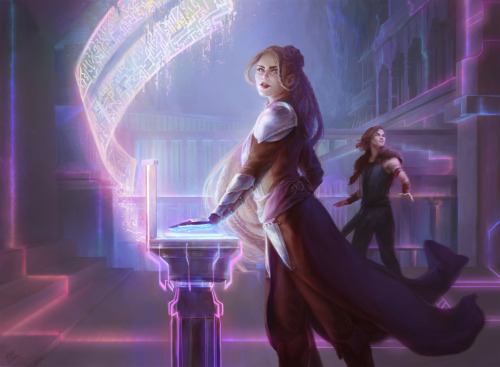
Replaying Dragon Age Inquisition and I realized I hadn't done a proper painted portrait of my main Inq playthrough post-Trespasser (any excuse to show off my lyrium roboarm idea)


I realized I hadn't ever played around with the brush megapack and found a brush I like so much I accidentally drew a whole thing I have no purpose for


yike
I don't do much fanart much anymore but I was thinking about Chrono Trigger, and how much I like Magus

process gif for Emperor’s Pet