Coolest Shit Ever - Tumblr Posts
Nell Shirt Recreation: Finishing Details
Part 1 | Part 2 | Part 3 | Part 4 | Part 5
Final update on this project. Yay for gender euphoric renegade nell shirt finally in my possession.
The tl;dr:


The Embroidery
Nell's Shirt has a cute little embroidered detail around the collar, neckline and cuffs. I'm ngl it is a bit hard to find any detailed and good quality shots that show exactly what it is, but my best guess is either just a plain zigzag stitch or a zigzag with a straight stitch on the outside edge. It's also done in blue thread.
From what I could see also, I believe it's done by machine with normal thread, rather than by hand or with embroidery thread.
I did some test swatches on my failed cuff pieces to test out different settings, but ultimately I ended up doing just a zigzag stitch. I also used a specific decorative zigzag stitch, rather than the usual type as that was making my fabric bunch up instead of laying flat, and I don't know enough about machine sewing to know how to fix that issue.
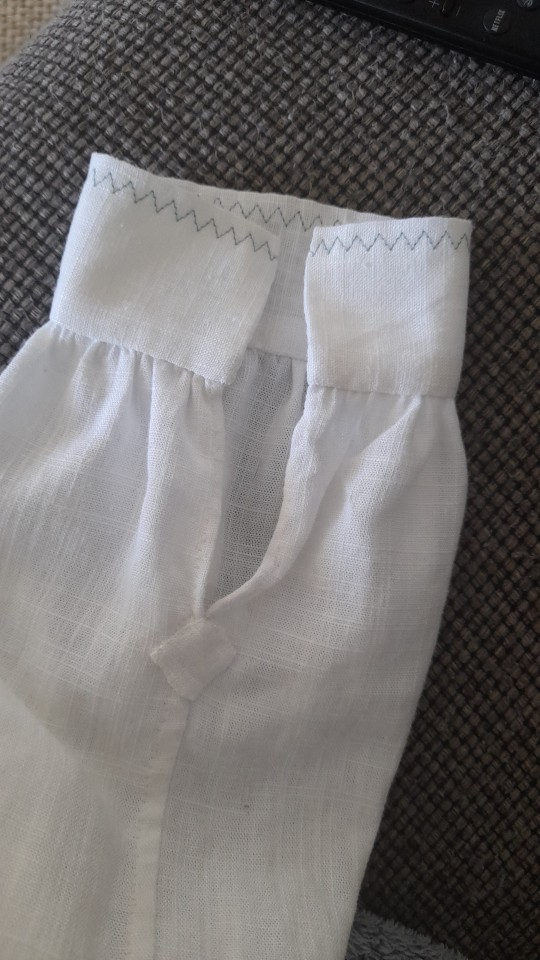

There's nothing crazy to note about this step, but this is what my collar and cuffs look like. It's nowhere near perfect, my machine sewing skills are very lacking, but I'm happy enough with it.
To get it so close to the edges on the cuffs, instead of doing a back and forth stitch to lock it in place, I just left the thread strands long, tied them in a knot and hid them inside the cuff.
Collar Button
Once you've done your embroidery stitch, find where you want the button to be. It's placed about halfway down the front neck opening on Nell's shirt, and I've done the same.
Her shirt seems to close with a loop rather than a buttonhole. You can do this in anyway you want, by including one in the seam when you do the lining or attaching it afterwards. I'm not sure what is specifically done on Nell's actual shirt, so I went for an option easiest for me.
I just followed this image I found on google as a guide:

After you've done that, you should end up with something that looks like this :D

Also taking a moment to appreciate the pretty shell buttons I finally got to use after finding them in a thrift shop like 3 years ago.
Cuff Buttons
Originally I was going to do the same method as I've done for the collar, however because I ended up making my sleeves slightly too long, I wanted my cuffs to sit more snuggle on my hands/wrists so that the extra length would just become poof. So if you want authenticity, and didn't make the same mistake I did, do the same as above.
Otherwise, I started with buttonholes. I'm not sure what this process looks like for machine done buttonholes, but I measured out the size of my button, and then used a seam ripper to cut my button hole. Keep the pins in place while you do this will also prevent you ripping your holes too big.


From there, I just did a very dense blanket stitch all around the outside of the hole to secure it.

Using this hole to mark out where the button should sit, I then sewed on my button to the other edge.

And with that you have a finished shirt!!!