A2 Nier: Morning By Luffie
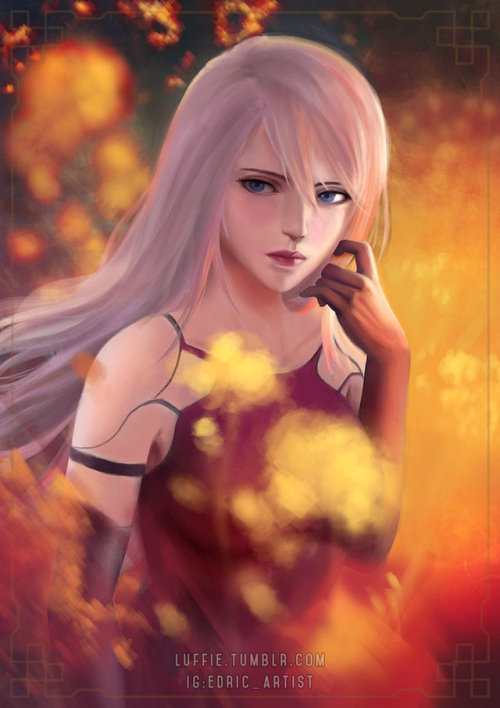
A2 Nier: Morning by luffie
Just an excuse to draw A2, in an unusual setting. :)
If you like my art, please support me Thanks a million!
You can support me at Patreon www.patreon.com/Edric?ty=h to get high res PSD, brushes and WIPs tutorials.
Or my Ko-Fi: ko-fi.com/edricartist
Instagram: edric_artist Facebook: facebook.com/edricluffie Tumblr: luffie.tumblr.com
-
 danganronpusassholefactory reblogged this · 2 years ago
 -
danganronpusassholefactory liked this · 2 years ago
-
 billybg31 liked this · 3 years ago
 -
 jandara946 liked this · 3 years ago
 -
 last-of-the-wolf-brothers reblogged this · 4 years ago
 -
 fantasy66sstuff liked this · 4 years ago
 -
 hollywoodundeadroger liked this · 4 years ago
 -
beasthunter28 liked this · 4 years ago
-
 aura1991 liked this · 4 years ago
 -
 evilveva liked this · 4 years ago
 -
 th3f1rstkn1ght liked this · 4 years ago
 -
 luna0349 liked this · 4 years ago
 -
 rajrjdraw liked this · 4 years ago
 -
docjr liked this · 4 years ago
-
 raifer-vayne liked this · 4 years ago
 -
last-of-the-wolf-brothers liked this · 4 years ago
-
 cdabsokrzy liked this · 4 years ago
 -
 wordsfromreuben liked this · 4 years ago
 -
 dantemephisto liked this · 4 years ago
 -
 blackladisdestrcz reblogged this · 4 years ago
 -
wildbill198six-blog liked this · 4 years ago
-
 duria-r reblogged this · 4 years ago
 -
duria-r liked this · 4 years ago
-
 seraph0079 liked this · 4 years ago
 -
spidermonkey95 liked this · 4 years ago
-
showstopper1111 liked this · 4 years ago
-
 osbantolben liked this · 6 years ago
 -
 porcelainlovebug liked this · 6 years ago
 -
 stuckyfan107 reblogged this · 6 years ago
 -
stuckyfan107 liked this · 6 years ago
-
 eudoraz25 liked this · 6 years ago
 -
 noctislife reblogged this · 6 years ago
 -
noctislife liked this · 6 years ago
-
 umiko14-blog1 liked this · 6 years ago
 -
mariocrack357 liked this · 6 years ago
-
 noodleofthemoon-blog liked this · 6 years ago
 -
 akilon liked this · 7 years ago
 -
 hxney--tears liked this · 7 years ago
 -
 faust-tia liked this · 7 years ago
More Posts from Luffie

Hallelujah of Megami Tensei by luffie
A fan art from Shin Megami Tensei series. The fox spirit is so cute. His name might be Hallelujah, but he actually descended from demons.

Adelheid Bernstein from King of Fighters by luffie
The son of Rugal Bernstein has never looked this cool. I propose snk to make a manga based on him :)

Deadly Dva Chapter 01
Part 02


This is my first time making a comic ever, so please be kind! Do please support me on patreon.com/edric if you like it, so that I can devote more time to create better script and tighten the drawings!
I will post some faq on the next post soon, if you have any queries or would like to send me some love, you can mail me at edricartist@gmail.com
Meanwhile, the actions will start at chapter 02! So stay tuned!
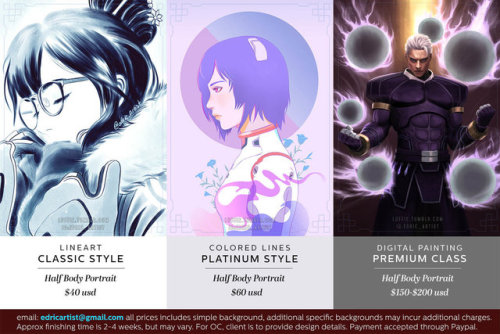
Luffie Commission Info 02 by luffie
Get you favorite characters done right!
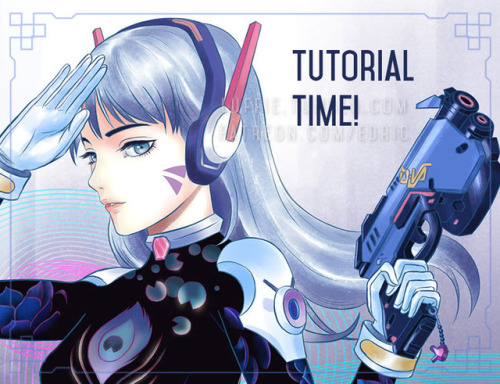
D.va Line Art Tutorial: Basic Level
I’ve been wanting to create some art tutorial for some time and I’ve finally did it! I hope there is some wisdom you get from this Tutorial, so let’s start!
Now this is a simple tutorial, so there wouldn’t be many advanced techniques, but the good thing is, it is simple, so that almost everyone can follow through, of course in the future, I will create even better tutorials that are easier to learn and understand.
I’ve always like illustrative art, and with my passion in digital painting, sometimes I try to combine them both together, and this is one of the result. In the future, I will try to constantly create many such illustrative art.
Software Used: Photoshop CS6, Corel Painter (optional)
Dimension: Approx 3000px x 3000px
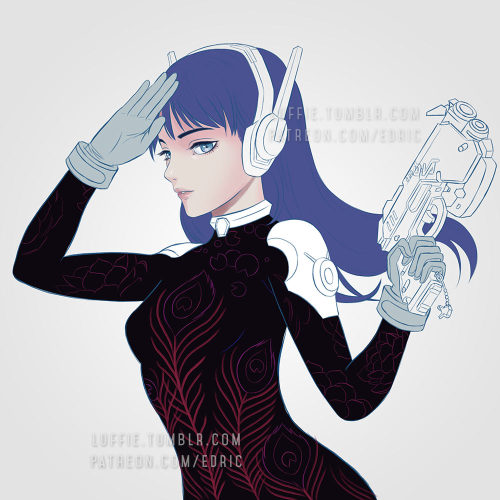
1. Drawing stage
Now this is the part that I cannot teach you here: drawing.
It really depends on your drawing skills, and for those who can;t draw so well, my strong advice is: draw on paper.
While I did this in digital out of convenience, nothing beats drawing straight on paper. Drawing digitally will hardly improve your drawing skills at all if any (my observation & exp), but drawing on paper will improve your accuracy and drawing memory much much faster and better.
Take your time drawing, if you have a good base drawing, then everything else will be nice and easy, so don’t rush it.
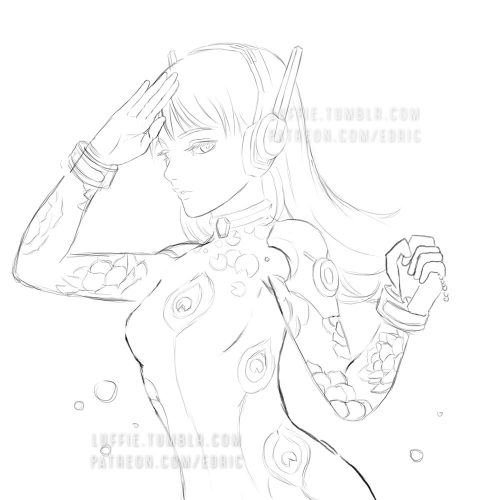
2. Outlining Digitally

Depending on your preferences, you can just draw any patterns, but my design here is about Peacock & Lotus design, with the Peacock symbolizing Dva’s penchant for showing off, as for the Lotus... well it’s pretty!
As you can see here, some of my outlines are pretty sleek and smooth, and that’s because I create a new clean outline on top of my previous rough drawing. This is usually quite important in terms of line drawing/painting. It makes the process easier and the whole image more clean and finished.
Painter Technique: Now, I create my drawing in my favorite app Photoshop, but Photoshop it’s not for being very bad in making smooth lines, so you have to use another program to do that.
Currently, my favorite program for creating such smooth lines is Corel Painter. You can search for “Brush Smoothing” setting, and set the “Damping” to around 80 for a good line stabilization.
While I forgot which brush I use for this, I now recommend the 2B pencil with 100% opacity (The blue lines). Make them on a different layer.
Try and create the lines with as little strokes as possible. For long curved lines like the hair, you can utilized Painter’s awesome “Paint on a path” feature, just check it on the top toolbar settings. It allows you to create a path and paint straight onto it, thus saving the frustration of redrawing again and again to get that smooth long lines.
For the red lines, “Concept Art Jitter Smooth” Under the Chalk section.
Other Software Technique: This line art technique can also be done with other software with brush stabilization feature like SAI, or Clip Paint Studio, and many others, so don’t worry if you don’t have Painter.
3. Base Colors
Now the next step is to bring the image back to Photoshop for coloring. Use the pen tool and create the basic shapes and fill them with block colors in different layers.
Now it is tempting to use the Lasso or the Paint bucket to fill, but don’t. The lasso tool has problem in creating smooth lines (which we need), and also the paint bucket (I’ll explain next time how to use it in another Tutorial).
If you have created the paths and shapes in different layers, then you can lock the layer transparency and start painting with the real desired colors.
Here I used the soft Airbrush in PS to paint it some reddish hue around her cheeks and forehead. Don’t worry about getting the colors very accurate for now, since you have separated them to different layers, it is very easy to make adjustments later on. Also, don’t forget to add a background, preferably grey or some neutral colors. It helps better to gauge the value of the colors later on, if you put white, most colors seem too dark, and of you put black, colors will seem too bright.
4. Start Painting
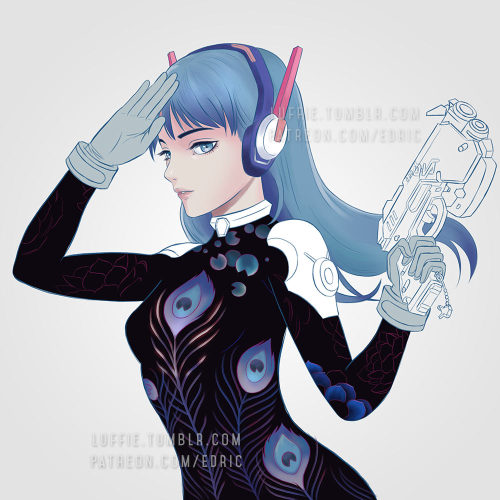
On a layer above the body, I painted the peacock leaves by using the Lasso tool, fill colors, and use airbrush to paint it highlights and shadow.
For the Lotus leaves, I use the Lasso, but I don’t fill it, since I want the blackness of the suit to come through. And instead of using the Airbrush, I use the PS standard round brush, with shape dynamic off and opacity pressure on, I painted with downward strokes lightly to create the leaf textures, and painted the same way again with brighter colors, and add a final highlight and the tip of most leafs.
5. More Painting
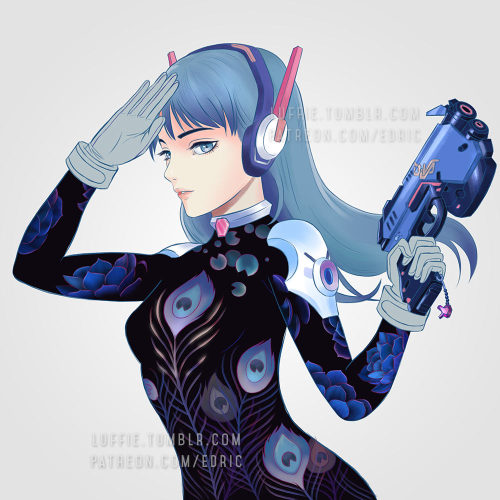
Continue painting the leafs, and the the shoulders, before moving to other parts like the gun. I’ve also added more leafs underneath the original leaf layer, since I felt it looked a bit empty. For the glow of the feathers, I simply create a layer on top of the outline layer, and set it to “color dodge”, and add some bright colors.
If the colors look weird/off, simply use Hue/Saturation to edit them till it looks right, then color pick from that section and paint the rest.
6. Finishing/Editing
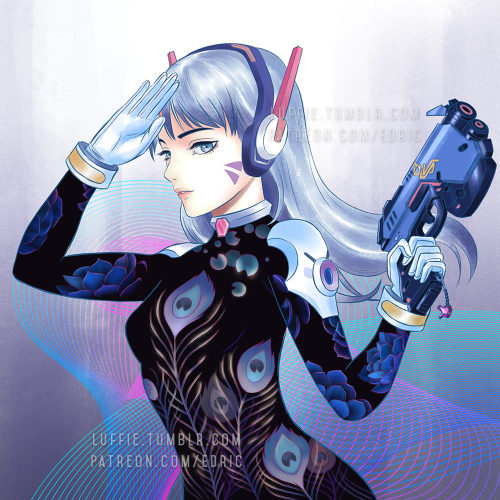
As you can see, I changed the hair, since I wasn’t satisfied with the previous color. To get the bright look, you need to start with a white base. And as with the gloves, shoulders and hair, I changed their base colors to white.
Then with my texture brush, I simply painted according to the form, and leave some white shining through in the middle. This will created those “white sheen” you see here. Then for the hair, I painted darker colors near the tip/end of the hairs. I’ve also brighten the her face in the process.
For the background, I was actually a little clueless on what to paint. So I just painted some light strokes using the same textured brush and add a design element on it. Maybe next time, with better planning, I will create better backgrounds.
End Note:
So there you have it, and as you have learnt, there isn’t any complicated techniques behind this picture, and if you have prepared each stage accordingly step by step, everything later will become easier. Of course this is not the most detailed tutorial as some steps can be broken down even further to make it clearer, but that is for future tutorials!
If you like my work and would like to learn more and support me, please do consider supporting me at Patreon.com/edric . It truly helps me a lot to devote more time to create this tutorials and art, plus you will also get my custom brushes and PSD file so that you learn better, and of course, Patrons receive special tutorials. Every bit of support helps, and are truly truly appreciated!!!
Or you can buy me a coffee for late night painting too here :https://ko-fi.com/edricartist