
901 posts
Some Resources
Some resources
Please keep in mind I’m not an expert, I don’t draw/paint professionally, there are way too many things I don’t know about, so I can only tell you what I do, what I use etc.
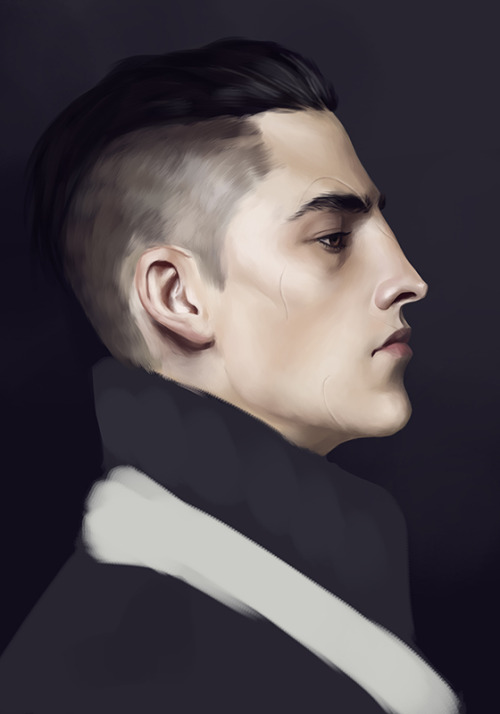
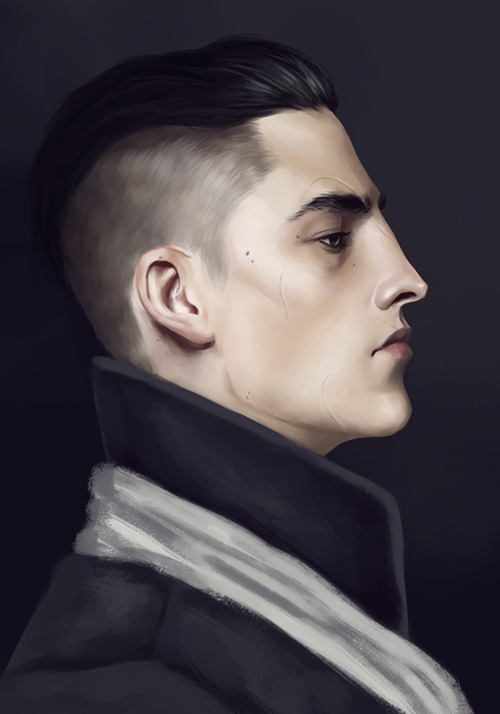
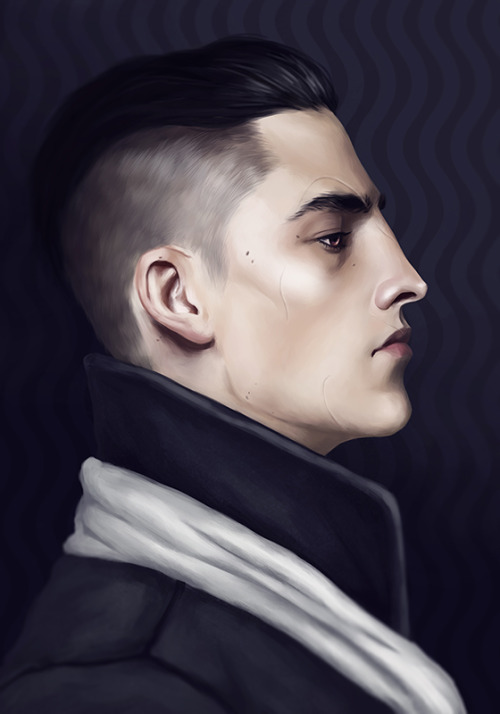
One of the first things I did, and something that actually made me want to get better at drawing, was subscribing to Stan Prokopenko’s channel. He’s absolutely hilarious and he illustrates in a simple way Andrew Loomis’ techniques, general anatomy, gesture drawing etc (I’ve already written about this but seriously, he’s the best).
Since you have to train your eye as well as your hand, gather and produce as many references and resources as possible. What you should avoid doing is using them mindlessly. Force yourself to break down the world in simple shapes, and always ask yourself why a certain thing looks that particular way (“the elbow looks like that because they’re bending their arm, otherwise it would look like that”, or “there’s a whole set of muscles that protrudes when they lift their arm” etc).
Anyway the topic is huge, I’m definitely forgetting tons of stuff, but I hope this will be helpful in some way. Here’s the links! And if I can be useful in any other way, my askbox is always open.
Stan Propokenko’s channel x
Andrew Loomis’ books x x
Useful ways of using references x x x x
3D models x
FunkyMonkey1945 notes x
Griz and Norm’s Tuesday tips x
Anatoref x
Some of my favourite tutorials:
Full body breakdown x
Body types x
Gesture drawing x
Head and neck x
Arms and hands x x x x x
Torso and legs x x x
Legs and feet x x
Backgrounds and perspective x x
and lastly
Character Design References (aka neatly organized tutorials for literally ANYTHING) x
Note: these boards can be a bit overwhelming, so you’ll want to dip into them once you know exactly what you’re looking for. Otherwise you’ll just end up scrolling through them aimlessly.
-
 seraphicmiso liked this · 1 year ago
 -
 dangerouschildbread liked this · 3 years ago
 -
 zeroconnectionn liked this · 4 years ago
 -
 rhaeken liked this · 5 years ago
 -
 annieter reblogged this · 5 years ago
 -
 descendingarrow liked this · 5 years ago
 -
 virvatulivale reblogged this · 6 years ago
 -
 pasobility liked this · 6 years ago
 -
 rowanreference reblogged this · 6 years ago
 -
 douxhes reblogged this · 7 years ago
 -
 straeif-blog liked this · 7 years ago
 -
 silverstrike liked this · 7 years ago
 -
 keatstxo liked this · 7 years ago
 -
 kokonutvx liked this · 7 years ago
 -
 raven-wilde liked this · 7 years ago
 -
 topaintclouds reblogged this · 8 years ago
 -
 earthmindheartsky liked this · 8 years ago
 -
 ccodenameyann reblogged this · 8 years ago
 -
 valuillu liked this · 8 years ago
 -
 celestialhoney liked this · 8 years ago
 -
 luigalaxy reblogged this · 8 years ago
 -
luigalaxy reblogged this · 8 years ago
-
luigalaxy liked this · 8 years ago
-
 kiarasynn-blog liked this · 8 years ago
 -
 dunadaan liked this · 8 years ago
 -
 rockstarmystique liked this · 8 years ago
 -
 cry-bee-bee liked this · 8 years ago
 -
 anduriil liked this · 8 years ago
 -
 treesources reblogged this · 8 years ago
 -
 inadequeer liked this · 8 years ago
 -
 nonbinarynightcrawler liked this · 8 years ago
 -
 bluemothcollection reblogged this · 8 years ago
 -
 telabelas reblogged this · 8 years ago
 -
telabelas liked this · 8 years ago
-
 grimdarkreference-blog reblogged this · 8 years ago
 -
 darthputa reblogged this · 8 years ago
 -
darthputa liked this · 8 years ago
-
 creengee liked this · 8 years ago
 -
 13xinfinity liked this · 8 years ago
 -
 flerpweep liked this · 8 years ago
 -
 shyfe liked this · 8 years ago
 -
 aspeni reblogged this · 8 years ago
More Posts from Binderclipping


HELLO FELLOW SHORT COSPLAYER!!! Would it be too much trouble to ask what shoe lifts you use and/or expand on your hidden heel process? Thank you!
This is stuff I’ve posted to my FACEBOOK PAGE before, but I’ll share it on here for you!

1. Use polyfill fiber to fill in the giant gap for heels, and hand sew on a bias-stripe of fabric to your boot cover so you can hide just how much extra height you’re packing.

2. Buy shoe lifts! (Can be called ‘heightening inserts’ or ‘shoe lifts’ or ‘shoe inserts’) You can get them from Ebay for $10-$20. I LOVE THESE THINGS. I started using them in 2009 and they work wonders. Especially if you want the slimming and heightening effect of heels but you don’t want footwear with a spike or platform heel (i.e. for female->male cosplay).
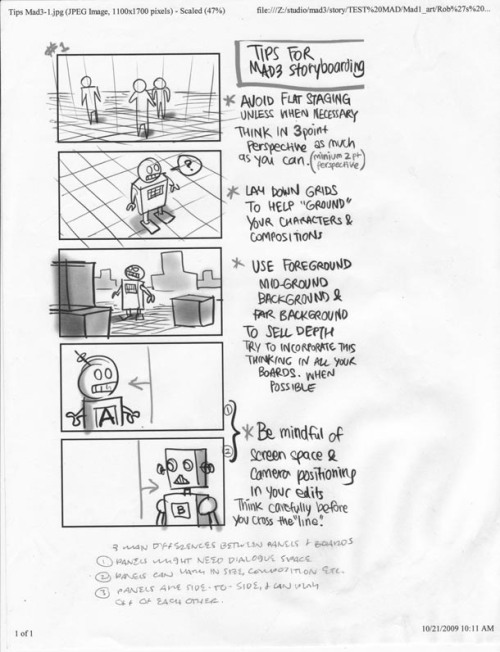
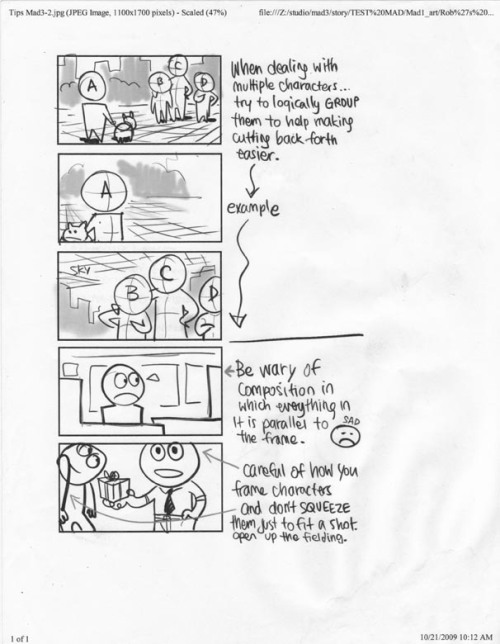

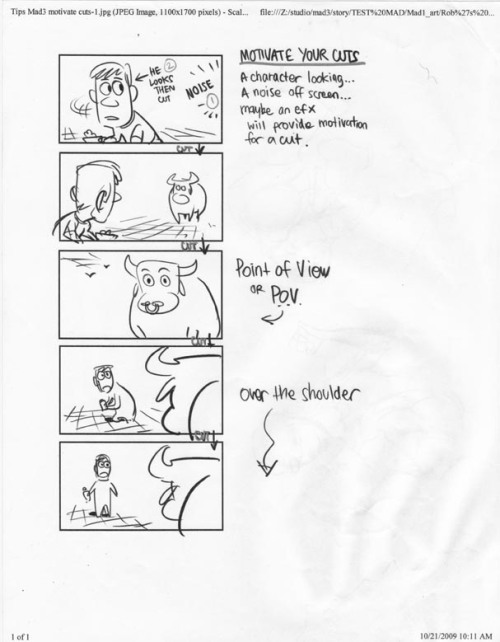
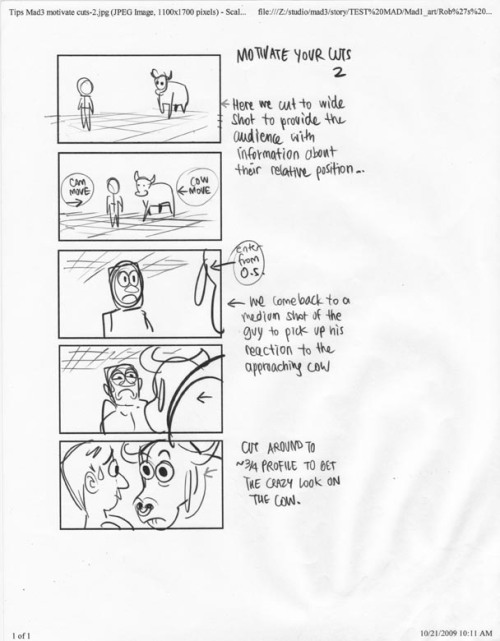
DreamWorks Storyboarding Tips by Rob Koo.
Via Ben Caldwell.
college AUs to consider
“you were passed out in the library clutching a monstrous pile of notebooks, i know it’s finals week and all but are you ok? also the library is closing, you gotta go home” AU
“we drunkenly hooked up at some party and you seemed vaguely familiar but now it’s monday and i’m realizing exactly how massively i fucked up because you are in fact my TA and I don’t think i’m going to be able to make eye contact with you for the rest of the semester” AU
“I got locked out at 3 am and you heard me banging on the front door of the res hall and let me in and turns out we’re wearing the same exact shirt, let’s stay down in the common room and discuss this until the sun comes up” AU
“I’m writing my thesis and somebody keeps leaving crumbs and shit on my carrel so the passive-aggressive sticky note war begins until one day i finally catch you in the act and it turns out you’re really attractive” AU
“I kinda want to try weed just once, just to see what it’s like, hello stoner acquaintance can you help me out” AU
“you always show up to our 8:30 immaculately dressed and your handwriting is so neat and you always have your shit together and today you look like you’ve been crying and you’re wearing a ratty old shirt and you’re not taking notes or participating at all and we’ve never talked but is everything all right” AU
“this week’s live model is extremely attractive and i don’t know what to do with myself” AU
“we always get into these extremely heated debates during lecture which usually culminate in heated shouting matches but i just want to let you know that I actually really love our discourse and i was wondering if you wanted to grab a bite to eat after class today” AU
“we always pass each other on our way to our respective classes and at first we would just nod but after a couple of weeks we’d nod and smile and eventually the nodding and smiling morphed into an elaborate secret handshake thing and now the semester’s almost over and I don’t even know your name??” AU
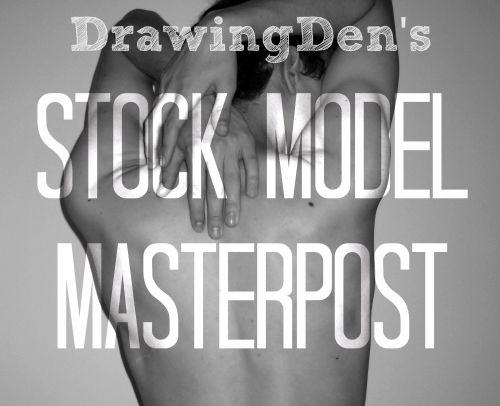
A helpful list of models for anatomy and other drawing references (x)
Key: (nsfw) Nudity | (£) Not Free
Female Models
MariaAmanda - Fantasy and fairy themed stock, mostly full body
Faestock - Expressions, portraits and poses, many with dresses
RobynRose - 360 angle lighting and pose sets, including expressions
Mirish - Futuristic and action inspired poses, all full body
MiraNox - Gothic inspired model including pin-up poses
ImperialStarlet - Poses with props including weapons
PrincessRowena (£) - Various poses with a fuller figured model
Liancar-art - Fantasy and medieval inspired poses
Male Models
BODYSTOCKS (nsfw) - Basic semi-nude athletic torso references
BirdsistersStock - Various everyday poses and portraits
Mousiestock - A small collection of back anatomy references
Justmeina (nsfw) - Nude anatomy reference portraits
Null-Entity - Different poses based on scenarios
Anyman82 - Military and vintage themed stock
Both/Other Models
SenshiStock - Huge collection of various action and everyday poses
Pyjamacake - Standard poses good for character bases
PhelanDavison - Futuristic and high-tech gear with action poses
Mjranum-stock (nsfw) - Classical nude portraits, and also action poses
Auroradreams - Many poses with dresses, and others such as children
MajesticStock - A large amount of poses with different body types
Animals
HOTNStock - Mammals including large felines and canines
LuDa-Stock - Equestrian and domestic animals
FurLined - Large and domestic felines
EternalOcean - Mostly wolves along with other various animals
Landkeks - All kinds of animals from a zoo
EdgedFeather - Close-ups of a wide range of birds
Other
Burtn - Natural landscapes and scenery
ProREF (£) - Urban and rural places such as abandoned buildings
Clz - Skulls and other bones
Please remember to follow the stock owners rules, happy drawing!