Process Log - Tumblr Posts

Starting assembly on the test print of this Laspistol Sculpt - Step 1, remove supports and clean up any particularly rough edges with 240 grit sandpaper


Next, glue the main body and the power cell together using superglue


Then, add the smaller detail pieces, again with superglue - any big gaps get filled with body filler and sanded flat-ish
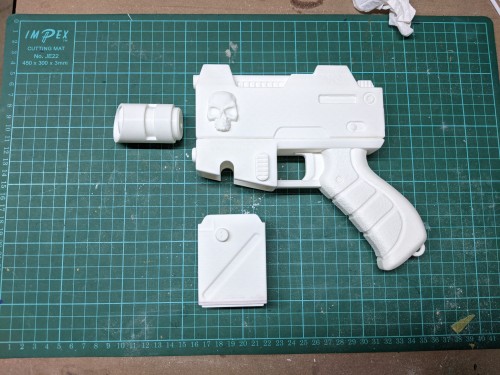
The assembled body, power cell & barrel are ready for the next step

Time to magnetise the power cell into the mag well
The magnets are 6mm x 3mm cylindrical neodynium magnets, held in place with superglue.


Step 1 is to glue the magnets into the power cell

Then, use the magnets on the power cell to position the magnets in the main gun

Test assembly to see what it looks like in one piece

Next step - spray with filler-primer to fill in most of the layer lines from the printing process


Then came another load of sanding with 240grit, followed by a coat of black primer

Once the primer had dried, more sanding with both 240 & 400 grit sandpaper. The deepest groves also got filled with body filler


Finally, the barrel was superglued to the rest of the pistol
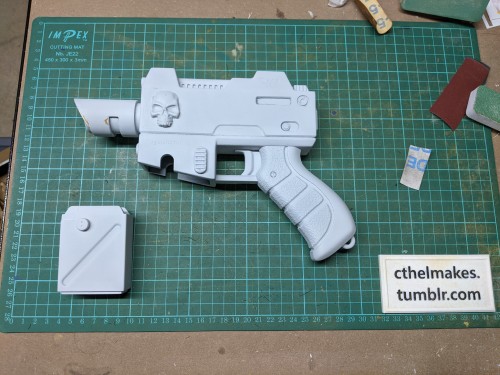
Everything gets a coat of grey primer (greybecause it makes it easy to see when I've covered the previous black primer coat)

First lesson from this test print - the D & M in the Departmento Munitorum need to be tweaked to print better

Gave the body of the pistol a coat of green, followed by drybrushing with a lighter green


The body got masked off, then the metallic parts got a coat of gloss black primer followed by gunmetal.
The handle got a coat of matte black primer, then the trigger, trigger guard & lanyard ring got a paint of gunmetal with a regular paintbrush.

The best bit of masking is the big reveal at the end when you peel the masking off

All the details get a coat of gloss black paint by hand


Then gunmetal/gold/black metal as appropriate, followed by drybrush highlights.
Weathering was done with a mixture of blue & black water-thinnable oil paints


Once the weathering was done, the muzzle lens & ammo indicators were painted by hand

Finally, everything got a couple of coats of satin varnish with an airbrush, followed by some gloss varnish by hand on the ammo indicators and muzzle lens - All that's left now are the beauty photos!

All finished! More photos & lessons learned below the break


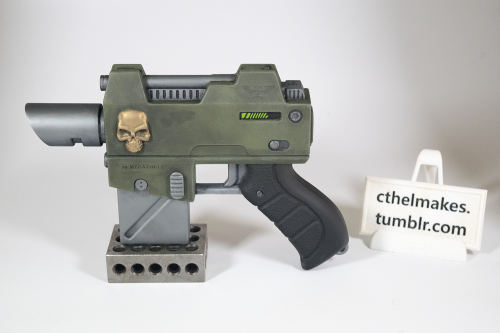
Good news - Everything fits together
Changes needed:
1) The "19 MEGATHULE" text is too shallow and some of the strokes are too thin to survive the filler primer & sanding - Switched to a different font & slightly deeper engraving
2) The knurling on the laser sight is a bit too fine - it survived the filler primer but fewer, deeper cuts would be better
3) The Departmento Munitorum stamp on the charging handle is a little small - made bigger
If you want to make your own version, .STL files are available for sale HERE