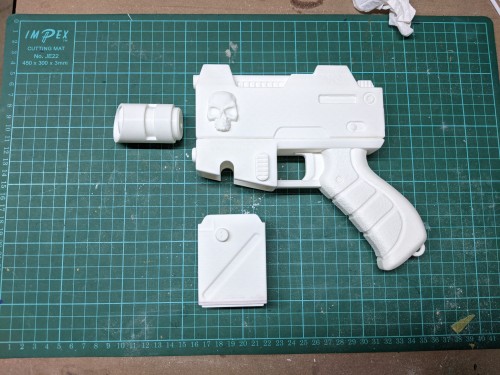
Everything Gets A Coat Of Grey Primer (greybecause It Makes It Easy To See When I've Covered The Previous
Everything gets a coat of grey primer (greybecause it makes it easy to see when I've covered the previous black primer coat)

First lesson from this test print - the D & M in the Departmento Munitorum need to be tweaked to print better

Gave the body of the pistol a coat of green, followed by drybrushing with a lighter green


The body got masked off, then the metallic parts got a coat of gloss black primer followed by gunmetal.
The handle got a coat of matte black primer, then the trigger, trigger guard & lanyard ring got a paint of gunmetal with a regular paintbrush.

The best bit of masking is the big reveal at the end when you peel the masking off
-
 notlooking23 liked this · 3 years ago
 -
 masteralaric liked this · 3 years ago
 -
 zrinboy reblogged this · 3 years ago
 -
 redicaldesign liked this · 3 years ago
 -
 gr33nsito liked this · 3 years ago
 -
 god2thezilla liked this · 3 years ago
 -
 yasuohatsu liked this · 3 years ago
 -
 aliquid-de-magis liked this · 3 years ago
 -
zrinboy reblogged this · 3 years ago
-
zrinboy liked this · 3 years ago
-
 cthelmax reblogged this · 3 years ago
 -
 frogshunnedshadows liked this · 3 years ago
More Posts from Cthelmax


Sisters of Battle-themed side plates for my 40k Plasma Pistol
3D printing files for the side plates available here - https://www.artstation.com/a/5659842
3D printing files for the pistol itself available here - https://www.artstation.com/a/2241490

Time to magnetise the power cell into the mag well
The magnets are 6mm x 3mm cylindrical neodynium magnets, held in place with superglue.


Step 1 is to glue the magnets into the power cell

Then, use the magnets on the power cell to position the magnets in the main gun

Test assembly to see what it looks like in one piece

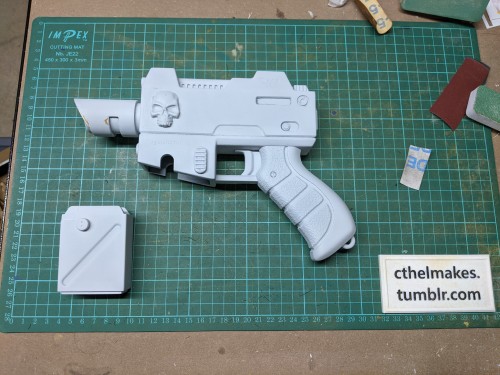
Starting assembly on the test print of this Laspistol Sculpt - Step 1, remove supports and clean up any particularly rough edges with 240 grit sandpaper


Next, glue the main body and the power cell together using superglue


Then, add the smaller detail pieces, again with superglue - any big gaps get filled with body filler and sanded flat-ish
The assembled body, power cell & barrel are ready for the next step


Artfight week 3
1) Siepert
2) DawRushesIn
3) NotOkayGuys
4) CrazyLunaticXD
5) @0re
6) @riyamilea
7) Solantro16