Goodness Gracious These Apples Are On Fire
48 posts
Guyrunsbackwards - Monster Box - Tumblr Blog


They gave my boy his sotn shield specifically so I could die happy

i can't help but feel i've crossed a line

Ok so I had this dream last night

Pizza Time with MAG200 spoilers


Sam paying the price for giving Ashley a ranged option
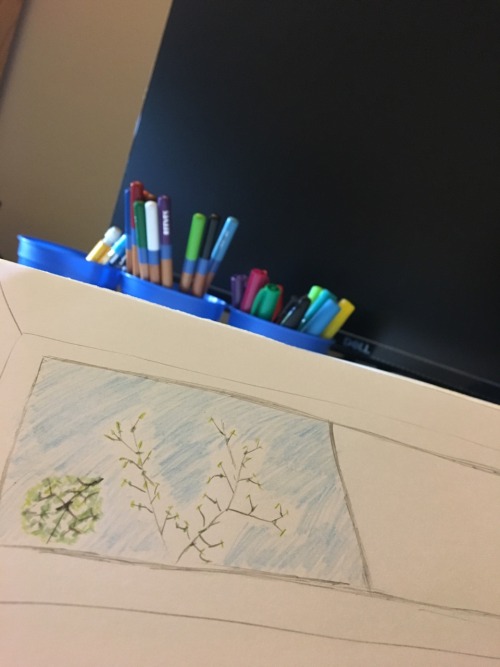
Rough pass for my first animation in class
I’ll be honest, I love that one stadium shade so much. They are the reason I get up in the morning. They will always be their when I’m trying to break Theseus’s ankles. And I know that I’m running right over to them before taking my reward.(This of course is functioning under the assumption that bull doesn’t counter-break my ankles in the fight.)
Please remember to show love to the greatest bestest number 1 fan shade.
A moment ago I exposed myself to the Songs of Supergiant Games.
I must now offer my blood, body, and soul to Darren Korb and Ashley Barrett.


doodled ch’boi
man i wish i was two-dimensional


i am now fully aware of my substandard knowledge of fish anatomy
his name is Michael btw
Mike Crew: heh. Jon go Brrr

For anyone who wants to spread The Eye’s influence into the realms of DnD.
All hail the Ceaseless Watcher!
For anyone who wants to spread The Eye’s influence into the realms of DnD.
All hail the Ceaseless Watcher!


I spat out my taco and started crying


just thought it’d be funny idk man
(( @guyrunsbackwards thank u for the suggestion))
Commissions - Ko-fi
can you explain how to do animations on csp? or do you know any good tutorials on how it works? im a bit confused
Animation in CSP can be a bit confusing (and daunting) since it’s nothing like Animate CC, Photoshop or ToonBoom. It’s pretty much has it’s own interface and quirks so it’s gonna take a while before you get use to it and start customizing it to your liking.
I don’t really know much about tutorials since I’ve learned everything on my own as well as finding very few books explaining CSP animation. Unfortunately, those books are only in Japanese and my skills aren’t at a level where I could fully translate everything. Though, I’m sure you can easily find some tutorials by a simple Google search.
Since you asked, I’ll just show you how I go about animating in CSP and set up my files such (if that’s okay and helps you).
Document Setup
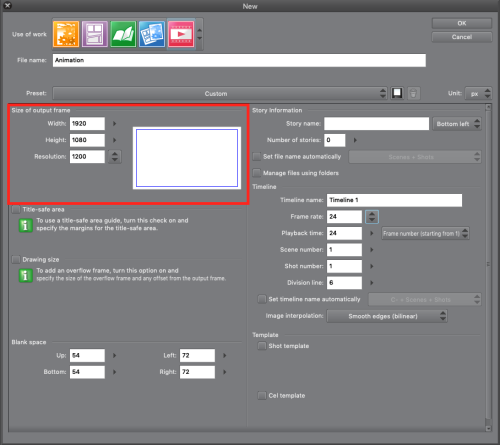
So, when you open CSP you go to the Animation section and plug-in what dimensions and resolution you want. I normally use 1920x1080 (that’s standard for most video and TV) with 1200dpi. You don’t have these specific numbers though.

Once the document is set and ready you have your canvas and all that jazz. This is my workspace setup for both illustration and animation.
Red - Canvas
Pink - Timeline
Blue - Color Set
Green - Auto Actions
Orange - Layers
Color sets and auto actions are great to cut down on time for coloring and clean-up. However, I’m still learning Auto Actions myself so I can’t give a full explanation on how to use them. But really, you don’t really need Auto Actions unless you’re doing some serious clean-up and color work. Color Sets can be downloaded ) for free through CLIP Assets. If you search animation on Assets, it should pop up with no issue.

CSP actually updated today, so, the timeline tool bar has changed quite a bit.
Red (from left to right) - New Animation Folder, New Animation Cel, Specify Cel, Delete Specified Cel
Blue - Onion Skin (allows you to see previous and next frame simultaneously while animating)
Green (from left to right) - Edit Timeline, New Timeline
Pink - Brand new Camera feature (I’m learning this one too)
Making Cels in Layers Window

When you create an animation folder (through the Timeline tool bar), you can also add cels by pressing the new layer icon (highlighted in red above). Make sure you’ve selected the animation folder beforehand or else it won’t some up on the timeline.
Animating on the Timeline

One long rectangular box on the timeline represents 1 frame of animation. So, 2 boxes equals 2 frames of animation, 3 boxes equal 3 frames, etc, etc. Personally, I always make my key animation frames on 4s (4 frames) since it just has a steady movement. Once I finish the key frame animation, that’s when I start messing around with the timing like above.
Blue - 3s
Green - 4s
Pink - 2s
Red - 1s
This part comes with a lot of tests, meaning I export a ton of gifs to see which timing I like best. Once you get the hang of it, it’ll start to feel like secondhand nature.
Layering Key Frame Animation
I love layers. I love to abuse layers so much. It’s just much easier to organize everything when using layers. In fact, the technique is regularly used in anime to cut production cost and time. You ever wonder how anime characters can talk but only their jaw moves while everything stays? Layers. There’s one layer where they only animate the jaw moving while there’s a secondary layer that’s essentially a still image. For this section, we’ll use my She-Ra animation as reference.

If you look at the upper left corner, you’ll see a bunch a circles with scribbles like A1, A2, B5, C3, etc written. These are different layers I made for the animation. A is drawn in black for She-Ra’s body, B is drawn in yellow for her hair and C is drawn in red for the lighting effect of her sword (another Japanese animation technique). By working in layers, I can make edits faster and easier. Also, this method is really helpful for overlapping action (i.e. She-Ra’s hair). It would be such a pain to have it all on one layer and trying to avoid finished line work (or worse having to redo it all). Below is how this animation is layer:
Red - A (Body)
Blue - B (Hair)
Green - C (Lighting Effect)
Pink - Blue shadow (this is a guide for if I ever wanted to bring this piece into color)

Another application of this layered animation is my recent Owl House piece below.

Within the animation folder, you can create a sub folder that can contain multiple layers at once. The cool thing about this is that the sub folder ends up acting like an animation key frame. Take note below how the sub folder has layers that break up the characters into its essential parts (C folder was Eda so it was one for her body, one for hair, one for earrings and one for her skirt). Again, super helpful when you have stationary animation (like a lip sync or eye blink). Or, for looped animations like this where you can reuse frames.

Camera
So as I’ve stated before, this camera feature is new so I don’t have much information or notes on it yet. To create a camera in CSP you go to the Animation tab > New Animation Folder > 2D Camera Layer.

To enable the camera function, you need to select the animation folders that you’re going to use and press this icon (highlighted in red) on the Timeline toolbar.

Once that’s done, those animation folders will have a lock icon appear next to them (highlighted in blue). Make sure to put the desired animation folders into the Camera folder (highlighted in red) or else the effect won’t show up. Here’s the same She-Ra animation but with the camera effect applied:

There’s so much I still need to learn about this function but overall it’s pretty cool so far. Maybe in the future I’ll do a more in depth tutorial about CSP animation since the program is up and coming in the animation industry. But until then, I hope you found this helpful!


Bait


Me Everyday