aka @rmgrey-author | Rowan Grey • writer • graphic artist • mix maker • tutorial maker • ABSOLUTE STEREK TRASH • multiship af
441 posts
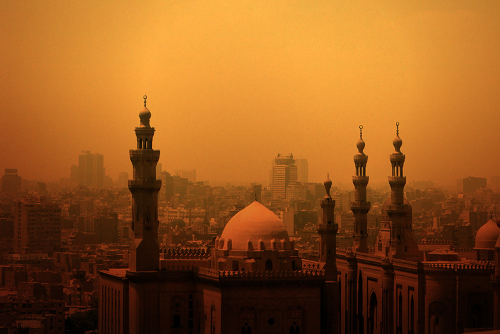
Lycaens - CHAOS HAS COME AGAIN
-
 lhazar reblogged this · 6 months ago
 -
 zurich-loves-munich reblogged this · 7 months ago
 -
 vixenvanityvulgarity reblogged this · 8 months ago
 -
vixenvanityvulgarity liked this · 8 months ago
-
 yearnology reblogged this · 9 months ago
 -
 nuhalovee reblogged this · 10 months ago
 -
 therootednomad reblogged this · 10 months ago
 -
therootednomad liked this · 10 months ago
-
 svetislava2007 liked this · 10 months ago
 -
 chryso-poeia liked this · 10 months ago
 -
 dianazzzzvm liked this · 10 months ago
 -
 ars-theurgia liked this · 10 months ago
 -
chryso-poeia reblogged this · 10 months ago
-
 asongpanda1 liked this · 11 months ago
 -
 nosferatupls reblogged this · 11 months ago
 -
 mysterywriter96 liked this · 11 months ago
 -
 mysugarvenom liked this · 11 months ago
 -
 blvqebird liked this · 1 year ago
 -
 beyond--the--imperfections reblogged this · 1 year ago
 -
 bloominskyline reblogged this · 1 year ago
 -
 fruitciders reblogged this · 1 year ago
 -
 saintangelic liked this · 1 year ago
 -
 asweet0ne liked this · 1 year ago
 -
 g-gor reblogged this · 1 year ago
 -
 naturalephemera reblogged this · 1 year ago
 -
 ageofpanek liked this · 1 year ago
 -
 itati liked this · 1 year ago
 -
 losnenufares reblogged this · 1 year ago
 -
 gemini-haven liked this · 1 year ago
 -
 cozy-corner liked this · 1 year ago
 -
 jupiter-0644 reblogged this · 1 year ago
 -
 dickie-smallz reblogged this · 1 year ago
 -
 glitteryonix liked this · 1 year ago
 -
 bestiolin liked this · 1 year ago
 -
 anetteva reblogged this · 1 year ago
 -
 danimoonstarr reblogged this · 1 year ago
 -
 lillyli-74 liked this · 1 year ago
 -
 cor-serpentis reblogged this · 1 year ago
 -
cor-serpentis liked this · 1 year ago
-
 charlyzard reblogged this · 1 year ago
 -
 toxartikourasthke liked this · 1 year ago
More Posts from Lycaens


we were both created in chaos, we were both born to destroy


MULTIFANDOM CHALLENGE || (4/50) Female Characters » Amelia Pond
↳ “There’s a little girl waiting in a garden. She’s going to wait a long while, so she’s going to need a lot of hope. Go to her. Tell her a story.”
me: how many words have i written
is it a million
is it TWO million
word counter: 409 words
me: LIES
COLOR TUTORIAL #2
Color Porn Stiles.
Another tutorial similar to this one, but with a few differences. This time I am focusing on changing colors for the background to blend well and match a palette coloring scheme or just to make color porn picspams.
I am using Photoshop CS5, and this is not a beginner tutorial, but it isn’t too hard either.
I will be showing you how to turn this:

into this:

First start with a duplication of the background layer, then resize and crop how you want. Next I sharpened, then duplicated again and set the new duplicated layer to screen.
Here are the smart sharpen settings I always use.

Next add these two gradients. Flip or move as needed.


If you’re using a different cap than me then you’d place the first one depending on where you’re best shadows are. You can use that first one twice at a lower opacity too if you need more shadows.
Now a blank layer, with a large soft brush (#000000) and just shade the side of the image with the most shadow. My selection:

I added a black gradient fill on top of that, rotate from right (being the black) to transparent (toward the left). Then add another blank layer on top of that and add more shadows using a large soft brush, again in black.
Next I wanted to add some shadow and contrast to parts of Stiles’ face. I used levels. Here are the settings and my finished mask.

(0, 0.70, 255 / 0, 223)

Here is the comparison gif.

Next I stamped the cap (alt+ctrl+shift+e) and moved it to the right; then I used the clone stamp tool to fill in the left side with the background. Like so:

Then add yet another selective color (black +4) and a black and white gradient map on top of that. Set the gradient map to soft light with a 20% opacity; or higher if you need more contrasting.
Now the eyes. Make a blank layer, set to soft light blend mode. Using a small round brush of a light brown color (#864514) and color the iris. Then I added some more details; like curves layers to brighten the reflections of his eyes. Then a color balance to dull the brown a little, more blue so it looks more natural. Then another curves layer to shadow near the corner of his eyelids.

I did another layer, color fill (#4c3422), this time for his hair; mask it and color with the black brush to fill it in. I did some light coloring for his eyebrows too. Set it to soft light blend mode. Here’s the mask:

Next some more toning.

(whites: -7,+5,-1,+31 / yellow: -27,+100,+70,0)

(reds: -32,+17,0,0 / yellows: -100, +100, +100, 0 / greens: -84,-100,+100,0)

(cyans: -33,-100,+100,0 / blues: -100,-100,+100,0)
Here’s the mask:

Here the comparison.
Next add a vibrance adjustment, vibrance +10, saturation +4.
Now colors! Finally right?
Make a blank layer and with a large round soft brush paint in the left side, but don’t fill in the whole left side. It should be careful! On the first layer I lowered the opacity to 55%.
Then another layer set to soft light (#b6a83e), color more toward Stiles with this one, again keep the stuff toward Stiles softer.
Repeat this step as needed with different colors of similar tones; all with the intention of carefully moving toward Stiles’s form with your bright colors. Make sure that if you do add any onto the skin, that it’s with a low opacity brush.
(upper left to lower right: #ff9f40, #b6a83e, #dd9236 & #fe9f40)

The trick to these is using lowered opacity for the brushes; keeping everything bright and vibrant on the far left and fading the color as you move toward Stiles.
I added some more selective color next, with the purpose of drowning unneeded tones and balancing the yellows and oranges. It’s a lot!

(yellows: +20,-11,-68,-20 / greens: -17,-37,-100,0)

ANOTHER selective color. This whole tutorial is basically selective color right? This one though, you need to mask.


Next a color fill (#ff9f40), soft light with opacity 16-20% on top. Now, create another blank layer, same color as above with soft light blend mode again and opacity 66%. This one is so we can match the color of Stiles’ shirt, to the background.

Color what I selected and it’ll blend better with the bg. It’s even better when you add another (guess what?) selective color.

(reds: +32, -32, +28, +50. yellows: -63, +40, +21, 0)
Now stamp the whole thing again (alt+ctrl+shift+e) and add a vibrance (+15, -1) and a curves layer (output 135, input 124)
Progress gif.


And we’re are technically done. But hey there’s a little more.
Now I can show you how to change the orange to green, purple, and even blue. Green to start with.


(reds: +100,-100,+100,-31 / yellows: +100,-83,+100,+100)
You’ll want to keep this one masked, so it barely effects Stiles. His skin will be corrected by the color balance.

Then color balance.
(shadows: 0,0,+6 / midtones: -3,+9,-16 / highlights: -10,+12,0)

(reds: +42,-68,+100,+16 / yellows: +9,-16,-1,-7)
This one should be masked too, but softer, less detailed.

Lastly add a blank layer, set it to the blend mode color. Take a green brush (#c8e740) soft round and color most of the left side, especially near Stiles’ neck, shirt and hair. Here’s my selection.

Now purple.


(reds: +100,+100,-100,+100 / yellows: +100,+100,-100,-19 / magentas: +2,+2,0,0 / neutrals: -53,+31,-62,0)

(shadows: 0,0,+6 / midtones: -2,-13,+15 / highlights: -10,+12,0)

(reds: +31,+100,-51,-3 / yellows: +100,+100,-100,-7 / neutrals: +30,+7,-9,0)
Lastly make another blank layer and use a nice purple color to color where we did with the green. Make this one’s blend mode color (#be5eec).

And blue. Same drill, start with selective color.


(reds: +100,-100,-100,+100 / yellows: +100,+100,-100,+100 / cyans: -36,+2,0,0 / magenta: -65,-16,0,0 / whites: -19,0,0,0 / neutrals: +100,-18,-17,0 / blacks: +100,0,0,+5)

(shadows: 0,0,+6 / midtones: -37,-10,+19 / highlights: -10,+12, 0)

(reds: +100,+100,-20,-3 / yellows: +100,+12,-88,-7 / cyans: +26,+24,0,0 / blues: -58,0,0,0 / magentas: +100,-100,-100,0 / neutrals: +26,-2,-13,0)
Mask all of the selective colors like you did for the green and purple.
Finally you’ll need two blank layers, one at full opacity, set to the color blend mode select or mask it for the background. This one is for the blending portion of the background.

The other is the same blend mode, but this one is to color only the shirt and needs a lower opacity, I used 45%. Both colors for the blending layers I used are (#2f97bb)

And that’s it! I know longest tutorial ever. But it won’t be my last. Also here’s a Scott version of the cap using the same methods.
DOWNLOAD THE PSD HERE.

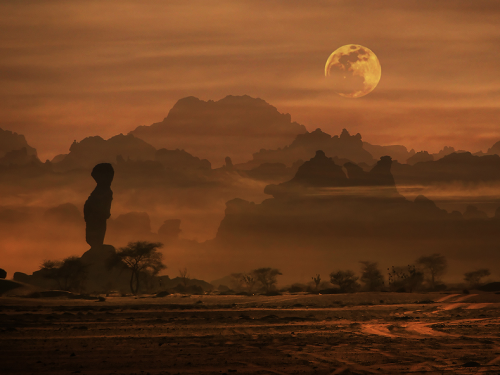
I went into the desert to forget about you. But the sand was the color of your hair. The desert sky was the color of your eyes. There was nowhere I could go that wouldn’t be you.
Jeffrey Eugenides, Middlesex (via larmoyante)