Photoshop Tutorial - Tumblr Posts
Photoshop Tutorial #2 -
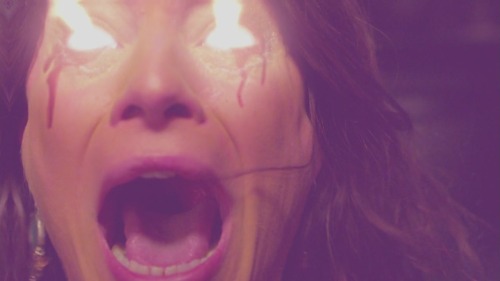
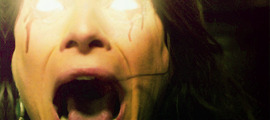
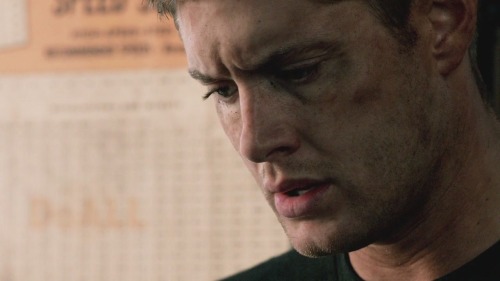
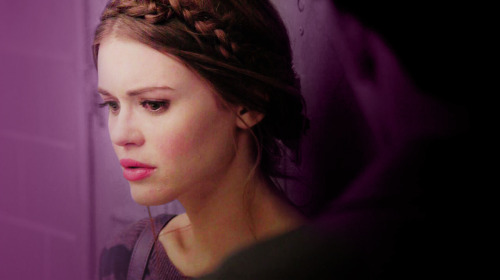
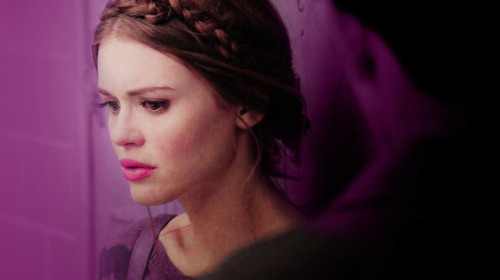
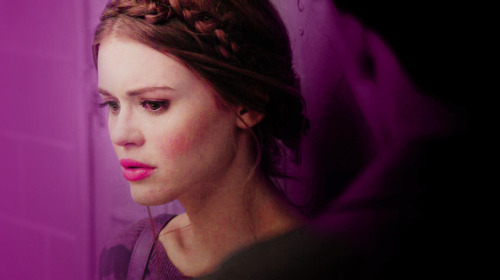
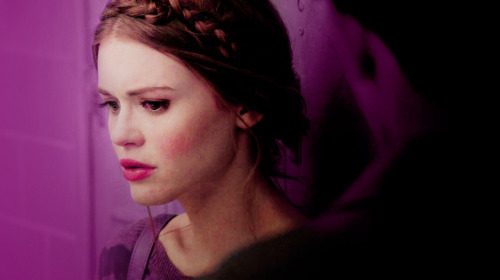
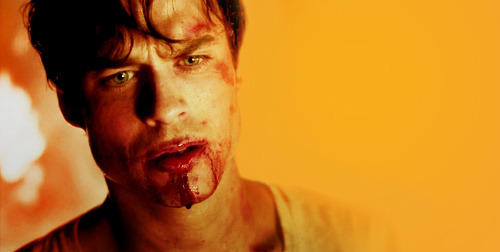
Paint Tears


This is the easiest thing in the world! You can do it in a minute. This is for anyone new to editing in Photoshop
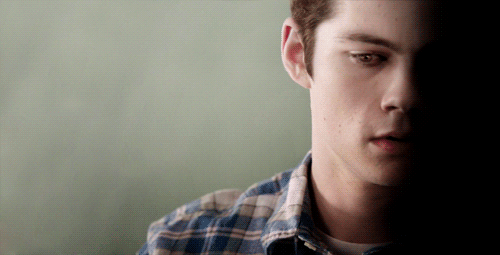
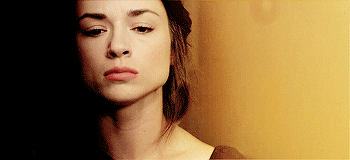
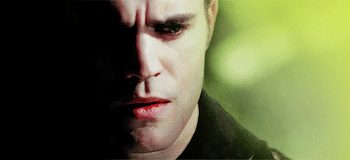
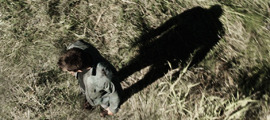
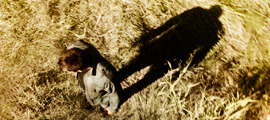
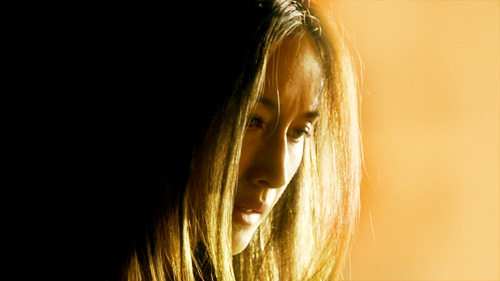
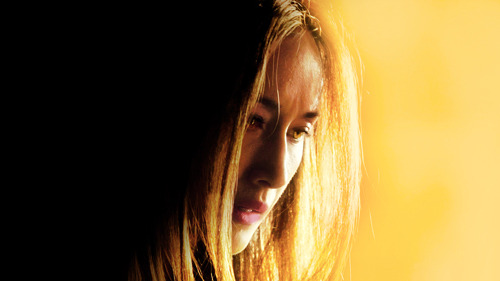
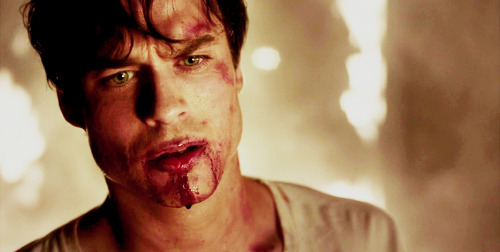
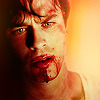
Okay! Starting off by opening my pic in Photoshop - I'm choosing this one of a sadboy

I'll simply create 3 layers

grab a brush, set it to white,

and on the first layer, I paint some tear shaped blobs in the characters eyes - I'm just doing whatever, as long as the shapes are round and bubbly in some way, it's okay.

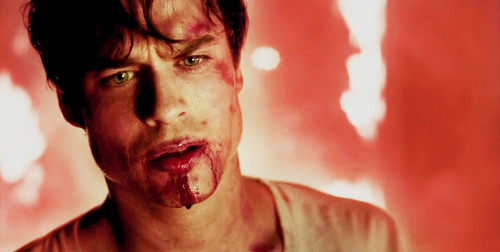
now, I'll set the opacity of that layer to around 25%

on the layer above, I want to draw some simple, round highlights with the same white brush

and set the opacity to around 30%
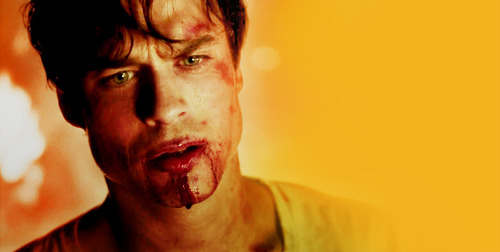
Finally, on the last (top) layer, I'm grabbing that same, white brush and making it really small - like, 2px.
Shortcut to increase & decrease brush size is [ and ]
and I'm going to paint some lines around the tears. Not all the way around, just kinda, artistically around some of the edges, and leaving other edges open.

now, I'll set the opacity to around 50%
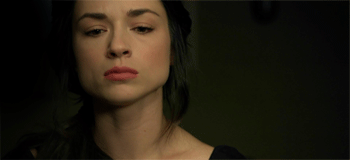
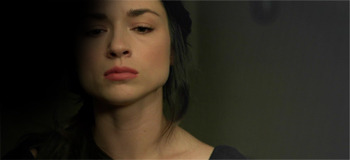
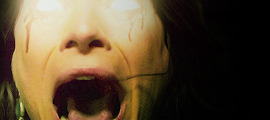
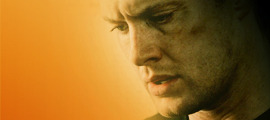
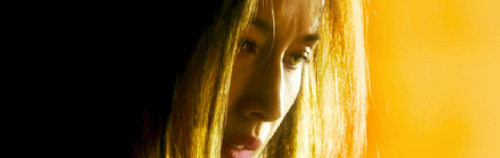
I'm happy, so I'll flatten the image and save!
and that's it!
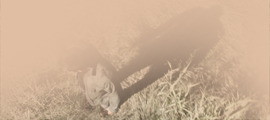
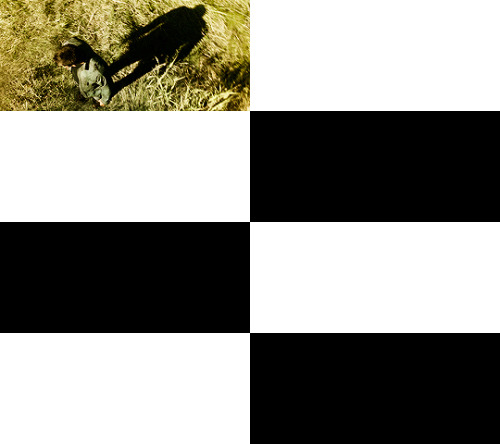
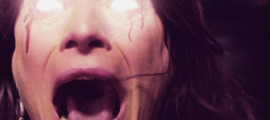
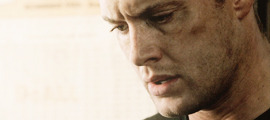
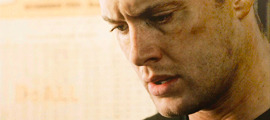
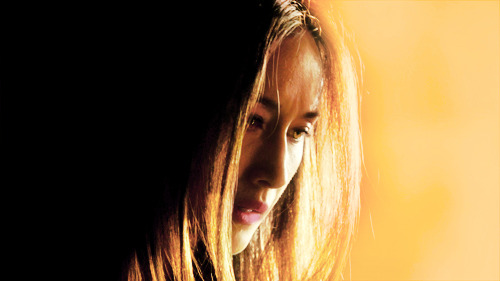
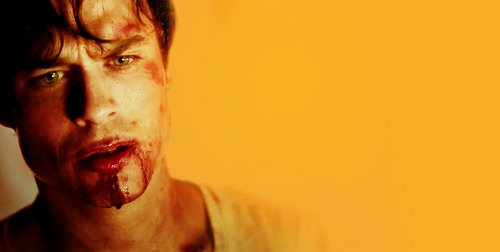
Here are the three layers isolated, just so that you can see.

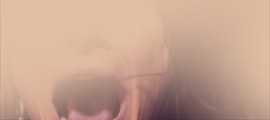
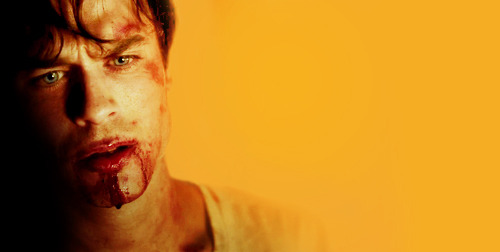
2.

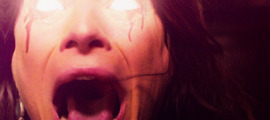
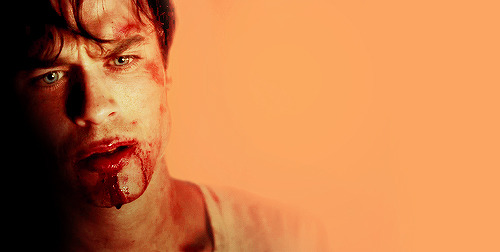
3.

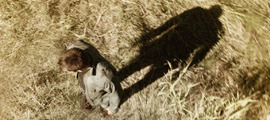
and combined

Hope this was helpful!
Good luck!
How do you make gifs so big and HD without going past 10.4 MB?
Heya!! Hah, I love big gifs and I always tend to push the very limit to 10mb, all because I NEED to have that specific shot of a scene slapped on my blog lol. I'm gonna turn this into a mini Photoshop gif tutorial post so maybe it will help you or others out. (´꒳`)♡
Always, ALWAYS go for 1080p as the resolution for any series or film that you would like to gif. You can go for an even higher resolution than that if your PC can handle it (mine can't cause the time and space that it needs to render, it will melt my PC lol), but 1080p is the standard for having crisp and clean looking gifs.
Deleting duplicate frames is also a must, when the timeline loads the frames you want to gif, there's always some pesky duplicate frames that can be the difference between 9.8 and 10.1, so before you start doing anything major, first you gotta hunt those frames down.
Cropping is also a way to push the size, the smaller the gif, the higher the number of the frames you can work with. I tend to always go with 540x300/ 540x350 /540x370 /540x390 as my favorites to work with, depending on the shot of the scene.
Coloring! The fun part! You gotta nail the look of your gif. For my gifs, I play around with curves, vibrance, selective color, and color balance. You gotta be careful though, the more vibrance you use, the more mb size it will eat up. The lighter the gif, the more colorful the gif OR the more dynamic (lots of movement) can affect size, so play around with the coloring to get what you want.
And that's basically it! Experiment and have fun making gifs! (≧◡≦)


I’ve found that I often work with weirdly tinted scenes which are sometimes challenging to colour, so I’m here to share how I tend to work around them.
There is no one way to colour gifs, and something that works for me may not work for you! This post just contains some things I wish I’d known when I started making gifs years ago.
To understand this, you need to:
already know how to make gifs on Photoshop
have basic knowledge of different adjustment layers
I personally use Photoshop CS5.
Keep reading
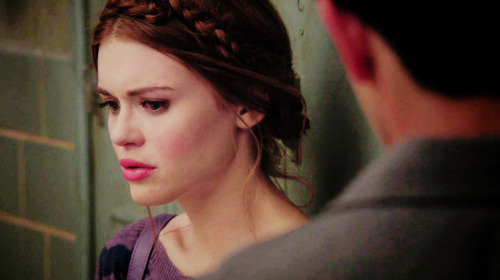
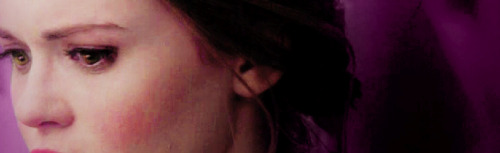
COLOR TUTORIAL #1
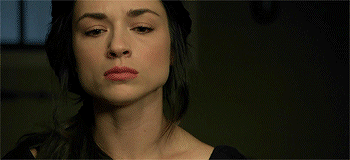
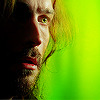
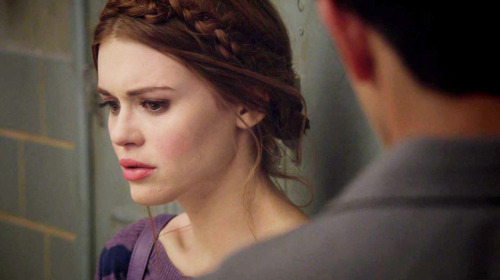
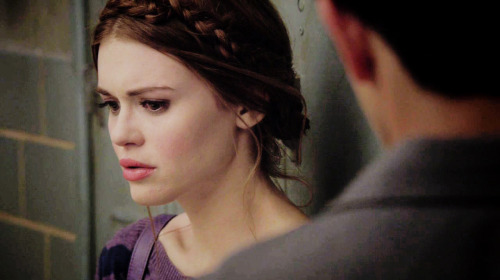
Color Porn Lydia.
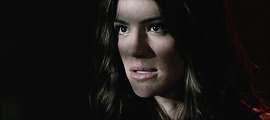
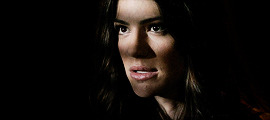
Another tutorial, this time with a lot of contrasting and color, featuring a Crying Banshee. This will be part one of a two or three part theme I’m trying to establish. Mostly working with color porn and contrasting.
I am using Photoshop CS5, and this is not a beginner tutorial, but it isn’t too hard either.
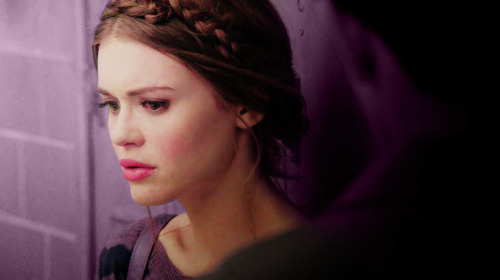
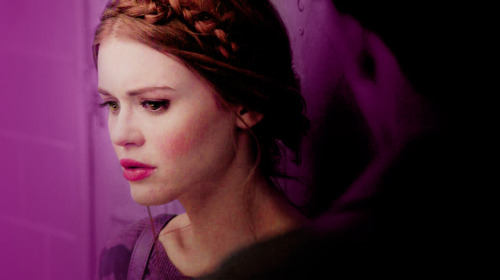
I will be showing you how to turn this:

into this:

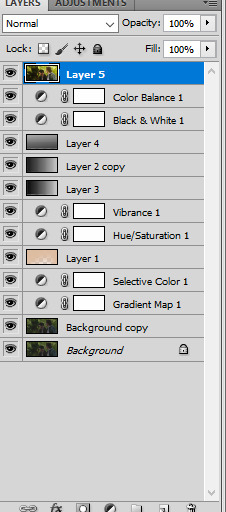
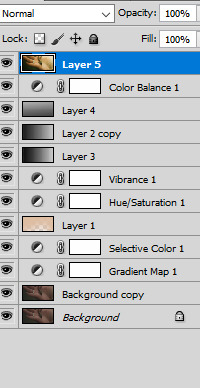
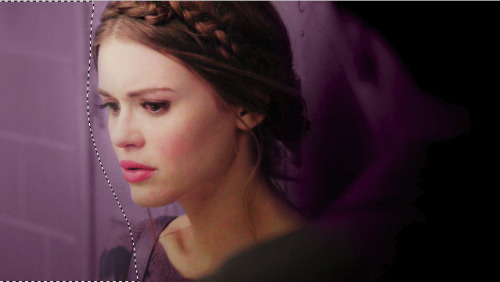
First start with a duplication of the background layer, then resize and crop how you want. My cap is 500x280. Next add a black and white gradient map and set the blend mode to soft light. Duplicate the layer and set the opacity to 45%. Now some lighting. Levels, curves and levels again; these are the settings I used.


Then a gradient map,

black, #000000; pink, #f10055. Set it to darken and make a layer mask to color the background. The mask will end up looking like this.


After that layer you want to hold CTRL and click into the black and white box for the curves layer, so that it selects only the parts of the face you highlighted with curves. Then make a levels adjustment.

Next you want to make a new layer, empty and select a small round brush, soft. Then a nice pink color, close to the color that you used for the background, so we can color the lips. I used this color #e40559. Then change the blend mode to multiply and change the opacity to 34%.
This screenshot has a lot of tight subtle emotion and fear, and I did want to focus on that, so I made another curves layer; output 140, input 114 and then mask it so the layer is hidden. Use a white brush to paint over the tear and some on her eyelids. Erase and blend as needed. Here is my finished mask.

Then another curves for her eyes. This one should be output, 106; input, 135. Then mask and use a soft round brush again. This was my end mask.

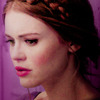
This is where the cap should be right now.

More curves. This time we mask it for the irises; the first curves should be output, 142; input, 100.


That’s the eyes right now. Next I added a simple selective color, just focusing on black (+5).
Take a soft brush, black; and make a new layer. Color only the left side of the cap, like so:

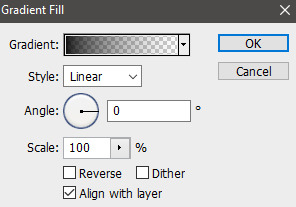
Gradient fill next, just to add to the shading on the left:

Now another solid color, pink same color as the background. Mask it and use a soft brush to blend it over the background and onto some of Lydia’s hair. The blend mode is color and the opacity 25%.

Add a selective color again, +5 black. Then another, for red adjustments.


Next is a vibrance layer, masked for the face.

Vibrance +28, saturation +14.
Next a gradient fill, now this one will focus on adding even more color to the right hand side. #000000, #e09696.

And focus it on the right, this was my mask.

Blend mode hard light, 38% opacity.

This should be masked for only the hair. Just to adjust and bring Lydia’s gorgeous strawberry blonde hair out of the pink background. Next another magenta selective color.

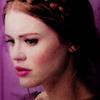
This is how it looks so far.

I added two textures, very subtle and sharpened after. Texture 1, set that to lighten and 24% opacity. Texture 2, this one I did screen at 16% opacity. Lastly, you press CTRL, ALT, SHIFT+E to stamp the image. Which just means you create a layer on top of everything that blends all the layers but also keeps the originals. Then filter>sharpen>smart sharpen; amount 500, radius 0.3, more accurate and remove gaussian blur.

Here’s a second example of another screencap using pretty much the same methods:

DOWNLOAD THE PSD HERE.
COLOR TUTORIAL #2
Color Porn Stiles.
Another tutorial similar to this one, but with a few differences. This time I am focusing on changing colors for the background to blend well and match a palette coloring scheme or just to make color porn picspams.
I am using Photoshop CS5, and this is not a beginner tutorial, but it isn’t too hard either.
I will be showing you how to turn this:

into this:

First start with a duplication of the background layer, then resize and crop how you want. Next I sharpened, then duplicated again and set the new duplicated layer to screen.
Here are the smart sharpen settings I always use.

Next add these two gradients. Flip or move as needed.


If you’re using a different cap than me then you’d place the first one depending on where you’re best shadows are. You can use that first one twice at a lower opacity too if you need more shadows.
Now a blank layer, with a large soft brush (#000000) and just shade the side of the image with the most shadow. My selection:

I added a black gradient fill on top of that, rotate from right (being the black) to transparent (toward the left). Then add another blank layer on top of that and add more shadows using a large soft brush, again in black.
Next I wanted to add some shadow and contrast to parts of Stiles’ face. I used levels. Here are the settings and my finished mask.

(0, 0.70, 255 / 0, 223)

Here is the comparison gif.

Next I stamped the cap (alt+ctrl+shift+e) and moved it to the right; then I used the clone stamp tool to fill in the left side with the background. Like so:

Then add yet another selective color (black +4) and a black and white gradient map on top of that. Set the gradient map to soft light with a 20% opacity; or higher if you need more contrasting.
Now the eyes. Make a blank layer, set to soft light blend mode. Using a small round brush of a light brown color (#864514) and color the iris. Then I added some more details; like curves layers to brighten the reflections of his eyes. Then a color balance to dull the brown a little, more blue so it looks more natural. Then another curves layer to shadow near the corner of his eyelids.

I did another layer, color fill (#4c3422), this time for his hair; mask it and color with the black brush to fill it in. I did some light coloring for his eyebrows too. Set it to soft light blend mode. Here’s the mask:

Next some more toning.

(whites: -7,+5,-1,+31 / yellow: -27,+100,+70,0)

(reds: -32,+17,0,0 / yellows: -100, +100, +100, 0 / greens: -84,-100,+100,0)

(cyans: -33,-100,+100,0 / blues: -100,-100,+100,0)
Here’s the mask:

Here the comparison.
Next add a vibrance adjustment, vibrance +10, saturation +4.
Now colors! Finally right?
Make a blank layer and with a large round soft brush paint in the left side, but don’t fill in the whole left side. It should be careful! On the first layer I lowered the opacity to 55%.
Then another layer set to soft light (#b6a83e), color more toward Stiles with this one, again keep the stuff toward Stiles softer.
Repeat this step as needed with different colors of similar tones; all with the intention of carefully moving toward Stiles’s form with your bright colors. Make sure that if you do add any onto the skin, that it’s with a low opacity brush.
(upper left to lower right: #ff9f40, #b6a83e, #dd9236 & #fe9f40)

The trick to these is using lowered opacity for the brushes; keeping everything bright and vibrant on the far left and fading the color as you move toward Stiles.
I added some more selective color next, with the purpose of drowning unneeded tones and balancing the yellows and oranges. It’s a lot!

(yellows: +20,-11,-68,-20 / greens: -17,-37,-100,0)

ANOTHER selective color. This whole tutorial is basically selective color right? This one though, you need to mask.


Next a color fill (#ff9f40), soft light with opacity 16-20% on top. Now, create another blank layer, same color as above with soft light blend mode again and opacity 66%. This one is so we can match the color of Stiles’ shirt, to the background.

Color what I selected and it’ll blend better with the bg. It’s even better when you add another (guess what?) selective color.

(reds: +32, -32, +28, +50. yellows: -63, +40, +21, 0)
Now stamp the whole thing again (alt+ctrl+shift+e) and add a vibrance (+15, -1) and a curves layer (output 135, input 124)
Progress gif.


And we’re are technically done. But hey there’s a little more.
Now I can show you how to change the orange to green, purple, and even blue. Green to start with.


(reds: +100,-100,+100,-31 / yellows: +100,-83,+100,+100)
You’ll want to keep this one masked, so it barely effects Stiles. His skin will be corrected by the color balance.

Then color balance.
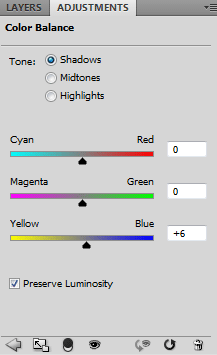
(shadows: 0,0,+6 / midtones: -3,+9,-16 / highlights: -10,+12,0)

(reds: +42,-68,+100,+16 / yellows: +9,-16,-1,-7)
This one should be masked too, but softer, less detailed.

Lastly add a blank layer, set it to the blend mode color. Take a green brush (#c8e740) soft round and color most of the left side, especially near Stiles’ neck, shirt and hair. Here’s my selection.

Now purple.


(reds: +100,+100,-100,+100 / yellows: +100,+100,-100,-19 / magentas: +2,+2,0,0 / neutrals: -53,+31,-62,0)

(shadows: 0,0,+6 / midtones: -2,-13,+15 / highlights: -10,+12,0)

(reds: +31,+100,-51,-3 / yellows: +100,+100,-100,-7 / neutrals: +30,+7,-9,0)
Lastly make another blank layer and use a nice purple color to color where we did with the green. Make this one’s blend mode color (#be5eec).

And blue. Same drill, start with selective color.


(reds: +100,-100,-100,+100 / yellows: +100,+100,-100,+100 / cyans: -36,+2,0,0 / magenta: -65,-16,0,0 / whites: -19,0,0,0 / neutrals: +100,-18,-17,0 / blacks: +100,0,0,+5)

(shadows: 0,0,+6 / midtones: -37,-10,+19 / highlights: -10,+12, 0)

(reds: +100,+100,-20,-3 / yellows: +100,+12,-88,-7 / cyans: +26,+24,0,0 / blues: -58,0,0,0 / magentas: +100,-100,-100,0 / neutrals: +26,-2,-13,0)
Mask all of the selective colors like you did for the green and purple.
Finally you’ll need two blank layers, one at full opacity, set to the color blend mode select or mask it for the background. This one is for the blending portion of the background.

The other is the same blend mode, but this one is to color only the shirt and needs a lower opacity, I used 45%. Both colors for the blending layers I used are (#2f97bb)

And that’s it! I know longest tutorial ever. But it won’t be my last. Also here’s a Scott version of the cap using the same methods.
DOWNLOAD THE PSD HERE.

COLOR TUTORIAL #3
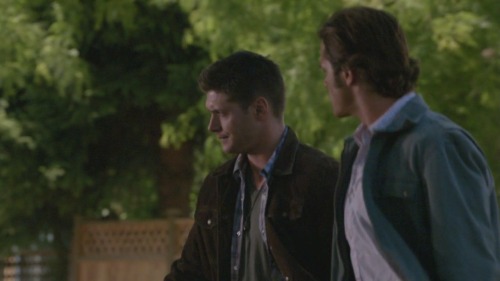
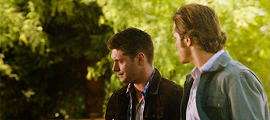
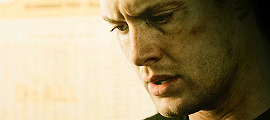
Yet another tutorial, this time with orange, yellow, contrasting and Sam and Dean. Beginner to Intermediate level skills. I use Photoshop CS6 for all of my tutorials.
To be clear, I will show you how to turn this unedited screencap of Sam Winchester:

Into this:

First things first, open up the top screencap and crop as needed. My cap was cropped on the top and bottom edges, and resized it to 500 x 264. Then I duplicated the background layer, set it to screen and duplicate it again. Adjust the opacity of the second duplication as you need to.
Like most of my tutorials I use gradient layers to increase light and shadows. Right click on the two below to save them.


The top one needs to be set to soft light, and placed wherever the greatest shadows are in your image. For this cap, the dark in on the left, the light on the right. Duplicate that layer, then add the bottom gradient set to soft light again, opacity should be 75-80%.
Next a black and white adjustment set to soft light, I put the opacity to about 12%. Next color balance.

(color balance: +22, +5, -33; I didn’t change the shadows or highlights)
Then another color balance.

(color balance: +38, -9, +37; I didn’t change the shadows or highlights)
Mask this color balance layer and focus it on the background. My end mask was like this:

Now we add some color. Make a new blank layer and take a large soft brush in an orange tone (#f5c665) Set it to hard light, 38-40% opacity. Then color on the right side, away from Sam.

Another color balance layer. This time: midtones -10, 0, +15; highlights +23, +17, +31; shadows +29, 0, +36.

Mask that color balance like the layer above. We only want these tones on the right side. Add another one, this one will be for the entire image. Midtones 0, 0, 0; highlights 0, 0, -3; shadows +3, 0, -3. Next make a selective color adjustment, only focusing on black tones (+20).
Then another blank layer, and this time just use black to fill in the left hand side. Use a soft brush; like so:

Next two solid color fill layers. The first in this color #ec9d75, 44% opacity. The second in this color #e07761, 60% opacity. These are the masks:

Another selective color; reds, -10, +8 and blacks 0,0,0, +8. Now add a black & white gradient, soft light blend mode and 44% opacity.This is how he looks so far:

Next I did a lot of coloring to the eyes. Curves, color balance and a layer of black fro the pupil. Then I used a light pink color set to multiply and colored over his lips at a low opacity. Subtle changes in detail can make all the difference in my opinion, but these two steps are optional.

(color balance: midtones +6, 0, -13; highlights +6, 0, +20; shadows 0, 0, 0)
Then a vibrance adjustment, +19, +5. Yet another color balance: midtones -8,0,-12; highlights 0,0,+20; shadows 0,0,0.

(selective color: reds +12,-4,-7,0)
Now stamp the image (ctrl+shift+alt+e) and smart sharpen. These are the settings I always use.

Last, I added one more color balance and masked it like so:

(color balance: midtones -13,0,-24; highlights 0,0,-15; shadows 0,0,0)
Finished result:

Here is a second image, this time of Dean with the same method:

DOWNLOAD THE PSD HERE.
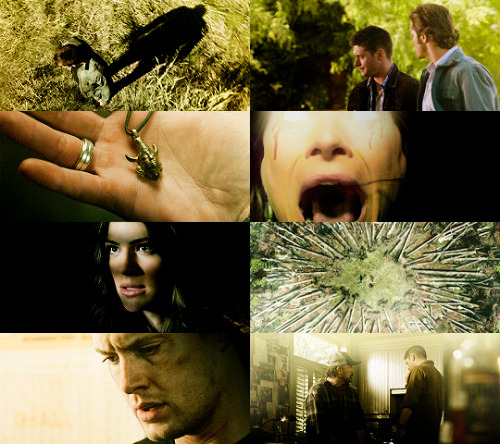
COLOR TUTORIAL GIF #1
Another tutorial this time for gifs. A really easy guide for dark gifs and color porn backgrounds. This isn’t a beginner tutorial; for how to make gifs and details on masking an image refer to the links in the post.
I’m teaching you how to make the background a different color than the rest of the image on a gif:


First open up the gif you want to use. I am using this one for this tutorial. I made it myself using this method.
Next some light and color. Make a curves layer output 175, input 77. Levels, 0,1.28, 255, output 0, 206.

Then lots of selective color. I ended with four layers of selective color total.

(blacks: 0,0,0,-13, cyans: +100,-39,-66,0)

(cyans: +100,-36,-30,0; blues: +49,-19,-100,0; yellows: -16,-27,-100,0)
Add a hue/saturation, with saturation set to +12. Then a color balance, midtones: -27,0,+30. Another selective color on top, set for:

(reds: +21,+64,-31,-52; yellows: -50,-34,0,0; cyans: -6,-58,-58,+4)
Here it is so far:

Now the hard part, which isn’t really hard just incredibly tedious.
Make another selective layer, make sure it’s all the same selective layer and the coloring is set to ABSOLUTE. Here are the settings:

(yellows: -2,-4,-47,0; cyans: +83,0,0,0; whites: -19,+32,0,0; neutrals: +56,-20,-90,0)

Now we mask it, make sure the selective color layer is selected, then press ctrl+i. Use a black brush, soft round to fill in the parts of the background you want in color. For those of you who don’t know how to use mask, please go here for info.
Here is my first mask:

Make sure that selective layer is visible for animation frame 1. If that was super confusing to you, the look below.

Make sure the selective layer you just masked is hidden for all the other frames. Next click frame 2 and duplicate the selective layer from below and erase the parts that are on Malia’s hair and face.
*The secret to it looking natural at the edges of her hair, is to use lower opacity for the brush when you’re erasing the color on Malia.
Rinse and repeat for all 32 layers. I said it was tedious.

And you know what? That was it. As always, DOWNLOAD THE PSD here. If you were confused at any point then definitely download the PSD.
Also here are two gifs with the same editing style.


COLORFUL GIF TUTORIAL
Another tutorial! This time I’m showing people how I make colorful gifs, like the ones in my latest giset of Allison Argent from Teen Wolf. The tutorial is for doing it with gifs, but of course you can also use this as a ref for screencaps too.
Just to remind you all I do not do beginner tutorials, so you have to have some knowledge of Photoshop before you try this. And this, refers to turning this gif:
Into this:
First off, you’ll need a gif to use. I’d suggest just starting with the one I am using since that’s the best starting point. If you want to make your own and don’t know how, try this tutorial or this one.
Now we edit. First thing I do is make a group called PSD and for this gif I made a few blank layers and colored black on the left side of the picture to erase the window in the background.
Next a Gradient Fill to add some light on the right side. My ending mask:
Subtle, but important.
Next add a black and white Gradient Map over the top at 35% opacity, set the blend mode to soft light.
Then a Levels adjustment layer, with these settings:
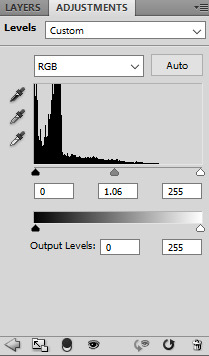
(0,1.06,255 - 0,255)

Download all of those, or just make the gradients yourself. When you add them to the gif make sure to set the blend mode to soft light.
Now make a new blank layer, pick the color you want (I used #c09f5e), and color lightly with a soft round brush on the right side. Here’s my selection:

Make sure to drown the opacity (60-75%) and set the blend mode to soft light.
Now either use hue/sat or just a b&w adjustment layer with 12% opacity and soft light blend mode. And add a Color Balance adjustment after that. I only subtly changed the midtones for this one.
This is how it should look so far:
Now enjoy a gif of adjustments:

blacks, 0,0,0,+11 - yellows, -27,+10,-8,0 - vibrance +9, saturation +6 - yellows, -16,-6,+12,0 - blacks, 0,0,0,+17 - reds,+3,0,0,0 - yellows, +5,+7,-31,0
Using this color #cdab64, with a new black layer, paint over some of the image. Lightly near the bottom of Allison’s chest and shoulders. Stay away from the black areas on the left, and make it light! Here is the end result, selection and mask.
This is meant to add more vibrant color to the right side.
Move on to more color balance, masked and colored like this:
Then I added some Curves, Brightness/Contrast and another Selective Color.
curves, 151,120 - brightness/contrast, 24,0 - reds, -24,+6,-13,0
I also noticed that third black layer from the top of the tutorial was too much black on Allison’s face, so I removed it.
Here’s FINAL GIF!

back and forth preview ↓↓
(I should mention that I added some more shading on the left, specifically around her skull near where the window is, and the difference it subtle, but really great)
And that’s it!
As always, here is the PSD, and another few examples of other colors.
ALPHA STILES GIF TUTORIAL
Another one? So soon? Yeah, well I originally made a werewolf!Allison gif tutorial, and it kind of sucked. So I revamped it for just a color porn gif tutorial and now I am making a much better werewolf eyes tutorial. Featuring the glorious and badass Alpha Stiles. Also, it’s the top gif from my most recent post.
MUST HAVE: knowledge of Photoshop and adjustments and of course know how to make gifs. This isn’t a super difficult tutorial, but it does require a lot of time and patience.
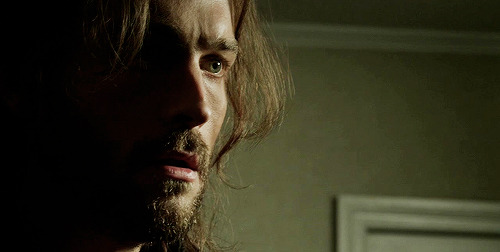
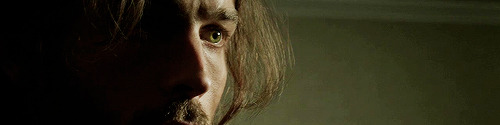
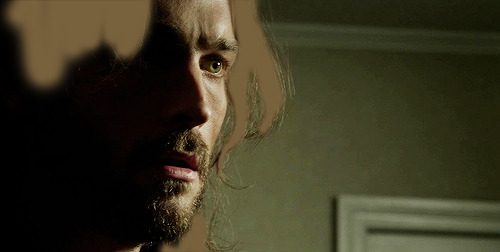
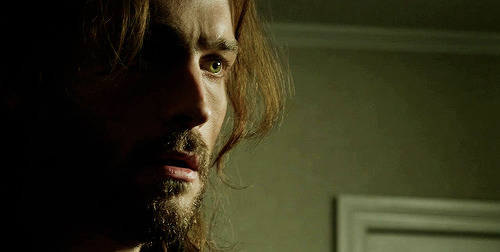
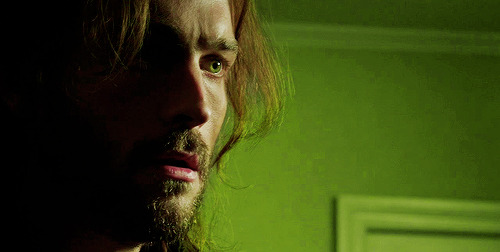
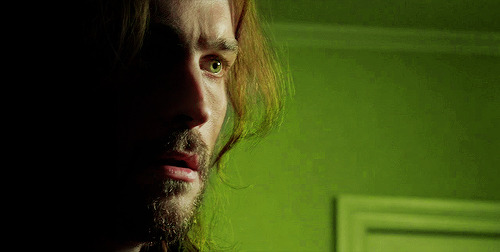
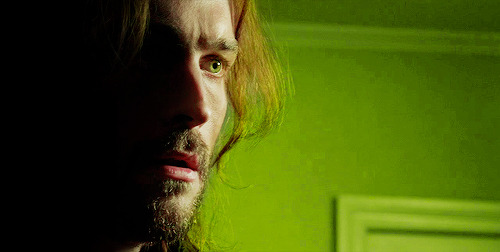
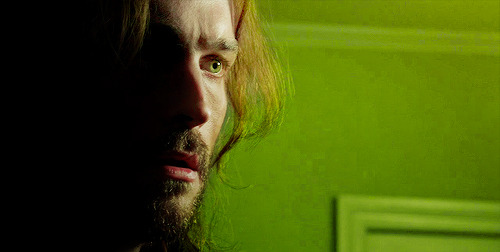
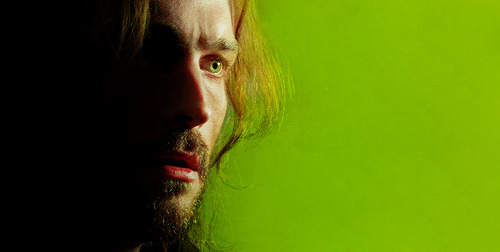
I will be showing all of you non-beginners, how to turn this:

into this:

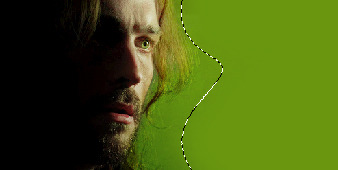
First step, I extended the background. The end size should be 500 x 220, and you should be cropping to get rid of some of the top and bottom parts.

The white on the right side is blank space because I moved the layers over.
Next I picked a color from the background, for the background. It’s much easier to do it this way and then manipulate the color of the BG later on using adjustment layers. Make a new, blank layer and start filling in the right hand side with a round soft tipped brush. The color I used is #d2ccb4.

Looking good right? I ended up with four layers for the background coloring alone by the way. So don’t be afraid to use a few.
Next some actual toning and coloring. I almost always start with a black and white gradient layer, set to the soft light blend mode. I kept the opacity at 100% for the contrasting.

I actually duplicated that gradient, and put the opacity to 14% on the copy.
Now a curves adjustment, output 143 and input 93. And selective color to mess with the background coloring. Focusing on Whites; the settings are cyan -1, magenta -8, yellow -9, black +15, set to absolute.

More selective color! This time, reds and yellows. Reds, cyan -13, magenta +10, yellow 0, black 0. Yellows, cyan -28, magenta -24, yellow -31, black -52. Set to relative, instead of absolute this time. I also added a black focused selective color, +4 on blacks and nothing else.

I wanted to make the reds pop in this gif, so I made another selective color but this time I masked it only for his shirt. Reds, cyan -100, magenta +100, yellow +100, black +100. Set to absolute.

Yet another, selective color. Yellows, cyan -10, magenta -18, yellow -37, black 0. Relative setting; Cyans, cyan -38, magenta -7, yellow 0, black 0. Neutrals, cyan -8, magenta -12, yellow -12, black 0.

Make another selective color, separate from the last one; again focusing on Whites & Cyans. For the Whites, cyan -8, magenta +3, yellow +10, black 0; absolute setting. Cyans, cyan -100, magenta -100, yellow -100, black 0.
I made another selective for the blacks again and masked it for the left side of his face. Adding deeper shadows and more contrast overall. (Black +12)

Next a vibrance adjustment; vibrance +11, saturation +18. Another selective color; Reds, cyan -12, magenta +15, yellow +17, black -20. Set to absolute. And another curves; output 126, input 109.
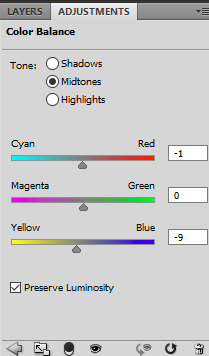
A subtle color balance next; 0, -3, +3. Another selective color; Reds, +10,+6,+5,0. Hue and saturation, 0,-7,0.

So far so good!
I love the coloring as is, but now it’s werewolf time. I used this screencap from season 4, because the eyes are perfect for what I was planning. (the link is too a cropped and lighter version of the one below)

Make sure to color the image first, before copying and pasting the part of the eye you need! I used a few layers to do this, some curves and a gradient. After I changed the coloring it looked something like this:

Now using the lasso tool, I circled and copied the left eye and pasted it as a new layer onto the gif of Stiles.

Now select the very first frame of the gif, and make a new group. I just called it EYES. Then paste in the eye layer and transform (ctrl+t) it down until it’s the right shape and size for Stiles’ eye. I started with the right eye, just because it was less shadowed and easier to place.
You may need to erase parts of the eye layer; don’t be afraid to do so, but be careful not to get rid of too much.
DO NOT MERGE THE LEFT AND RIGHT EYE LAYERS! Just don’t, it will make everything so much harder and it won’t look as good in the end either.

Duplicate the layer for the eye and place the other one over the other eye.
Now the first frame is good to go, but if you play the gif you will notice only the first one has the eyes. Or, all of them do, but on the other frames the eyes aren’t where they should be. So the cool and easy thing about this, is that you can go to frame 2, then click the layers and move them how you need them. Then go back to frame 1 and they didn’t move!
Keep doing that until you can’t anymore, which for me was frame 10 when he starts to blink and look down. With that one, go to the eye layers for the red eyes and duplicate them both.
Now, I named the layers, left and right just to make it easier on myself, and I suggest you do the same. So I ended up with 38 eye layers, all duplicates and you will probably end up with about the same amount. There is a method to the madness though.
Basically with the closing eyes parts I needed to duplicate the original layers so I could erase the top parts of the eye layer. That way it’s not overlapping on his lids.

Here is a super slow down to show you just how natural it looks. ^^
If you just tried to move the layers like before it would have worked, but you would try to erase the top parts of the eye to make it look better and it would erase those parts on every frame. Not good. So make sure to duplicate as needed and keep the eyes for the next 30-ish frames as separates so you can and make sure to manipulate the parts you need to without screwing the other frames over.
I always, ALWAYS save the PSD and of course sharpen. Best way to do this, and the fastest way, is to press the three line thing in your frames box (upper right corner, it’s a drop down) and convert to timeline. Then select all your layers, right click and convert to smart object; then filter > smart sharpen. Amount > 500, Radius 0.3, Remove gaussian blur, and make sure the More Accurate box is ticked.

A lot of time and effort later and you’re done! I’d say the end result is worth all that time wouldn’t you? As always, here is the PSD DOWNLOAD, and more examples of the werewolf eyes below:


SCREENCAP PICSPAM TUTORIAL
Yes, another tutorial! This was a request from an anon; they wanted a tutorial of how I did this Supernatural Picspam, and I am going to actually do it, because I actually like making tutorials ^_^ So just to be clear, I will not be doing the exact same pictures and color scheme because I didn’t save the PSDs for each of those pictures, but it will be pretty much the same.
I am showing you how to make a color-scheme picspam, made entirely of screencaps from Supernatural:

First thing you need is a template. There are plenty you can find online to download, especially on tumblr; but I am going to give you one for this spam.
I use different templates for each picspam I make, and for the original post I used the picture sizes above and made it for sixteen pics instead of the eight I am doing right now.
For this kind of picspam I usually either cap my own screencaps from HQ videos that I have of episodes, or I get them online. For these caps I used homeofthenutty.com, and the episode I took the caps we are using for the tutorial is season 4, episode 1.
Now, open up the first cap you’re going to use:
First things I usually do are to duplicate the background layer; set the blend mode to screen and mess with the opacity until I find a lightness I like. Then I made a black and white gradient map, set the blend mode to soft light, and the opacity remains at 100% for this one.
Now a selective color, focusing on reds. Cyan -34, Magenta -29, Yellow -12, Black 0. Now make a new layer, blank and pick a round soft brush and a color. This color will define the color scheme for the whole picspam, so pick something good.
I made a duplicate of the layer and erased some of the middle parts I colored before. I used this #e0bea3 for both layers, and set the blend mode to soft light.
Now make a Hue/Saturation adjustment layer, with saturation +24. Then a Vibrance adjustment, vibrance +16 & saturation +11.

Download those and add them on top of the cap. The first one should have a blend mode of soft light, and an opacity of 38%. The second is also soft light, but 100% opacity. Now another black and white gradient map; soft light blend, 95% opacity.
Lastly, I stamped the layers (ctrl+alt+shift+e) and sharpened. Filter > Sharpen > Smart Sharpen, then make sure that More Accurate is ticked, Amount 500, Radius 0.3 and Remove: Gaussian Blur. And then a color balance if you need it, just for more toning. I used midtones only, -9, +22,+22.
Then add it to the template. And rinse and repeat.
Here are my layers for this cap, and the results:
This one ^^ required some more toning and darkening than the others.
I started with the darkening and contrasting. A black and white gradient map set to the soft light blend mode. Then another at a lowered opacity, then a selective color, focusing on reds. -34,-29,-12,0; set to absolute.
Then a new blank layer, the same yellow-orange tone as before (#e0bea3) This was how I colored it:
Then set the blend mode to, guess what? Yeah, soft light. Did a hue/saturation and a vibrance layer, just like on all the other caps. And the gradient layers I told you to download from before. Now it looks like this:
Now for the real trick, making it yellow/green without making it look terrible. Make a color balance adjustment, midtones only; -47, +31, -30. Then another one, only midtones again; -17, +12, -31.
Then I stamped (ctrl+alt+shift+e) and sharpened, same as before. Then I added a blank layer and painted in black on the right side, and added a subtle curves layer on top.
And add it into the template!
Looking good so far ^^
Ruby’s cap was different too; for her I duplicated the background layer and set the new duplicate to the blend mode screen. Then I stamped it and sharpened. Next a gradient map, soft light black and white color scheme.

I wasn’t happy with the contrasting so I duplicated the gradient one more time. And I did some toning; just a vibrance and some selective color.
Next the famed soft light color layer.
And then the same gradients as before and some black for the right side too.
I did another vibrance, (+38,+10) and a color balance (midtones: -17,+15,-10) and a selective color (reds: -32, +36, +35, 0)
Final result ^^
This one I just duplicated the background and set the duplicate to screen. A vibrance layer, a color balance for more green, and then sharpened it.
Follow all steps from the first picture; this time I added a blank layer on top and used a yellow-green color for the top part. I wanted there to be a lot of light; here is my selection for where I put the color (#e2d5a0)
Color balance and gradient maps are your best friends!
Same steps as before! Only this time, I used an extra color layer (#e17813) I placed the coloring like so:
Blend mode = screen, Opacity = 44%.
Hue and saturation, vibrance then the same gradient layers we’ve been using all along.
I added another gradient map on top for some more contrasting; soft light blend mode and 43% opacity. Then I used blank layers, a soft brush and absolute black to add some darkness to the right side. Then a color balance on top of everything for the green-yellow tones of the picspam’s color scheme.
That’s it! Now add them to the template if you haven’t already and save it.
At the very end, I did add a vibrance and a selective color on top of all of the layers on the template. Vibrance +11, +3; Selective Color, blacks +5.
No PSDs this time, but for more screencap editing help check out my other tutorials. Especially the one I did for Sam.
ICON TUTORIAL #1
I decided to show you how I make some of my icons; most of the time I make them by just cropping my own edits. But sometimes I make colorful icons for no reason, so, that’s what we’re doing.
PROGRAM: Photoshop CS6, DIFFICULTY: Medium
To be clear, I am showing you how to make icons like these:
First things first, open up your screencap your turning into an icon.
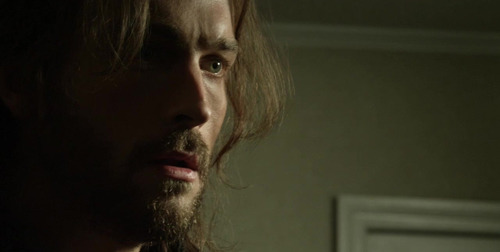
I am starting with Ichabod from Sleepy Hollow.
Duplicate the background layer and sharpen the image. I always use Filter > Sharpen > Smart Sharpen, with the Amount set to 500, the Radius as 0.3, More Accurate and Remove Gaussian Blur.
Add a Brightness/Contrast adjustment, with the brightness as 43 and contrast 16. Then a Curves; 152, 140. I added a Levels just to dull the brightness a little; 0, 1.00, 255 then output levels 0, 229. Lastly, for more contrasting I went with a Selective Color adjustment blacks +8.
Now I focus on his eyes. I wanted the colors be more vibrant and noticeable; so I created a new blank layer and grabbed a pale green color (#746e48), set the blend mode to soft light and painted in his iris. I selected the layer and right clicked to ‘select pixels’ and added a Curves; 150, 105.
Now make another blank layer and with a soft round brush, use a brown color to paint his hair (#78613d).
Paint where I did ^^^
Then set the layer to soft light blend mode, at 74% opacity.
Next I do some toning for the entire image. Color Balance, midtones only: +10, +13, +1. Selective Color; REDS, -39, +54, -11, 0. Then make a whole new Selective Color and mask it so this one doesn’t touch his face and barely grazes his hair. YELLOWS, -23, -42, +57, -10.
Make another Selective Color that is not attached to the one you just did. This time I colored the whole image and then went back over with a lower opacity brush and got rid of SOME of the coloring on his face. Just some of it.

Above is what my selection looked like, and here are the Selective Color settings: YELLOWS, +42, -40, +85, 0. Then another Selective Color, for more YELLOWS, -8, -42, +38 with the selection of the previous selective color. Also on this one you want to do these GREENS, -55, -37, +100, 0.
Next, make a new blank layer; using this color #d1c39b color like so:
Soft light blend mode, 71% opacity.
Another Selective Color, YELLOWS, +31, +31, -26, 0; make sure it’s masked only for his face! It shouldn’t touch the background this time.
Next I wanted to shade the left side, so I used a black brush on a new blank layer; then a gradient fill and painted in more on the side.
Next another Curves, 138, 112. Vibrance, +16, +5.
Add both of these:

Blend modes should both be soft light!
Next we edit the background! Make a new layer, and get a nice vibrant green color (#6e9700) then use a soft brush to color the right side of the image.
Above is my selection. Keep the blend mode and opacity at default for this one.
Rinse and repeat, only this time use this color #93be1e; and make sure the blend mode is soft light and the opacity is 70-76%. I duplicated the layer and erased a lot of the color near Ichabod; keeping the more vibrant greens near the edges of the image.
Lastly, I stamped the layers (ctrl+alt+shift+e) and added one more Selective Color. REDS, -28, +29, +30, 0; and another Vibrance, +10, +2.
Then crop it! I make my icons 100x100, and then usually sharpen the image again. For the final step I did add a texture:
I set it to soft light, and lowered the opacity to about 80%. I also erased the parts of the texture that overlapped on Ichabod’s face and hair.
See how the texture adds some definition to the background, and makes everything pop? If you have trouble finding good light leaks and icon textures, I definitely recommend midnight_road.
++
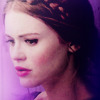
Now onto the Lydia icon, open up this cap:

Start with a duplication of the background layer, and set the duplicated layer to screen for the the blend mode. Then add a Brightness/Contrast adjustment; brightness 24, contrast 16. Then another of the same adjustment, this time brightness at 34, no change in contrast.
Now a Curves, output at 152, input at 140. And a Levels, top row 0, 1.00, 255; output levels, 0, 229. And a Selective Color, BLACKS +32.
Next some toning; Color Balance (midtones), +10, +13, +1. Selective Color next, REDS -39, +54, -11, 0. And a Vibrance; vibrance +16, saturation +5.
Now add in the gradients! Save the two images below:

And add them onto the cap. I did duplicate the first one three times; and of course all of them are on soft light blend mode 100% opacity!

Next I started on the coloring; first make a blank layer and grab a brush. I used a round brush at 50% hardness and a nice deep purple color to paint in the left side background (#5c3955). Then I set the blend mode to color; after that make another layer and do the same for the other half of the image.
I made another blank layer, blend mode normal, opacity 65%. And I used a very soft round brush at about 40% painting opacity to add in some more purple on the left side.
Add yet another blank layer, this time set the blend to soft light, 55% opacity and paint with a soft brush on both sides of the image. (#a45494). One more blank layer using the same color, normal blend mode 72% opacity and very lightly paint some on the left side again.
Now a Selective Color, REDS +26, +12, -1, 0. YELLOWS -79, -19, -55, 0. MAGENTAS -75, +11, -50, 0. This really brings out the pinks and purples, and tones her skin some more.
Now a Vibrance, +24, +12. For this vibrance adjustment layer, I masked it so it didn’t touch most of Lydia’s face. I kept the vibrance for her hair, lips, eyes and blush.
I added another BLACK focused Selective Color (+9), and messed with her lips too. MAGENTA +68, +73, +54, +51. Then another Selective Color, BLACKS +18, and I masked it for just her eyes, and only colored the lashes and eyelids.
I did add a blank layer, blend mode overlay at full opacity and used a light green to color her irises. (#919952). Then a Curves; output 130, input 99, and masked for her irises only. Then another Curves; 144, 79, this one for the reflections in the eyes. And lastly a Hue/Saturation, -31, for the whites of her eyes.
Last for the toning, hair! New blank layer again, soft light blend mode, 79% opacity. Use this color #d4a783, and color her hair with a soft round brush.
Now make an icon; just make a new canvas sized 100x100. Then stamp the Lydia cap (ctrl+alt+shift+e) and move it over to the small canvas. Use Ctrl+T to transform the image so you can resize it how you want. This is how I did mine:
Add a Selective Color, BLACKS +42 to deepen the blacks. I also added a gradient map (black and white) at a soft light blend mode and 27% opacity. Just for simple blending/contrasting.
Save this image texture:
And add it to the icon. I set the blend mode to soft light, opacity 40%; and then I flipped it vertically.
For this one, screen blend mode, 61% opacity. I flipped it horizontally and erased most of the middle part of the texture using a soft round brush at a lowered opacity.
This one, set the blend mode to screen, 80% opacity. I flipped it horizontally and used ctrl+t to move the lightest part of the texture into the bottom left corner angled upward at Lydia’s jaw.
I also added another Vibrance, +7 and +12. Then stamped the layers and sharpened with the same settings as the Ichabod icon above. Filter > Sharpen > Smart Sharpen, with the Amount set to 500, the Radius as 0.3, More Accurate and Remove Gaussian Blur.

++
Open up this cap of Nikita:
I liked the brightness and contrast of the cap already, so I started by making a new blank layer and taking a light yellow color to paint in the right side background. (#dfc83b) I used a soft round brush, at varying opacities to color that side in.
I then made another blank layer and colored the left side background in with absolute black.
Next add a Gradient Map (black to white) with the blend mode set to soft light, and the opacity at 73%. Then a Curves adjustment, output 150, input 103. And a Levels, 0, 1.42, 255; output levels 0, 255.
Now some more toning; Selective Color, REDS -52, -40, +62, +43. Absolute not relative; also make sure to mask the adjustment so it doesn’t touch Niki’s face. Make another Selective Color, also masked so it only effects the background. These settings: YELLOWS +6, +68, +57, -17. Also set to absolute.
I also added a Vibrance adjustment; vibrance +27, saturation +26.
Now add a blank new layer, this color #dfc83b and set the blend mode for the layer to soft light. I used a soft brush to paint her lips. Then a Curves, 160, 94; and masked it to color her irises. I did the same thing for the reflections in her eyes.
I also added another Selective Color, REDS -18, +40, -12, -38 (absolute). BLACKS 0, 0, 0, +100. Another Selective Color, YELLOWS -18, -5, -40, 0 (absolute).
My final touches were to add two Gradient Fills; the first is black angled from the left to the right. These are my settings:
I masked this for only the left side.
The second one is for the entire image; and the blend mode is soft light, 100% opacity. And finally, stamp and sharpen.
Great cap edit for a picspam, but this is an icon tutorial. So make a new canvas like before, 100x100 and add the stamped Nikita image. All I did with the icon was add a blank layer and some light in a soft yellow color with a light opacity brush.
I also sharpened it again!
++
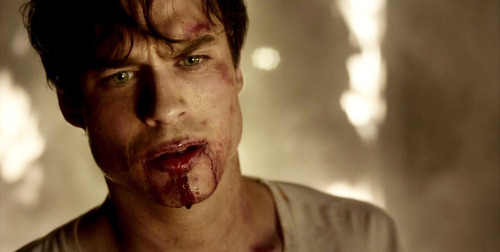
First duplicate the cap of Damon, set the blend mode to screen. Now a Brightness/Contrast, 24 and 16. Another Brightness/Contrast, brightness at 34. Now a Curves, 152 and 140. Levels, top row all default and the output levels, 0, 229.
I added a Selective Color too, BLACKS 0, 0, 0, +8.
Now some toning; Color Balance (midtones), +10, +13, +1. Selective Color, REDS -39, +54, -11, 0.
Now the background! Make a Selective Color, REDS -70, +100, -56, 0. YELLOWS -100, +100, -9, +98. And mask the adjustment to only effect the background. Use the same masking selection to create another Selective Color, REDS -59, +19, +65, +56. YELLOWS -19, -100, -96, 0. MAGENTA -79, -25, 0, 0. One more time, same selection and another Selective Color; REDS -47, -9, +40, 0. YELLOWS -8, -42, +38, 0. GREENS -55, -37, +100, 0.
I made another Selective Color to maximize the oranges; REDS +1, -8, +66, 0 (absolute). I masked it to color basically everything, but erased some color from Damon’s face and neck.
Now add a Curves 138, 112; and a Vibrance +16, +5.

Use the same two Gradients as before:

Both set to soft light blend mode and 100% opacity. And the first image needs to be reversed, the light on the right and the dark of the left.
I made a bunch of blank layers and used them to make some changed to the background. I used this color on the first two #f0a334, and colored the right side in.
Then mask a Color Balance to only effect the right side: settings for midtones (only) +22, 0, +73. I then made more blank layers and used this orange #eea036, to color in the background the rest of the way on the right side.
I did add a black and white Gradient Map, soft light blends mode at 20% opacity.
I then stamped the image (ctrl+shift+e+alt) and moved the stamped image over to the left.
I made a new blank layer, used a very soft round brush and filled in the left side of the background that remained (#000000).
Now a few more things for toning; Selective Color, REDS -14, -6, -10, 0. YELLOWS -4, -20, -48, +14. Then another Selective Color, YELLOWS -17, +30, -45, 0. And one last Vibrance, +27 and +10. Now Sharpen!
Now make the canvas, 100x100 and drag the stamped Damon layer over. Add this texture:
Blend mode to soft light, opacity at 100%. I also erased the middle section of the texture, to avoid overlapping Damon’s face.

This one, I flipped around a bit to find the right angle, and set the blend mode to screen and the opacity to 63%. Then erased the middle parts again.
And finished; wow that was a long tutorial. Hopefully it helps you create cool icons!
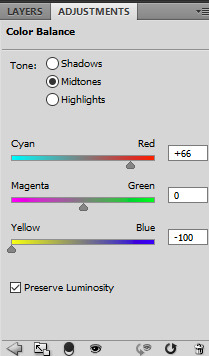
COLORFUL CAP TUTORIAL
Showing you how to make a colorful pastel-ish cap for use in graphics and picspams.


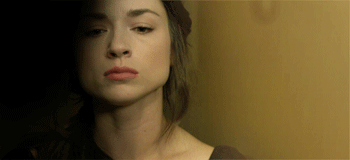
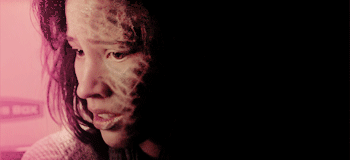
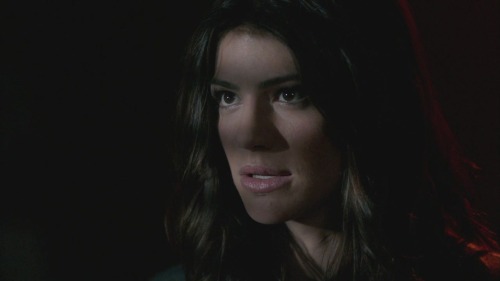
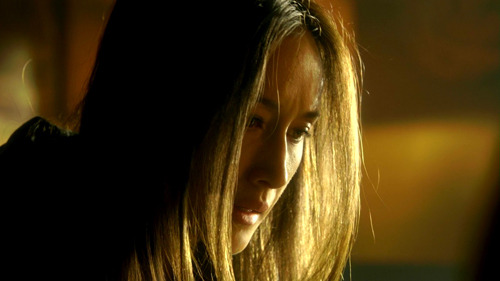
First download or pick a cap that you want to use. Here is mine of the beautiful crying Malia:

I would suggest picking a cap with light base coloring and blurred or simply-colored background. After you pick your cap, duplicate the background layer and Filter > Smart Sharpen using these settings:

Now a Color Balance layer to tone down the redness in the cap, it’s a correctional layer for the PSD I am about to add. I used midtones only with the settings as -6, 0, +9.

Next download and load in this gorgeous psd by Mila. I adjusted the Curves layer a little for the first cap in this tutorial, tones it down to these settings 114, 83.

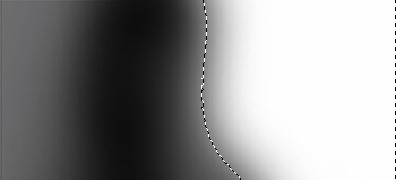
I also masked the SECOND Color Balance layer to mostly miss her face since the psd white-washed Malia’s beautiful tan skintone. I dropped the opacity of the layer to 47%, and here’s the mask.

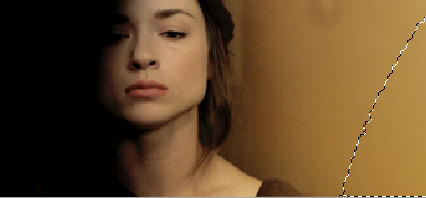
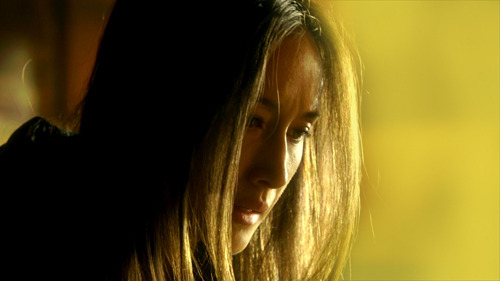
And use the same mask for the THIRD Selective Color layer. Here’s how the cap looks right now:

I also masked the final Selective Color layer for the eyes, I wanted to take the layer’s shadow from the eyes so they’d stand out a little more. So mask it to only effect the rest of the layer and not the eyes.
Next make a new layer, set it to Soft Light and grab a nice peach-pink color (#b65a5b) and paint her lips. I then selected the mask for the layer and added a Levels (0, 0.86, 255) and a Color Balance, midtones (-10, 0, -2).

I made another new blank layer and used a brown-blonde tone (#9f724d) and colored her hair. I then duplicated the hair layer and realized I wasn’t totally happy with the color I chose, so I added a Color Balance midtones (-48, 0, +17).
I added a Vibrance layer next (+25, +17). Next a new blank layer set to Soft Light again, this time with an off white color. I use this one to paint lightly over the parts of the face and hair that the natural light of the image hits.
In this case I touched on her cheek, forehead, nose, the corner of her mouth, ears and her hair. I dropped the opacity of the layer to 66%, and I duplicated this process on another layer, but this time focused on lighting the background like so:

So far so good! Next we focus on color. Make a new blank layer again, Soft Light blend mode again. I colored the background and some of her sweater with this purple tone #b87fab. Next I added a Selective Color and used this to eliminate the yellow and green tones in the background.
Next another blank layer this time with the blend mode set to Color, using this tone #be7caf and masked to the background selection. Now another one this time with a Normal blend mode and using this color #fddcf5 to color only the right side of the image like so:

(This eliminates the stuff blurred in the background on that right side)
Add another blank layer, #e8a7d9, this one set to Color and use it on both sides of the background. Yet another blank layer, set this one to Color Burn and use this color #b856a1. I used this very lightly in the corners.
Add another Vibrance (+10, +3) and a Color Balance midtones (+9, 0, -6) and mask it to only effect her face. Then another blank layer with the Soft Light blend mode with this color #b856a1 and color only the sweatshirt on the left.

This will lighten the right side and darken some of the left. Add another Vibrance (+11, +7), then a Selective Color reds (-5, +4, 0, 0) and second to last I added another Selective Color to drown some of the over-saturation and pastel the colors. Magenta -13, -100, -7, 0.
Lastly I stamped the layers, shift+alt+ctrl+e, and Smart Sharpened again.

And that’s it! As always here is the PSD, and a cap using the same methods as above, and the PSD for the second one too while I’m at it.
