aka @rmgrey-author | Rowan Grey • writer • graphic artist • mix maker • tutorial maker • ABSOLUTE STEREK TRASH • multiship af
441 posts
COLOR TUTORIAL GIF #1
COLOR TUTORIAL GIF #1
Another tutorial this time for gifs. A really easy guide for dark gifs and color porn backgrounds. This isn’t a beginner tutorial; for how to make gifs and details on masking an image refer to the links in the post.
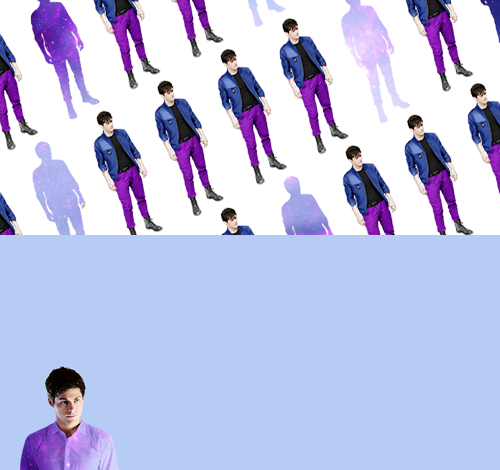
I’m teaching you how to make the background a different color than the rest of the image on a gif:


First open up the gif you want to use. I am using this one for this tutorial. I made it myself using this method.
Next some light and color. Make a curves layer output 175, input 77. Levels, 0,1.28, 255, output 0, 206.

Then lots of selective color. I ended with four layers of selective color total.

(blacks: 0,0,0,-13, cyans: +100,-39,-66,0)

(cyans: +100,-36,-30,0; blues: +49,-19,-100,0; yellows: -16,-27,-100,0)
Add a hue/saturation, with saturation set to +12. Then a color balance, midtones: -27,0,+30. Another selective color on top, set for:

(reds: +21,+64,-31,-52; yellows: -50,-34,0,0; cyans: -6,-58,-58,+4)
Here it is so far:

Now the hard part, which isn’t really hard just incredibly tedious.
Make another selective layer, make sure it’s all the same selective layer and the coloring is set to ABSOLUTE. Here are the settings:

(yellows: -2,-4,-47,0; cyans: +83,0,0,0; whites: -19,+32,0,0; neutrals: +56,-20,-90,0)

Now we mask it, make sure the selective color layer is selected, then press ctrl+i. Use a black brush, soft round to fill in the parts of the background you want in color. For those of you who don’t know how to use mask, please go here for info.
Here is my first mask:

Make sure that selective layer is visible for animation frame 1. If that was super confusing to you, the look below.

Make sure the selective layer you just masked is hidden for all the other frames. Next click frame 2 and duplicate the selective layer from below and erase the parts that are on Malia’s hair and face.
*The secret to it looking natural at the edges of her hair, is to use lower opacity for the brush when you’re erasing the color on Malia.
Rinse and repeat for all 32 layers. I said it was tedious.

And you know what? That was it. As always, DOWNLOAD THE PSD here. If you were confused at any point then definitely download the PSD.
Also here are two gifs with the same editing style.


-
 payidaresque reblogged this · 3 years ago
 -
 chambersofthesea liked this · 6 years ago
 -
 photoshopstyn reblogged this · 6 years ago
 -
 ohkawas reblogged this · 7 years ago
 -
 zacksoldiers liked this · 7 years ago
 -
 ulric-nyx liked this · 7 years ago
 -
 starfishride liked this · 8 years ago
 -
 aki-koto liked this · 8 years ago
 -
 bitcherine liked this · 8 years ago
 -
 wanhxdas-survival liked this · 8 years ago
 -
 kksresources reblogged this · 8 years ago
 -
 sheconjures liked this · 8 years ago
 -
 lilywhitepoppyred reblogged this · 8 years ago
 -
 dontneedcalmingtea liked this · 8 years ago
 -
 immunetothetune liked this · 8 years ago
 -
 dawnsoblivion liked this · 8 years ago
 -
 graphicalcharlie reblogged this · 8 years ago
 -
 jssica-jones liked this · 8 years ago
 -
 mars31 liked this · 8 years ago
 -
 wyqw liked this · 8 years ago
 -
 nellgwyns liked this · 8 years ago
 -
 tevinters liked this · 8 years ago
 -
 awinxgirl liked this · 8 years ago
 -
 chaoticresources reblogged this · 8 years ago
 -
 cybersharkdestiny liked this · 8 years ago
 -
 helpnghands reblogged this · 8 years ago
 -
 girlinterrupted liked this · 8 years ago
 -
 dearesthale liked this · 8 years ago
 -
 tzaharasykes liked this · 8 years ago
More Posts from Lycaens


We’re supposed to take care of each other.


“in order to rise from its own ashes, a phoenix first must burn.”