My Craft - Tumblr Posts

Redid it in full gold this time! I love my gold pen💛

Put a nice big sigil by @manic-witchbitch on my arm with sharpie, plus a few spots with gold pen. This sigil is to help overcome depression, and I certainly feel like it’s working!
My Sigil Making Technique


This is how I make the designs that I'm now using as sigils. It might be a little hard to read, so I'll re-explain it here and you can follow along with the pictures.
Step 1: Choose your starter. Most of these will be familiar to you from Tetris. There are 5 technically possible starters, but we do not ever use the L-shape as it is easy to accidentally make an evil symbol. The 2 easy starters are the heart shape (or short L), and the S-shape. They are shown first and last at the top of the first page. The more difficult starters are the square and the T-shape; they are more difficult because in the second step they form perfect squares.
Step 2: Rotate your starter around a point. The starter pieces should not leave any space in the center, because this will mess up the design. As can be seen in the first picture, the square and the T-shape form perfect squares at this point.
Step 3: Start adding the shapes you are drawn to with your intent in mind. If it is your first time, you may wish to choose an easy starter because it is easier to add shapes onto it when it is jagged. At this point it is ok to use the L-shape, if you are careful. Add each shape to the same spot on each rotation, in the correct orientation.
Step 4: Continue adding shapes until you feel satisfied with your design. The design should be rotationally symmetrical. The example near the bottom of the first page took only a few minutes to create as I thought about the happiness I want to bring people with this post.
Next page.
Step 5: Choose 4 colors. Any 4 will work, though I find it looks best if you can tell them apart. They should correspond to your intent as you were drawing. You can use paint, markers, colored pencils, or even a regular pencil drawing different designs for each color.
Step 6: Mark where each color goes. There are 3 basic rules for this.
1) Each color must not touch itself directly.
2) Each element or shape must be every color at some point around the design.
3) The order of the colors, whether it's clockwise or otherwise, must not change.
In the second image, near the middle of the page, there are examples. The first and colored image shows a valid design. The second image shows a design where two of the same color are touching. The third image shows a design where one element has the pattern 1,2,3,2. The fourth image shows a design where one element has the pattern 1,2,3,4 and the other has the pattern 4,3,2,1.
Step 7: COLOR! You can color it in clockwise for bringing things in and anticlockwise for pushing things out; you can color it top to bottom or side to side, or one color at a time. You should color it however you feel is right.
Good luck and happy sigil making!
On my birthday this year I saw a rainbow cloud and immediately thought of Iris, I wonder if this was her reaching out to me...
Also found a local metaphysical shop and purchased my first crystals, amethyst and rose quartz.
AND I recieved my first deck, Mystical Manga Tarot, for Christmas and will hopefully get to use it soon since I'm prevented from fully introducing myself now; I don't my lack of focus and attention upsetting our relationship.
taurus full moon & partial lunar eclipse recap
happy full moon witches & friends!!! i started out my full moon ritual tonight with some bottle cleansing then set up the bottles with water to be charged by the taurus full moon. i set up these bottles & my crystals on my windowsill to charge. i then reflected on this past moon cycle & how this month has affected me & how i’ve grown. i then wrote in my bos about the full moon & wrote some affirmations. i finished off with collecting the full moon incense ash i had been burning & put the candles on my altar out. i hope you all had a good full moon! stay safe & blessed be always! 💗
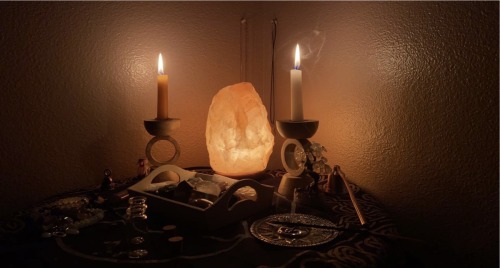
Devotion Candles
a big part of my craft is my altar which is dedicated to the sun, moon, & the 4 elements.
2 things on my altar are candles for the sun & moon. this past week i charged the two candles with different intentions that remind me of the sun & moon, respectively.
now without further a do, here’s the “recipe” for both candles:
Protection Sun Candle
Ingredients:
gold candle
black candle
spiritual protection water (includes basil)
lavender essential oil (for my anxiety)
juniper
something to carve with
Directions:
take your gold candle & the protection water & lavender oil. rub both of these on your candle thinking & having the intention of “every time this candle burns, i am protected by the suns light & energy”
now take your juniper & either put it on the candle or around the candle wherever you choose to put it.
carve protection & anxiety relieving sigils, words, runes, &/or etc.
light your black candle & drip it around/on your gold candle.
speak/think about your intention through the making of this candle.
Self Love & Healing Moon Candle
Ingredients:
blue salt
pink candle
white candle
tea tree oil
rose water
something to carve with
Directions:
take your white candle & the tea tree oil & rose water. rub these on the white candle while thinking of your intention, “while this candle is lit i am healing & loving myself.”
now take your blue salt & put it on/around your candle.
& carve your healing & self love sigils, words, &/or runes.
light your pink candle & drip it around/on the white candle.
speak/think about your intention throughout the making of this candle.

