Digital Tutorial - Tumblr Posts
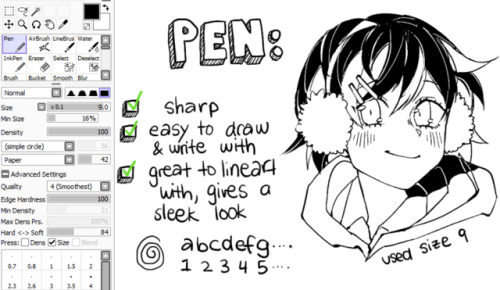
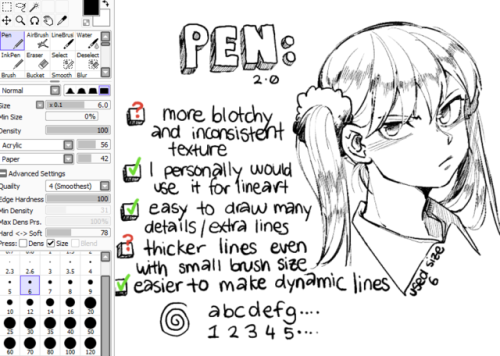
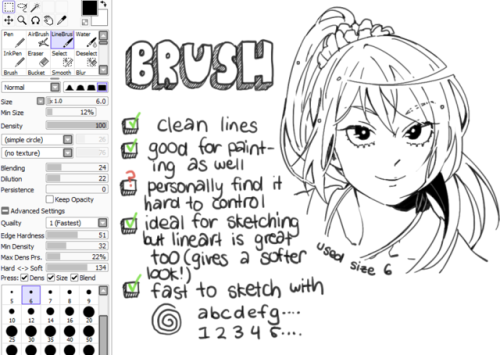
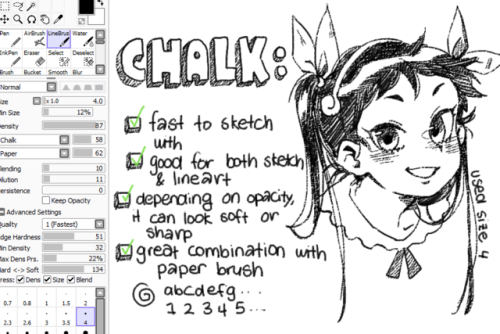
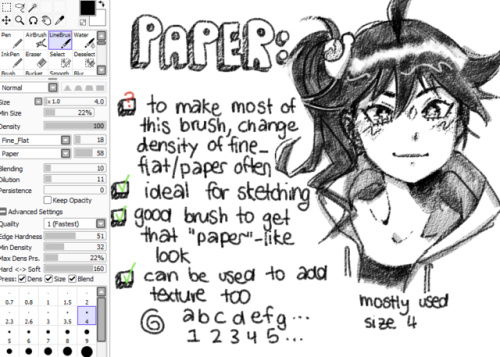
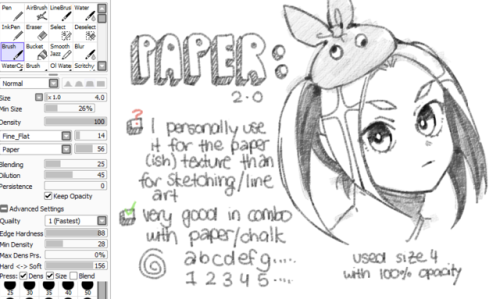
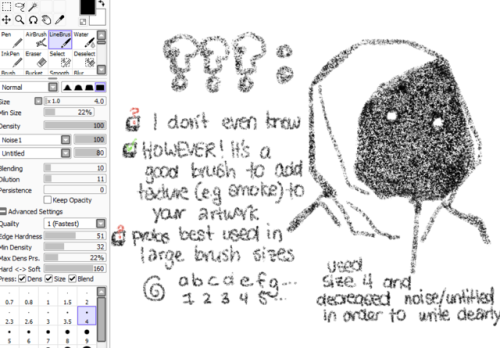
Brush settings
If you’re not sure where to find [insert texture], then this link should answer your question
Some Photoshop Tips
I’ve been getting quite a few asks about the process for the patterns in my stylized artworks, so I decided to put together a couple of tips regarding them.
Firstly, what you need are
— CUSTOM BRUSHES —
Most of the patterns I use are custom brushes I made, such as those:

For the longest time I was convinced making brushes must be super extra complicated. I was super extra wrong. All you need to start is a transparent canvas (2500px x 2500px max):

This will be your brush tip. When you’re satisfied how it looks, click Ctrl+A to select the whole canvas and go to ‘define brush preset’ under the edit menu

You will be asked to name your new glorious creation. Choose something that describes it well, so you can easily find it between all the ‘asfsfgdgd’ brushes you’ve created to be only used once

This is it. Look at it, you have just created a photoshop brush. First time i did I felt like I was cheated my whole life. IT’S SO EASY WHY HASN’T ANYONE TOLD ME

Time to edit the Good Boi to be more random, so it can be used as a Cool Fancy Pattern. Go into brush settings and change whatever you’d like. Here’s a list of what I do for patterns:
- under Shape Dynamics, I increase Size Jitter and Angle jitter by 5%-15%
- under Brush Tip Shape, I increase spacing by a shitload. Sometimes it’s like 150%, the point is to get the initial brush tip we painted to be visible.
- If I want it to look random and noisy, I enable the Dual Brush option, which acts like another brush was put on top of the one we’ve created. You can adjust all of the Dual Brush options (Size, Spacing, Scatter, Count) as you wish to get a very nice random brush to smear on your backgrounds

The result is as above. You can follow the same steps to create whatever brush you need: evenly spaced dots that look like you painted them by hand, geometric pattern to fill the background, a line of perfectly drawn XDs and so on.
BUT WAIT, THERE’S MORE
— PATHS —
But what if you want to get lots of circles made of tiny dots? Or you need rows of triangles for your cool background? Photoshop can do all of that for you, thanks to the magic of paths.
Typically, paths window can be found right next to Layers:


Draw whatever path you want, the Shape Tool has quite a bit of options. Remember, paths are completely different from brush strokes and they won’t show up in the navigator. To move a path around, click A to enable path selection tool. You can use Ctrl+T to transform it, and if you move a path while pressing Alt it will be duplicated.

Now, pick a brush you wish really was in place of that path you’ve drawn and go to layers, then choose the layer you want it to be drawn on. Then, click this tiny circle under the Paths window:

Then witness the magic of photoshop doing the drawing for you while you wonder how tf have you managed to forget about this option for the past 2 years

You can combine special brushes and paths for all sorts of cool effects. I mostly use them in backgrounds for my cards, but you can do whatever you want with them.

I hope that answers the questions for all of the people who were sending me inquires about the patterns. If you have any questions regarding this or any other Photoshop matter feel free to message me, I’m always up for complaining about how great and terrible Photoshop is C’:
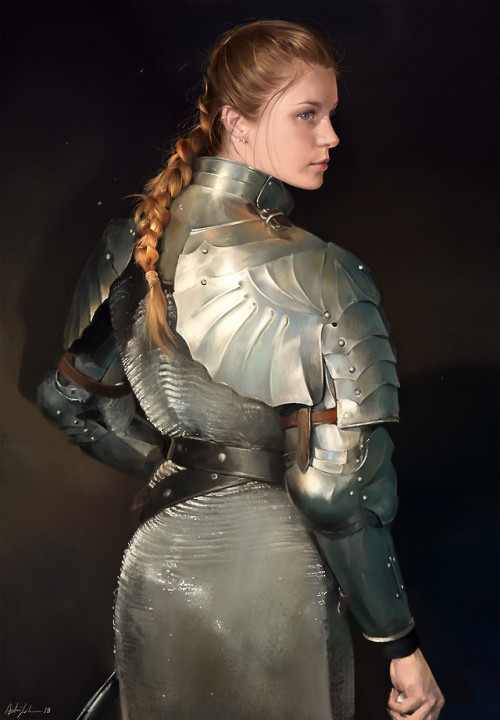


Armour Study by Astri Lohne
Support the artist on Patreon!


I have to draw a lot of gold and metal for my work, but wasn't happy with any of the metal tutorials i could find around. I prefer really specific instruction, so after some research i put together what i think works as a generalist's guide/tutorial. Not perfectly accurate, but i hope it's helpful!
this is so useful, thank you!!


I made a Room Building tutorial! Lemme know if it helps! 🧡
Tip me here| Commission info here!


A small tutorial on how I approach the normally time-spending task of getting details on armor and save myself hours of work I would eventually hate after 30 minutes. Hope it’s the first of many!


It’s that time of year where i go through my 2019 folder and see what WIPSi never finished, and well…..I promised you guys a galaxy tutorial!! This is my cheap 8-step galaxy program. Now that I’m posting the pictures I see a few typos in the tutorial but THAT’S JUST LIFE YOU KNOW!! It adds character….
I literally threw this together in an hour so practice the technique and you two can make believable space in no time!
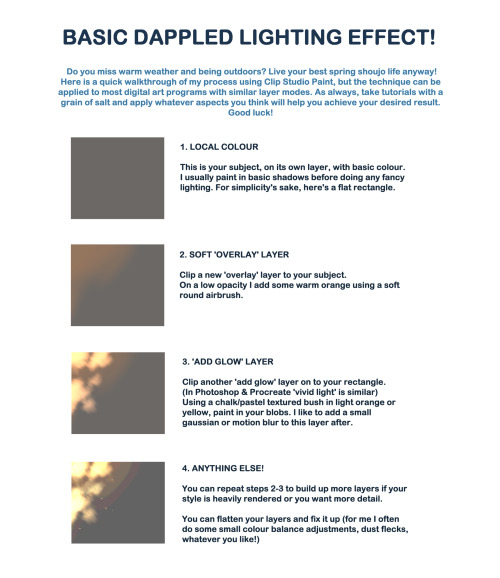

I created a quick walkthrough on my process! You can do the same with any digital art program and brushes you like. As always, learning comes with critical thinking and if you feel this does not apply to you, then no worries! There’s no correct way to do things as long as you achieve the results you want.
The technique can be customized with different brush types and colours, and can be as simple or heavily rendered as you so desire. I hope it helps a little! I like to do lighting like this in my own work for a sense of atmosphere.
Please ignore the fact I spelled complementary wrong, it’s been a long week ok lol
IT DOES HELP
Drawing closed spaces in perspective is one of my biggest flaws and I do believe this will be of a great assistance!!
I made a Room Building tutorial! Lemme know if it helps! 🧡
Tip me here| Commission info here!

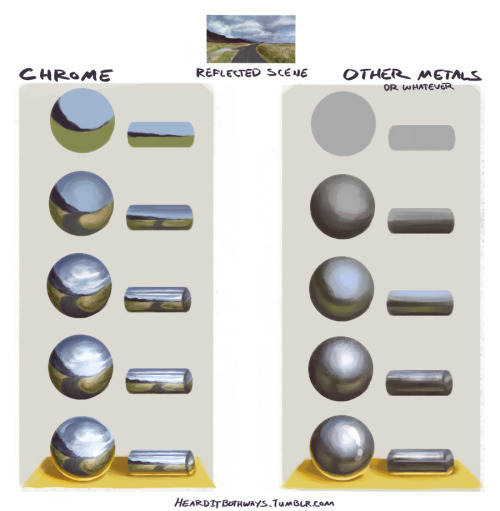
I am probably not the best person to be asking since I am still learning myself, so take this with a grain of salt. Your best bet is just to observe metal objects in real life or find references. But I hope this at least points you in the right direction!!


Sketch Notes by ben_eblen_design
Check out the artists Gumroad for more in-depth versions of the tutorials!


Upon request someone asked for an anatomy tutorial! I kept it fairly general but if anyone wants something more specific, I’m happy to make a more of them :D
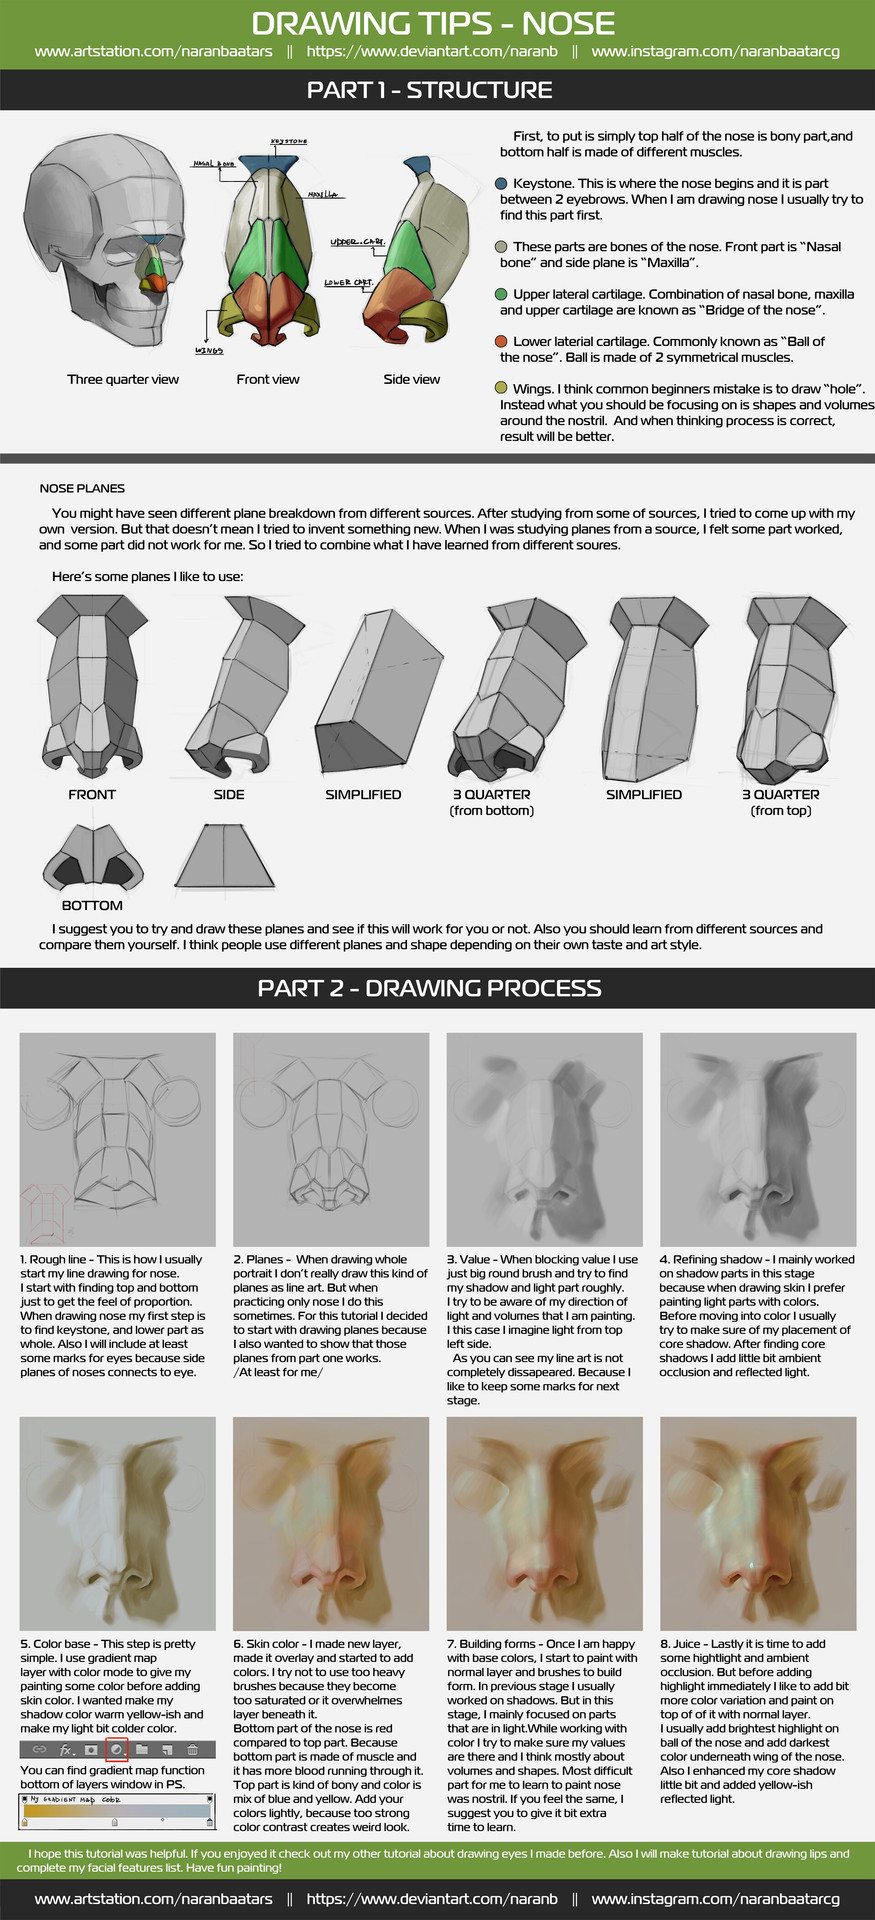
Nose Drawing Tips by Naranbaatar Ganbold
Support the artist and buy one of their full tutorials!


Very happy to finally post my third tutorial! Thank you so much for your overwhelming support of my last tutorial, I am so happy it was useful for you guys 🙇♀️. I feel like this topic was harder to explain so feel free to ask me some questions if you want!
Like last time, I really hope this helps some of you in your art path 🙌
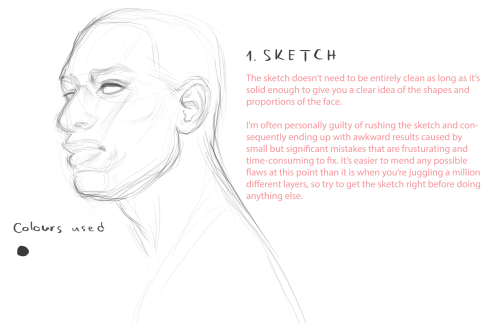

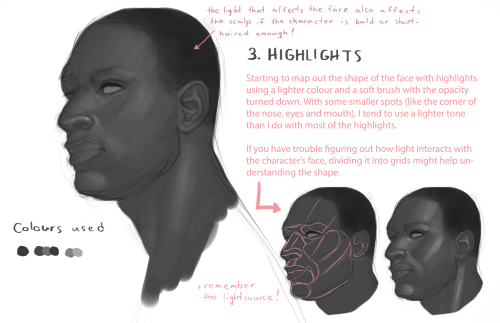

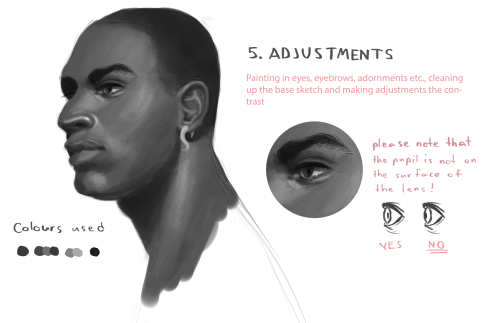


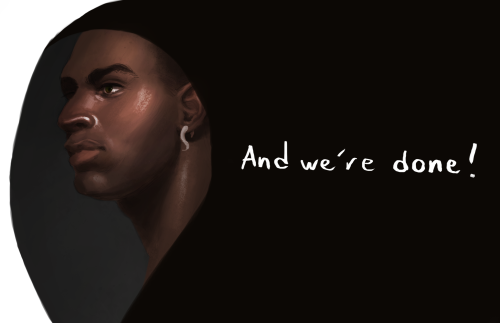
A few people have asked about this recently so I tried to break down my method of painting faces to the best of my ability. I personally like to use gritty chalky brushes, and this particular painting was mainly done with this brush by Mark Winters.


two (2) people asked how i did the matchbook thing so take this
this is just a simple idea but if you spend some more time you can get real krazy with it:

making fake prints is so fun please do it immediately free resources under cut xoxo
Keep reading