Ps Resources - Tumblr Posts
can you make a tutorial on how you made your header please (of course you don’t have to if you don’t want to)
hi anon! unfortunately as i was doing so my computer died so i've lost the original one </3 but we'll just make a new one using the same steps hehe! see under the cut.
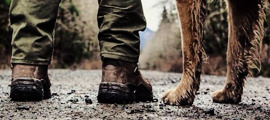
i'm using photoshop 2024. open ps, and create a new canvas that is 640 x 360 px. add the image of your choice. the original picture i used was already rotated, but if you still want that effect and yours isn't, rotate it by 90 degrees. size it to your liking then click the check mark! after that, click your pen tool (or press p). create a rough outline of the areas you want outlined.

after that, click make selection at the top. the settings that pop up are fine. press ok. then, go to your marquee tool and right click on your outline. select stroke. choose the settings and color you want, im using 2px and making it white.

with that done, we can get to work on your text. the original font i used is called payback. here, i am using the font 'grandma house sans'. i am using gradient overlay, stroke and outer glow. after you have your main text, create a rectangle shape underneath. you will use this as the path for your subtext. with the rectangle selected, grab the font tool and place your text within the rectangle. i'm using the font asenine wide. once you have selected your text, look on the right side of your ps at the text properties. scroll down to paragraph and click 'justify all'

i'm adding a drop shadow and outer glow to the text to accentuate it but that's all i'll do. when that's done, you'll want to use the line tool to draw a line between the first space. duplicate the line and drag it over to the other empty space. i'm using a 1px purple line. i'll also add a drop shadow and outer glow to it bc the colors are light.

now, we are going to go back to our rectangle tool. create a rectangle the same length as the rest of the text. its color is up to you, i'm using a gradient overlay the same colors as the main text so it's cohesive! grab your text tool and again, with the rectangle selected, place your text within it. this text will be your tumblr url (unless you don't want it to be haha). i'm using the same font, asenine wide regular. i've added a drop shadow to the text. this is how it should look.

now, we're going to grab the rectangle tool one more time and place a rectangle at the top that is the same width as the canvas. the height is up to you, mine is 14 px.

now, change your shape to the ellipse and create a circle within the rectangle that's about 8px wide + long. duplicate it twice and place them about 4px from eachother. you can change the colors, i'm going to leave one white and then use two shades of light purple.

now, head on over to the other side of your canvas and use your type tool to add your date (and time if you wish, i didn't). mine is seventeen's debut date :) i used the same font, asenine wide regular. this is what i have so far.

last but not least, we're going to add the particle effect. i screenrecorded effect #5 from this video. to make your life easier and save me from explaining the process, i've uploaded it as a psd here.
before you open the psd, open the timeline on your current canvas. this can be done by going to window -> timeline. mine is already open as you can see, once it is open click create video timeline.

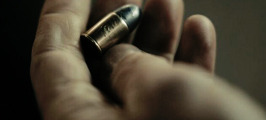
then, you're going to go over to sparkles.psd and copy the 'group one' layer. paste it underneath your text! now, you're going to have the wonky problem of a gif that's significantly shorter than your other layers and cuts off, see here:

so to fix this, use this little thingy and drag it until it no longer goes over the edge of 'group one' in your timeline. it should look like this.

now, why is our overlay still blocking the rest of our image out? this is an easy fix, go over to layers, and with group one still selected, change the blend mode to 'screen'. bam!

finally, to achieve the background effect i have, create a new layer underneath all your other layers, then, go to the layer with your outline on it and use the magic wand tool to select everything outside of the line. go to your image layer with the selection still intact and go to image -> cut to remove the bg. i had to do this in 2 pieces.

then go to that new layer you created and make it whatever color you want. you can use a gradient map, solid color, whatever you want. i'm using a gradient fill similar to background colors, then over it i'm putting a crumpled paper texture (i just googled black paper texture haha) on screen mode. feel free to get creative. this is how it looks!

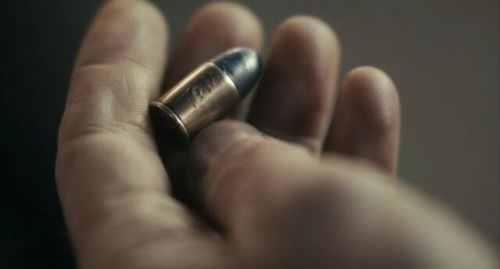
and that's all, your header is ready to use. go over to file -> export -> save for web (legacy) and save it to your computer. this is our end result! i did add a bit of noise to hoshi bc the image was low quality but otherwise, i did nothing that wasnt't outlined here!

i hope this was semi easy to understand! ♡
hi friends! i am cleaning some files off of my laptop and i figured i would share some resources i have saved here before i delete them!
download link: here
there are four folders available for download -- pngs, fonts, textures and gif overlays. there are 7 gif overlays (sized 640 x 360, header size) as well as 75 pngs, 100+ fonts and 200+ textures. nothing belongs to me, they are just things i have accumulated over time! ♡
font preview:

texture preview:

gif overlay preview:

png preview:

AESTHETIC PICSPAM TUTORIAL
Another tutorial! And it’s another requested one from an anon; they wanted a tutorial on how I make my aesthetic picspams.
PROGRAM: Photoshop CS6, DIFFICULTY: Medium
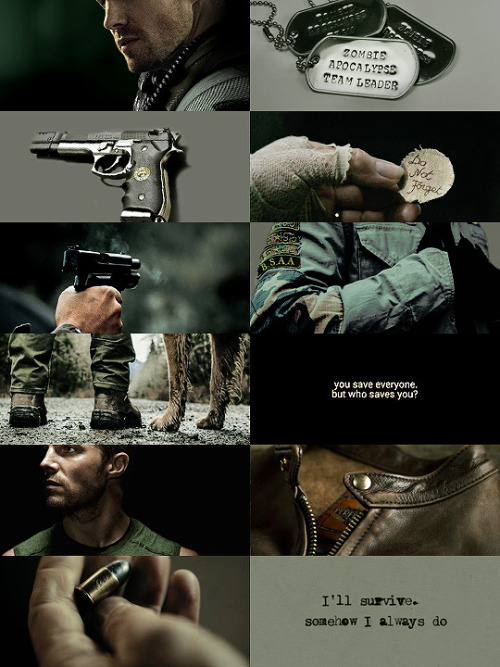
I will be showing you how to make this specific picspam:
Now the first thing you’ll need is a good template. I either make my own, or download them online. Templates can be downloaded here; and an all around great place for resources is chaoticresources. Here is the template I used for the spam:

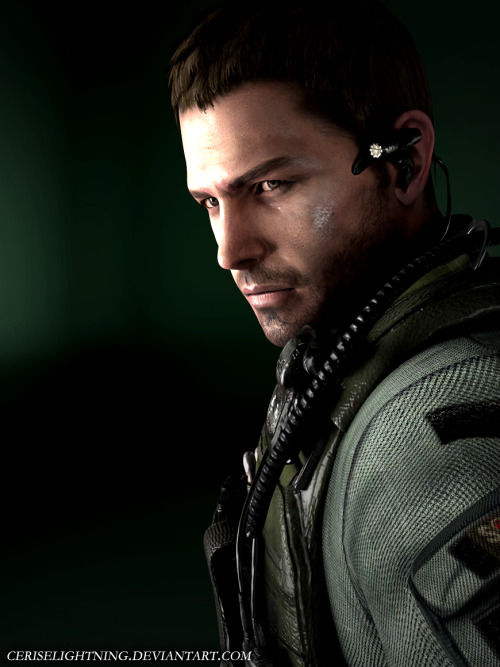
The first image I used was of Chris Redfield, a render of a 3D model by ceriselightning.
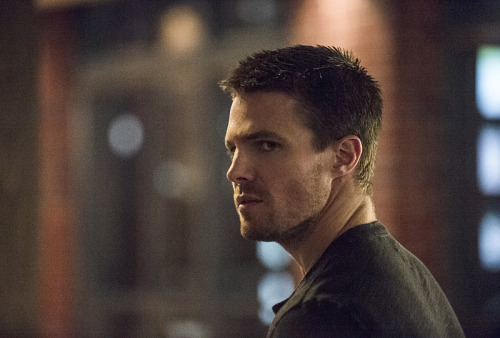
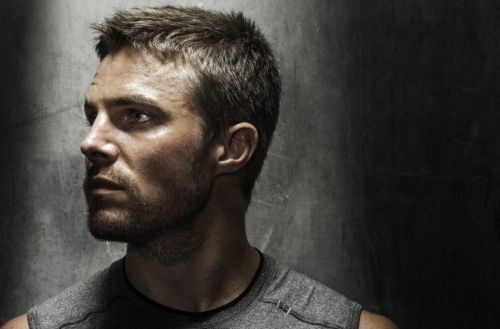
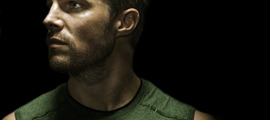
I cropped it down and resized the image to 270x120 to fit the picspam. Now open up a picture of the gorgeous Stephen Amell.
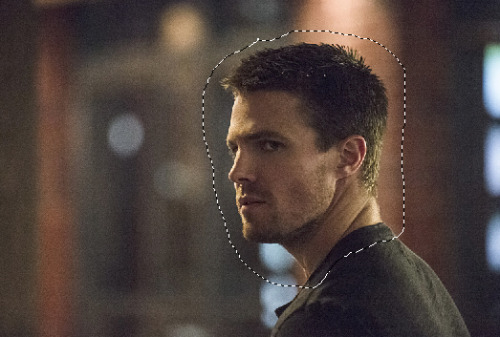
I used the lasso tool to cut out the parts I knew I wouldn’t need. Here is the selection:
Now move it over to the template, and mask the image.
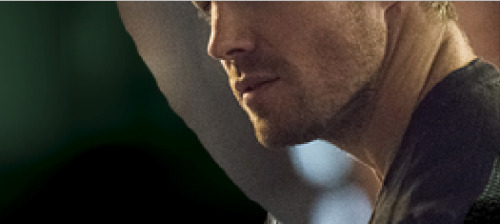
I went ahead and erased the parts I didn’t need; then cropped it to fit with the image of Chris.
Now select Stephen’s face layer (right click the box and choose ‘add mask to selection’) and make a Color Balance adjustment. Midtones only, -12, +8. +3. Then a Selective Color, blacks +17.
I also put a new layer on top and used a soft brush, black color and carefully filled in some of the right side.
Next open the image below.
This one was super easy, just crop and recolor; start with a Gradient Map (48% opacity)
(#101010, #b3b3b3)
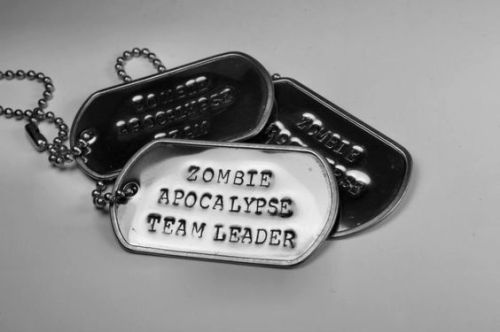
Next a Curves; 125, 104. Then Color Balance, +13, +17, -8 (midtones). Last a Levels, this time paint over everything but the face of the dogtag. (0, 1.00, 255, 0, 204)
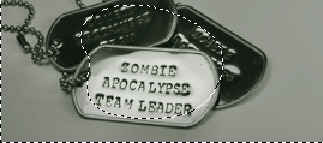
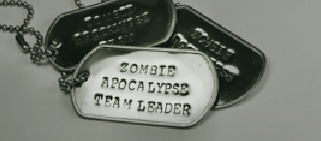
And here’s the finished picture.
I could not for the life of me find 2 of the images; this one is the first one, so it’s already cropped and I erased the background from the original with a cool grey tone.
Then I added a Curves; 124, 99. Then a Color Balance, +8, +12, -3 (midtones)
Next picture:
Again, this was just a matter of toning it to match the color scheme of the picspam. Now add a Curves; 150, 84. Then a Color Balance, +12, +15, +2. (midtones) Lastly, a Selective Color blacks +19.
The next one is literally the easiest one, because it is the second image I could not find again. However, I actually didn’t have to do anything to it. It already had the perfect coloring.
Here’s the next one:
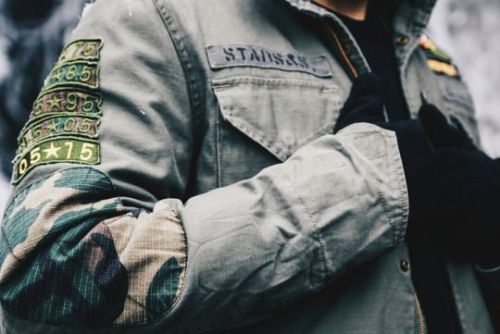
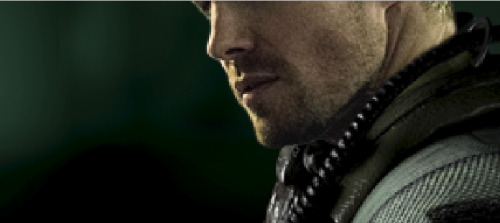
Make a new blank layer on top of the image, and use this color #303a23 to paint over the 05 * 15 on his sleeve.
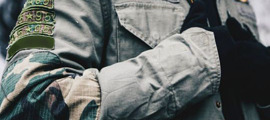
Then make another blank layer and fill in the background with this color #6f7167.
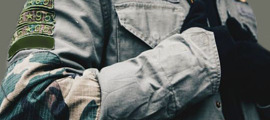
I made a Selective Color next, WHITES; +83, -4, +28, +14. BLACKS, -4, 0, 0, +51. Then a Levels, but I masked it so it didn’t touch the background. These settings, 0, 0.72, 255 (top) 0, 229 (output).
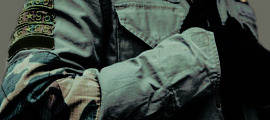
Next I found a B.S.A.A logo on Google, and used the warp and transform tools to put it on the patch over his arm.
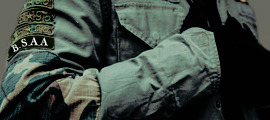
I decided to color it green (#89a867), and used a Color Balance to tone the logo a little more. Midtones, +22, 0, -64.
Next this picture:
First off, a Selective Color. REDS, -15; YELLOWS, +36, BLACKS +50.
Now a Color Balance (midtones), -13, +15, -10. Hue/Saturation next, -32 saturation.
This one all I had to do was crop it.
Another picture of Mr. Amell ^^
For this one, make a blank layer and fill in the background with black. I used a round brush at about 60% hardness and solid black and painted.
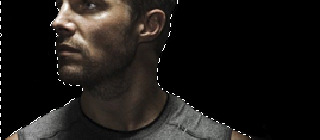
Next another blank layer, this time use a green color (#7ea973); and use your brush to paint the shirt. I set the blend mode to multiply, 79% opacity. For the full image, a Color Balance (midtones); +12, +15, -3.
Selective Color next, BLACKS +9. YELLOWS, -15, +15, -26, -29.
This one just needs a Color Balance (midtones), -17, +6, -10.
This needs some toning; Selective Color, BLACKS +26. Color Balance, midtones again; +5, +9, 0.
Last one!
Color Balance, +9, +36, -10 (midtones); now make a blank layer, blend mode as color and use this to fill it in #7ea973. Selective Color, BLACKS +30. Now a Levels, 0, 0.89, 255, output 0, 134.
Last but not least you should have had all of the images on the template; if not move them over now, and then stamp the image (ctrl+alt+shift+e). And sharpen; Filter > Sharpen > Smart Sharpen, Amount 500, Radius 0.3. Remove Gaussian Blur, make sure More Accurate is ticked.

And you’re done! As always, enjoy and I hope this helps you make some cool aesthetics.