Bookbinding - Tumblr Posts


I made a book!
I do love notebooks and I sure have more than enough of them at home that are sitting unused in my shelf, waiting for me to give them a life. and I will. all in due time :D But, I have so much scrap paper at home that I wanted to give book binding another try. I cut up a load of old papers - because I like the mismatched look of every page being a different colour or texture - and an old chocolate bar box and just started without overthinking it. I even threw in some old sheet music pages and I love how it looks :D i did make some mistakes along the way, and the binding of the signature is very improvised, but it all holds together and it was such a fun project to make :D to everyone looking for a new idea or project to do - Try making your own notebook! :D


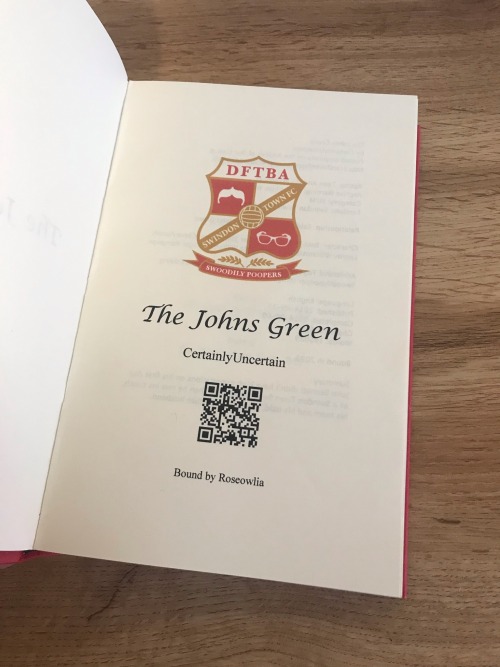
I'm like super normal and not unhinged in the slightest (I spent 3 days formatting, printing, and binding a niche internet story about sci fi football into a 280 page physical book)
Swindon Town Swoodilypoopers
So, over a decade ago, I wrote a fic.
This fic was about a fictional version of Swindon Town’s football club, wherein the two star strikers were both named John Green, as played by John Green on FIFA, streaming on YouTube. It’s exactly as weird as it sounds, you just kind of have to lean into it.
It is probably one of the more niche fics on the internet, and I really couldn’t explain what drove me to write it other than a persistent nagging in the back of my head that compelled me to put it to paper. I’m lucky enough that other people in this strange corner of the internet also found it, and loved it, and shared their love of it with me. It means so much to me when it still gets the occasional comment on Ao3.
All of which is to say, when @roseowlia reached out to ask whether they could bind a copy of it, I was extremely excited about the idea, especially if they’d be willing to also make a copy for me!
It arrived today and oh my it’s the most beautiful thing I’ve ever seen!
For many reasons, this fic holds a very special place in my heart, and I’m so touched that it stuck with other people too.


I love my new sketchbook #bookbinding #art #sketchbook #silkscreen #screenprint
Listen to your elders
So last week I posted abut the importance of downloading your fic. And then three days later AO3 went down for 24 hours. No one was more weirded out by this than I was. But while y’all were acting like the library at Alexandria was on fire I was reading my download fic and editing chapter eight of Buck, Rogers, and the 21st Century. And also thinking about what I could do to be helpful when the crisis was actually over.
So first off, I’m going to repeat that if you’re going to bookmark a fic, you really need to also download the fic and back it up in a safe place. I just do it automatically now and it’s a good habit to get into.
But let’s talk about some other scenarios. Last October I lost power for over a week after hurricane Ian. Apart from not having internet or A/C I did find plenty to do, I collect books so I had plenty to read, but maybe, unlike me, your favorite comfort reads aren’t sitting on a bookshelf. So let’s do something about that, shall we?
In olden times many long years ago around 1995 we printed off a lot of fic. It was mostly SOP to print a fic you planned to reread and stick it in a three ring binder. And that’s totally valid today too, but you can also make a very nice paperback with a minimum amount of skill and materials.
Let’s start with the download; Go to Ao3 and select your fic, we’ll be working with one of mine. This method works best with one shots, long fic tends to need a more complicated approach. Get yourself an HTML download

Open up the HTML download and select all then copy paste into any word processor. Set the page to landscape and two columns, then change the font to something you find easy to read, this is your book, no judgement. This is all you have to do for layout but I like to play a little bit. I move all the meta, summary, notes to the end and pick out a fun font for the title:

No time like the present to do a quick proofread. Congratulations, you’ve just created your first typeset. On to the fun part.
Now you’re going to need some materials: 8.5x11in paper ruler one sheet of 12x12 medium card stock (60-80lb) scissors pencil pen or fine tip marker sheet of wax paper white glue two binder clips 2 heavy books or 1 brick butter knife
You’ll also need a printer, if you’re in the US there is almost a 100% chance your local library has a printer you can use if you don’t have your own. None of these materials are expensive and you can literally use cheap copy paper and Elmers glue.
Print your text block, one page per side. Fold the first page in half so that the blank side is inside and the printed side out:

use the butter knife to crease the edge. Repeat on all the sheets. When you’ve finished, stack them up with the raw edge on the left and the folded edge on the right. I used standard copy paper, because you’re only printing on one side there’s no bleed to worry about. Take the text block and line everything up. Use the binder clips to hold the raw edge in place.
Wrap the text block in the wax paper so that the raw edge and binder clips are facing out. I’m going to use my home built book press but you don’t need one, a brick or a couple of books or anything else heavy will work fine.

Once the text block is anchored down, take off he binder clips and get out the glue.

You can use a brush but you don’t need one, smear some glue on that raw edge.
Go make a margarita, watch The Mandalorian, call your mother. Don’t come back for at least an hour
In an hour smear some more glue on there and shift your brick forward so that the whole book is covered. This keeps the paper from warping. While glue part 2 is drying we’ll do the cover. Get out your 12x12 cardstock

Mark the cardstock off at 8.5 inches and cut it. Measure in 5.5 inches from the left and put in a score line with the butter knife (the back edge not the sharp edge)
Carefully fold the score line, this is your front cover. You have some options for the cover title, you can use a cutting machine like a cricut if you have one, you can print out a title on the computer and use carbon paper to transfer the text to the cardstock. I was in a mood so I just freehanded that beoch. Pencil first then in pen.
Take your text block out from under your brick. Line it up against the score mark and mark the second score on the other side of the spine

Fold the score and glue the textblock into the cover at the spine. Once the glue dries up mark the back cover with the pencil and then trim the back cover to fit with your scissors.
Voila:


I’m going to put this baby on the shelf next to the Silmarillion.
The whole process, not counting drying time, took less than an hour.
If you want to make a book of a longer fic, I recommend Renegade Publishing, they have a ton of resources for fan-binders.
Tiny Book? Tiny Book. Pt1.
Idk yall I just felt like writing a little how-to of how-I-do my tiny A9 books! So if you've ever been interested, I hope this will be helpful. This will be neither a beginner typesetting nor beginner bookbinding tutorial; as I go through my process I will only be showing my process and providing a few tips, assuming you already have the basics understood. We can worry about the rougher technical skills in another post.
Also keep in mind that this guide includes images of fic I've bound, and you're zooming into these fics at your own discretion. I am not responsible if you read something yucky. I know you have a lot of options out there but thank you for flying No-Name Publishing.
Tiny books part 2; Tiny books part 3


Just like with regular ficbinding, there are layers, and they are:
1 - Typesetting and Imposing 2 - Printing 3 - Cutting, Folding, and Sewing 4 - Gluing, Rounding/Backing, Endbands 5 - Building the Case and casing in 6 - BOOK
In this part we will be focusing on steps 1 and 2. Please feel free to skip to the area you're interested in most.
1 - Typesetting and Imposing
Okay, so this area has some nuances that you don't have to consider so closely with typesetting for more traditionally sized books. To me, these tiny books are not about readability, they are about novelty. As such, I do not prioritize readability. Instead, I try to achieve something that is closer to scale. That said, neither do I want these illegible. But we'll begin from the top.
You want to make a tiny book, but you're wondering, what would be an appropriate word count for a tiny book? Tiny books are the perfect medium for the ficlettes, the shorties, the one-shots. They are also perfect for the mid-sized, 10-15-20k fics, in my opinion. Here we can see,

On the left we have a fic that is exactly 12,771 words, typeset on a 1.5" x 2" (37 × 52 mm) document, with .3" margins, 6pt Garamond font, and 5pt line spacing. This book is only approaching 1/2" (13mm) wide, and only took 5 sheets of Letter paper to print. On the right we have a fic that is exactly 1,939 words, typeset to the same specifications. This book is only 4-5mm wide, and took only 1 sheet of Letter paper.
In my opinion this format of book begins getting unruly around the 300-page mark. However, making any combination of margins, fonts size, and line spacing will yield different page results for different word counts. For example:


Like the above, in each of these examples I typeset in Garamond font @ 6pt size and 5pt line spacing. Typesetting on an A9 page, this is about as small as I felt comfortable sizing my font while still being legible. But notice the rivers between the words--the rivers of white space bisecting the lines, due to the Justified alignment battling the admittedly tiny work surface. At this scale, with the font at this size and alignment, those will be unavoidable. Over time I began disliking this in my own work, so I pursued a different method, which was typesetting on a quarter letter page (4.25" x 5.5" / 108mm x 140mm), and allowing my imposer to scale the PDF down.


Have you ever seen anything sexier. THIS looks like a tiny book. Little to no rivers, still legible (hand-wobble), and preserves the novelty feel that I desire from a tiny book. This method of scaling down (specifically from quarter letter to A9) does change the final shape of the book, from A9 to A9-ish in this case. Specifically, from 1.5"X2" (37 × 52 mm) to 1.625"X2" (41.3mmX52mm). You're achieving something closer to a square shape, which is delightful to hold. All this to say, you have some freedom with word count, with font size, with page size. I've done as many pages as 376 and as few as 17. The fantastic thing about tiny books--their structure will not be load-bearing, meaning--the only thing stopping you are your tastes.
Quickly, some more examples of features in a regularly sized typeset and their tiny counterpart after the imposer has scaled them down. First, scaling half-letter down to A9, a little-over 4X shrinkage:


And from B6 to B9, smaller by 3x:


You notice the compression of every element, and too how entirely unparcable the text in the first example is, sometimes not horrible, sometimes very. Make your decisions dependent on your tastes!
You have decided on the fic you'd like to bind into a tiny book. I will be using my own fic as the typesetting example, and I will be using Word 365 for PC. I'm sure many of my pointers during this process might not apply 1-to-1 if you are using a different word processing software, but hopefully you can adapt the concepts to your program of your choosing.
Kay, next you will do your typesetting. Since this is not a typesetting guide I'm trusting that you have your preferred methods, but I will go through my key steps for setting up a tiny typeset:
First, for every typeset I delete each default Style, create mine own, and dictate the document size. For this example I will be doing my preferred quarter letter method, setting the custom page size to 4.25" wide and 5.5" tall, and .5" page margins all around (except Gutter; leave 0"). On the Multiple pages dropdown I will select Mirror margins (however, as all my margins are the same size, this is redundant, though may not be the case for you). My body text style will be Cardo font @ 11pt size and Exactly 15pt line spacing, with a .2" first line indent and Justified alignment.


You can use whatever body font you like, I only encourage you to do many many test prints to refine your preferences. Your favorite font for half-letter books might not translate to tiny books. After ~30 tiny books I've found I like Cardo at this size and spacing. And if you're using A-paper sizes, consider doing quarter A4 instead of quarter letter, which is technically A6--4.1"X5.8", or 105mmX148mm. Follow your heart~~nyah 🐱♥
Now I will go to my fic and download the HTML file. I hugely prefer copying from the HTML file rather than the browser itself. It kind of standardizes any goofy formatting that might try to make its way over otherwise, while still preserving the italics and bolds, etc, and makes for an easier editing process. It was important I made my body Style in Word first, so that once I paste the text into my document that Style is automatically applied in one fell swoop (if not, you can change that in your Word settings. Advanced -> Cut, copy and paste -> Merge Formatting. It is a huge time saver.)
Now you've gone through your typesetting process, you have a liddle quarter letter Word document that you're happy with. Gets real close to you. Listen to me--listen, you're going to Export as PDF. Not Save As PDF. Not Print to PDF. Export. It's in--listen--it's in File, then Export, then Create PDF/XPS. You need to Export. Especially if you selected Bookfold instead of Mirror margins in your page settings because we need an unimposed PDF in order for this to work right and exporting to PDF is going to solve 99% of your pdf formatting woes with Word. Okay, I love you 👨❤️💋👨
Now, your EXPORTED pdf should look something like mine. Straight, unimposed.

Now what we're going to do is take this PDF back to my penthouse and freak it. Go to this link for the Renegade Bindery-created and -curated imposition tool. This has been will be is such an incredible FREE asset to you, maintained by a crew of intelligent, skilled Renegade Bindery members who understand the importance of community and accessibility. If you find someone hiding this link behind a paywall of any kind it is not with the creators' permission, so shame on them.
Anyway I will be assuming that you know what imposing your document means. If you've never used this site before, it's very straight forward, and here are my settings for making Tiny Books.


1 - Upload your unimposed exported pdf. 2 - ignore 3 - Select the paper size you will be printing on. This is not the FINAL size of the book, this is what paper you are printing on. These instructions are for Letter sized paper. Don't change any of the other settings right now, I will explain more about the Single-sided vs Duplex option in a bit. 4 - Skip aaalllll the way down to Signature Format. Under Wacky Small Layouts, click on the bubble next to Little. You'll notice there are a lot of options here. I encourage you to play with these settings later on as well, there are so many things you can make with this tool.
Once that's done, scroll down to the very bottom. You'll see the Signature Info area, telling you the results of your imposition. In the case of using the Little option we've selected, 1 sheet of our paper will make 40 book pages. 3-signature-sets of 3/3/4 folio configuration. That's a lot of pages per page.

Anyway for our document today it will cost us 2 sheets of Letter paper, and will make 6 signatures. Math says that's 80 pages. Now, you may be concerned because your typeset PDF is not formatted in a number equally divisible by 40. And why would it be. The imposer is doing that math for you in the background, organizing your pages regardless. In my case, my finished typeset is 62 pages, which means that from my second page, I will only be using my 3 folio segments, and discarding the 4 folio segment. This will make more sense later. Click the Generate button, and save the zipped folder wherever you want. Don't change the name of it.
Unzip that baby, and inside you'll notice 2 files--(filename).pdf_little_packed_backs, and .pdf_little_packed_fronts. Appropriately named as one file contains one side of the sheet that will be printed, and the other file the other side.

And when you open them up, they will look like:

2 - Printing
We are manually duplexing this bad boy, because working at this scale amplifies and compounds every millimeter of difference. Manual duplexing will keep printer skew to a minimum, as the printer will not have to perform gymnastics in order to print on the reverse side of your page. Here are some examples:


Two auto-duplexing examples of skew, one horizontal and one vertical, dependent on which direction my paper was loaded into the feeder. There is significant skew. Not a horrible issue on full-sized books but these will matter much more on our tiny books, the key issue being that we do not have much to work with in the margins department. Trimming 5-6-7mm of margins of your half-letter sized textblocks might not be much of an issue; however, here, in order to remove all the trim lines during the cutting process, you will be significantly impacting the margins of your tiny textblock.
Now here is an example of the skew from manual duplexing:

MUCH subtler. Your skew with manual duplexing will range from this--less than .5mm--to no skew at all, and you will have to cut off far less of each page to remove the trim lines, maintaining the consistency of appearance of your tiny, beautiful pages. This is why during step 3 of the imposing process we selected Single-sided (which is MANUAL duplexing), and not Duplex (which is AUTO duplexing) appropriately. This will result in you either getting two files for manual duplexing, or one auto duplexing file.
Your next consideration when it comes to printing your liddle book will be whether you want to use an inkjet printer or a laser printer. I've until recently only had a laser printer available to me. I can say after about 6 or 7 little books on an inkjet printer that I prefer the laser printing on tiny books. Here is an example of why:


On the left you have a tiny book printed from an inkjet printer printed on the highest quality setting, and on the right is a tiny book printed from a laser printer. These were both printed at the same scaling, same font size, same line spacing, everything. The inkjet printer, printing at this scale, introduces pretty glaring feathering on the letters, whereas the laser printer is crisp as can be. I've said before that to me tiny books are more for novelty rather than readability, however I do still want to make out the word I'm looking at, you know what I mean? For this reason I prefer printing my tiny books from a laser printer. Use what you got though, you'll get a tiny book regardless. Make sure you're flipping on the short edge with these tiny books too, and double check to make sure your page numbers line up. And when you're done you got...

BOOK(-adjacent).
Continue on to part duex.
Bookbinding Thread Options
In my soon-to-be ongoing series of "components of bookbinding", here are some options for thread and a discussion of why different options might work better or worse for your book.
Thread is used to sew signatures together. The thread used for bookbinding needs to do several things:
Be small enough to thread into a needle to poke through the signature holes
Be large enough so that it doesn't slice through the paper after repeated page turnings
Be strong enough so that it doesn't break when subjected to wear from the paper after repeated page turnings. If you are using a binding that leaves the threads exposed (such as Coptic binding), this goes double
Let's start off with S-tier bookbinding thread, and then discuss what's possible to skimp on. (note: None of the links are affiliate links. I am not making money on these recommendations. Links are provided merely for illustration purposes.)

This is Irish Linen Bookbinding Thread, from Talas (a well-respected bookbinding supplier).
Linen is used because it is an extremely tough, long-staple fiber. Linen withstands wear much better than cotton. This particular thread comes pre-waxed with just enough wax to make it strong and prevent it from untwisting, but not so much that it's sticky to work with. It comes in multiple thicknesses. However, one spool of this will set you back between $13 and $24, and while it will last you a while, that's still a pretty hefty chunk of change, so let's look at alternatives.
Alternative #1: Sewing Thread
Sewing thread is a very common option.
Pros
Commonly available, even at places like Walmart
Significantly cheaper
Many people already have some
Cons
Varies widely in quality, and therefore in durability. Cheap polyester thread is not going to hold up to nearly as much wear as high quality cotton thread
Thinner than much bookbinding threads. I'm not going to get into thread weights here (I looked it up to try and give some recommendations but it turns out that thread sizing is bonkers and kind of complicated) but because it's thinner, it has the dual problems of potentially cutting through your paper, and wearing out sooner.
Does not come pre-waxed.
Some solutions for these problems
Double or quadruple your thread when you sew with it. Luckily, unlike other types of hand sewing, it's very easy to sew in short chunks, knot in new pieces of thread, and hide knots where they can't be seen, so you don't have to use long, tangly, unwieldy pieces.
Wax your thread. You can buy straight up chunks of beeswax for pretty cheap (plus it has lots of other uses!), or you can buy those little "thread magic" or "thread waxer" items at craft stores.
Don't buy the absolute cheapest thread. I know this is a post about cheap thread alternatives but it's better to buy one spool of good thread than a big box of dogshit thread. (ask me how I know)
Alternative #2: Embroidery Floss
Pros
Also commonly available
Thicker
Comes in lots of fun colors, which is nice for exposed-stitching binding styles
Can also be used for making your own decorative endbands, embroidering your covers, and other fun bookbinding-related activities
Cons
Not as cheap as sewing thread
Not necessarily manufactured for tensile strength since embroidery isn't usually put under a lot of stress
Unwaxed
Solutions
Make sure you only use cotton embroidery floss, not rayon or wool
Make sure to wax it with beeswax
Alternative #3: Waxed Dental Floss
Make sure that you are getting thread based dental floss, NOT plastic based dental floss!!
Do NOT get this stuff:

The stuff you are looking for will say "waxed" on it.
Pros
Cheap
Readily Available
Already Waxed
Manufactured to stand up to abrasion
Cons
May be hard to find unflavored
Archival Quality unknown, potentially not the best
Long term strength unknown - while it is meant to stand up to quite a bit of short term abrasion via the teeth, it is also a one-use product in most cases.
Solutions
Know what you're getting into
Use for beginning and testing purposes, so you can get the hang of skills before committing more expensive materials
Use for smaller sizes of books
Fanbinding by @jinkieswouldyoulookatthis 📖🫶
Continuing my run as the luckiest little fangirl in the west... 🥺💖

@jinkieswouldyoulookatthis did something truly beautiful for me recently, and I've just received the results: my very own handmade, hand bound copy of my West series.
You can see her incredibly cool (possibly haunted) process here:

Below, you can see my very uncool emotional breakdown of/about it (and some more photos). 🥲

Now look at all of the beautiful details!
These end papers are so eye-grabbing and perfectly selected, since the series takes place through a revolving door of motels, just as in early-seasons canon.

The title verso has all of the information from AO3, the original LJ publishing dates, @idlingintheimpalapodcast's podfic version details, and the fanbinding specs. Then there's the contents page! JUST LIKE A REAL BOOK, YOU GUYS!

Also, did you happen to spot @tsukiyo-7's credit line on the verso page?! BECAUSE I DID! And I had no idea what that was about until I opened to the page with their custom artwork!

How freaking cool is that?! 😭 Thank you, you fantastically talented person! 💖 Everyone go check out their other beautiful art (plenty of stunning Wincest. 🫶) on their Tumblr!
In case you're wondering, the Kushtaka, which Jinkies also created a whole, super cool entry from John's hunting journal for, is the creature that necessitates Sam and Dean ending up in the shower together in part two of the series. 🤭
Then, not only that, but this curious little sticker tumbled out when I opened those pages:


Because Jinkies doesn't do anything by halves, it turns out that she even found this traditional formline artwork of the Kushtaka by Nick Alan Foote, an indigenous artist of Native American Tlingit heritage, where the legend comes from. That is such a special connection to have that I would never have expected. I'm way beyond touched. 🥹 Please check out the artist's other wonderful work here on Insta.
The final dagger in the coffin of my tendency to blubber at the drop of a hat, let alone in the face of heartfelt gestures, was this page:

@sam-is-my-safe-word and @talltalesandbedtimestories have been personal champions and cheerleaders of mine since the very beginning of my return to writing in this fandom, and they haven't stopped since. The fact that they still have effusively kind things to say about me and my work just makes me want to die (in a happy way).
The comments on my fics are, like, 90% of what keeps me writing. Sharing and engaging and knowing that my stories are making people happy is what it's all about for me, so having those comments from @fictionallemons, Faraway22 (not sure if they're on here under a different username?), Jinkies, and @chiquititasnewsong preserved as a reminder of that... Honestly, you should be glad you can't hear the noises I'm making right now.
The thing is, I knew Jinkies was doing this. She asked permission before she started, she offered to make me a copy as well, and I've been elated and flattered from the moment she did. But now, having it in my hands, I'm moved even further than I thought I would be (and believe me, I know myself–I knew I'd be a mess).
I live a very small life, y'all. The joys I experience tend to be on the same scale. So while this might not be grand or extravagant to many people, this gift, of something I put into the world through a medium I've only really known digitally, intangibly, now being something I can hold in my hands as proof that I've touched the lives of people so far and wide, is a kind of profound that these words don't do justice.
It makes my life feel pretty darn big after all.
Thank you, @jinkieswouldyoulookatthis. Thank you to those who contributed. Thank you to everyone who's read and commented and been a part of West in some way over the last 14 years. The story's still being told in this way. I'm so grateful to remain a part of it.


— @jensenscomedyelbows
It is an absolute trip! I was just mooning over the book yesterday and happened to open it to the finale sex scene and kind of gawped a little. I mean, I knew it was in there, but I've sure never owned another printed book that had a scene as explicitly smutty as that in it before! 😂🤭 Makes me feel proud, to be honest!
Also, the fact that this series is on your all-time fave list is amazing. 😭 Thank you so freaking much!

Fanbinding by @jinkieswouldyoulookatthis 📖🫶
Continuing my run as the luckiest little fangirl in the west... 🥺💖
@jinkieswouldyoulookatthis did something truly beautiful for me recently, and I've just received the results: my very own handmade, hand bound copy of my West series.
You can see her incredibly cool (possibly haunted) process here:
Below, you can see my very uncool emotional breakdown of/about it (and some more photos). 🥲
Now look at all of the beautiful details!
These end papers are so eye-grabbing and perfectly selected, since the series takes place through a revolving door of motels, just as in early-seasons canon.
The title verso has all of the information from AO3, the original LJ publishing dates, @idlingintheimpalapodcast's podfic version details, and the fanbinding specs. Then there's the contents page! JUST LIKE A REAL BOOK, YOU GUYS!
Also, did you happen to spot @tsukiyo-7's credit line on the verso page?! BECAUSE I DID! And I had no idea what that was about until I opened to the page with their custom artwork!
How freaking cool is that?! 😭 Thank you, you fantastically talented person! 💖 Everyone go check out their other beautiful art (plenty of stunning Wincest. 🫶) on their Tumblr!
In case you're wondering, the Kushtaka, which Jinkies also created a whole, super cool entry from John's hunting journal for, is the creature that necessitates Sam and Dean ending up in the shower together in part two of the series. 🤭
Then, not only that, but this curious little sticker tumbled out when I opened those pages:
Because Jinkies doesn't do anything by halves, it turns out that she even found this traditional formline artwork of the Kushtaka by Nick Alan Foote, an indigenous artist of Native American Tlingit heritage, where the legend comes from. That is such a special connection to have that I would never have expected. I'm way beyond touched. 🥹 Please check out the artist's other wonderful work here on Insta.
The final dagger in the coffin of my tendency to blubber at the drop of a hat, let alone in the face of heartfelt gestures, was this page:
@sam-is-my-safe-word and @talltalesandbedtimestories have been personal champions and cheerleaders of mine since the very beginning of my return to writing in this fandom, and they haven't stopped since. The fact that they still have effusively kind things to say about me and my work just makes me want to die (in a happy way).
The comments on my fics are, like, 90% of what keeps me writing. Sharing and engaging and knowing that my stories are making people happy is what it's all about for me, so having those comments from @fictionallemons, Faraway22 (not sure if they're on here under a different username?), Jinkies, and @chiquititasnewsong preserved as a reminder of that... Honestly, you should be glad you can't hear the noises I'm making right now.
The thing is, I knew Jinkies was doing this. She asked permission before she started, she offered to make me a copy as well, and I've been elated and flattered from the moment she did. But now, having it in my hands, I'm moved even further than I thought I would be (and believe me, I know myself–I knew I'd be a mess).
I live a very small life, y'all. The joys I experience tend to be on the same scale. So while this might not be grand or extravagant to many people, this gift, of something I put into the world through a medium I've only really known digitally, intangibly, now being something I can hold in my hands as proof that I've touched the lives of people so far and wide, is a kind of profound that these words don't do justice.
It makes my life feel pretty darn big after all.
Thank you, @jinkieswouldyoulookatthis. Thank you to those who contributed. Thank you to everyone who's read and commented and been a part of West in some way over the last 14 years. The story's still being told in this way. I'm so grateful to remain a part of it.


I make a lot of hardback notebooks, and I have finally remembered to actually put them for sale somewhere! I now have new A6 and A7 hardback books available in my shop. I’ve also learned to attach ribbon bookmarks since the last set. All of them are plain sketching paper, and I ship them with guidelines in case you’re like me and can’t write straight without them. I hope they go down as well as the previous batch! https://www.etsy.com/uk/shop/sarahfogg?section_id=13856530
25 Free Typesets!

New achievement unlocked! I've finished my 25th public domain typeset, and you can find all 25 unimposed pdfs for FREE here! (Personal use only! Use these to read, bind, burn, or ignore at your pleasure!) I'm so excited to post this collage of all the title pages I've done for pd texts thus far. I started getting into typesetting earlier this year, and that journey started with googling "what is typesetting???" 😅😆. Since then, it's been fun exploring literature and the designs surrounding text. Anyway, thank you to everyone who's stopped by this blog! It's meant a lot to me, whether you liked/reblogged/followed, or just took a look!
Back in October last year, I started reading This is an Adjuration by @not-freyja.
By the time I had made it to chapter 5, I had already started typesetting this story as I read because I knew this would be one of those stories that I needed to have on my shelf.
When I finally caught up to the story at chapter 31, I begged the author to let me bind this when it was finished.
Nearly a year later, and what is probably the most important bind of my life is finally finished. Check out these glamour shots, and if you want to hear more about the actual binding process and about how this fic actually changed my life, see below.


So funny story, before I get into the technical side of this bind, but this fic actually changed my life. Not as in I was greatly emotionally moved by the story, though don't get me wrong I absolutely was, but genuinely this fic introduced me to some of the best people I have ever had to privilege of knowing (Hello Class, you know who you are 🩷), and also, it introduced me to Freyja, the incredibly talented author, who, as I type this, is curled up in bed next to me fast asleep after flying half way around the world to go on a two week long date with me.
Moral of the story folks is comment on the fics you like. You might accidentally meet the love of your life on, and I can't believe I'm saying this, AO3.
Anyways, about the bind!
This bind was a challenge from day 1. I had to do the typeset for this 300k word fic 4 times, and had to split it across 2 volumes. This was the longest fic I have ever attempted to bind, and it was so thick I couldn't get it in the paper trimmer.
To make this book as durable as possible, I attempted a few techniques. I secured it with 3 tapes, I made an Oxford hollow, I rounded the spine, I made a slipcase and I used 2.3mm boards where normally I use 1.8mm.
The slipcase is covered with embossed faux leather, buckram and plain ribbon, and lined with gold satin fabric. I've never made a slipcase before so this was an experience.
The books are covered with an emerald green silk finish bookcloth which really gave the books the luxury they deserved. I foiled custom end papers as well as every chapter title page using heat reactive transfer foil on toner ink (never again I am never doing that again omg it took days). Huge thank you to @la-sera for letting me use her artwork which helped inspire this fic!
The grey flashback chapters I had to use HTV for the border decoration and I'm very happy with how that turned out because it was so easy and straight forward, unfortunately it just wasn't viable for the whole book.
It feels weird to finally have these books done. They have my blood, sweat, tears and my heart poured into them, and I've been working on them for so long that it's odd to actually have them finished. I'm so proud of this bind, and feel like I've grown so much as a fanbinder by making these.
Anyways, if anyone has any questions about the process, please don't hesitate to ask!
(and if you are an Linked Universe fan and haven't read Adjuration yet, this is your sign!)
holy gods i want a printed fic :[
Todays bind! Fools Gold, by @tigers1o1 !!

Personally, I absolutely adore the paper and bookcloth combination on this bind. I got the cloth a while back for free and I’ve been waiting for a chance to use it, and then my friend Cam got me this paper as a gift! It seemed way too perfect to not use!

This was a very exciting bind, because it gave me the opportunity to try something completely new, gilded edges!!
Although it didn’t turn out perfect, I’m still super proud of how clean it ended up. Plus, I personally think the flaws make it better :D


The typesetting here was very exciting for me. A few months ago Ty held a tattoo contest for the fic, and I couldn’t not use them when I saw the two finalist designs. So I went ahead and contacted the artists, and they both said I could use them!!
Title page design: @eldrigeonsss
Chapter header design: @sheeeeeeeepherd
Thank you both again for letting me use your beautiful work!
You can read the fic here: https://archiveofourown.org/works/42798252/chapters/107512251
GUYS
GUYS I'M BOOKBINDING FANFICTION WHAT SHOULD I TITLE IT???
IT'S FISH AND CHIPS ONESHOTS AND ALSO SOME LIKE QUEEN AND GRYFFON AND ALSO MAYBE LIKE SOME OTHER STUFF
MOSTLY RIPTIDE THO
its me boy im the seventh cool textile hobby you wanna pick up speaking to you inside your brain listen to me boy you DO have time for me you wanna do me so bad
Fanfic: Collector’s Edition
I’ve always loved collecting books. I’ve got enough books that my friends make jokes about using stacks of books as furniture - not true, but close enough. But there is one type of book that I’ve never been able to get my hands on: fanfiction and other independently written, underground work. Especially work with queer themes and/or erotica.
It’s frustrating that fanfiction isn’t generally publishable or sellable. It’s a shame that creators could spend months or years laboring over a phenomenal piece of work and never see a dime for it, never see it in print. So I finally hit on an idea, an attempt to thank the authors of these wonderful underground works, without wandering into legality issues. I decided to learn how to make books. These books are not for sale and are gifts to the authors.
So I have been working on this for a couple of months and here are the first results. These are the very first books I have bound.
My guinea pigs:
Flyboys by @gefionne Bad Things by @ellabesmirched
Step 1. Making bookbinding tools. I realized very quickly that I needed a sewing frame and a book press. If I were to order these things I would have spent anywhere from $150 - $500. Luckily my family likes to make things. So I enlisted my dad to help me make some simple tools. cost: $30 in materials and an afternoon.

Step 2. Typesetting. Microsoft Word lets you print in “booklet” form, which allows you to create signatures from folded 8.5x11" paper. Each book takes a half to a full day to format.

Step 3. Printing. I am lucky enough to have a robust color laser printer at my disposal. Lightweight 20lb bond / 75gsm copy paper is what I used. This isn’t ideal for books, but it’s inexpensive, easy to procure, and doesn’t choke the laster printer. Perhaps in the future I can do an edition on super thin Bible paper, if I can find a printer that will print on it.
Step 4. Folding, Punching. Perhaps the most tedious part: Every sheet of paper must be folded individually. Then you assemble the signatures and use an awl to punch holes for sewing. Flyboys was 888 pages, which means 222 sheets of paper to fold.

Step 5. Sewing the text block. Now it’s time for tool #1, the sewing frame. This worked exactly as designed, holding the linen tapes steady while I sewed around them. A brick in a rag serves as a weight to hold the text block down while sewing.


Step 5. Gluing. Once the text block is sewn, I glue the end papers to both sides. Then it goes into tool #2, the press, with the spine edge poking out. I glue the signatures together, then apply the headbands and mull as further reinforcement. I leave the book in the press overnight.

Step 6. Making the Case. The case or cover. I’m making half-bound cases, which means there is fabric on the spine, but the boards are covered in decorative paper.

For Flyboys, I went with a “Hux’s hair and verdigris” theme of green cloth, copper printed paper and copper endpapers.
For Bad Things, I wanted murderous blood spatters. I ended up with black cloth, black and red marbled paper and red metallic endpapers.

Step 7. Assembly. The most nerve-wracking step. This is where you glue the block to the case. One shot deal. If you do it crooked, the book is crooked forever. YIKES! After you glue it, you put it in the press overnight again.


Step 8. Ex Libris. I have a few old ex libris labels with Aubrey Beardsley art, I think that’s an appropriate choice to pair with the queer and sexy, so I am adding them inside the front endpapers in the traditional spot. An ex libris label is a traditional way to signify who the book belongs to.

Step 9. Make author squeal with glee. My favorite step.
Again, these books are NOT FOR SALE.
What people think why i became a bookbinder: Oh she wants to explore her artistic horizon with those pretty leather bound books of hers. She even gives them out as gifts to her friends. It most likely helps her with anxiety or maybe she just wanted a more special costume made notebook.
Why I actually became a bookbinder: I just illegally downloaded and printed out several of my favourite fanfics and books and started binding them into books cuz I love reading them but looking at screens for too long gives me headaches.
Kunikida's Ideal Notebook


the pages are dotted bc i like dotted notebooks marginally better than lined notebooks bc i can organize and put stuff in little boxes and stuff
has 40 leaves total which is enough for my personal needs, i can always make another one when i need to
New Special Interest Unlocked!
Bookbinding.
I am just so deeply in awe of the history of books and how they were made throughout. It's such an interesting thing to just learn about because I'd always loved books, but I had never given the process of creating one just ANY thought. I'm fascinated.
...Brb gonna stock up on material so I can bind books of my own.
