Tutorial - Tumblr Posts - Page 3


A guide to designing wheelchair using characters!
I hope this helps anyone who's trying to design their oc using a wheelchair, it's not a complete guide but I tried my best! deffo do more research if you're writing them as a character
¡WARNING!: VERY long post ahead!

I was recently asked to do a tutorial for two friends, and I figured I’d share it here! It’s on how I personally use markers and colored pencils for portraits, so if that’s something you’re interested in then this is for you!
I must preface by saying this is my first tutorial/guide thingy and I’m no professional, but hopefully it helps some! This is only one way of going about it, don’t worry if it’s not your way!
Without further ado, let’s do this! And remember: Trust the process!!!
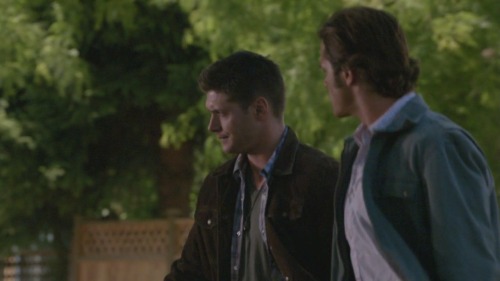
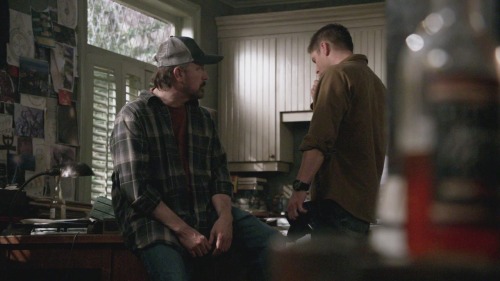
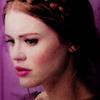
First, the angelic (😏) reference:

Now, we all see tones differently. I also am using the Art Alternatives Portrait Set, which is limited in tones. So, this won’t be completely picture accurate- which is okay! Essence over accuracy!
Alright! Here we go!
Step One: the sketch!

Typically I do the sketch in the person’s undertone, usually pinks or purples. However, for whatever reason I was compelled to try blue on this one, and hey- what is art if not random attempts at creating beauty?
And just like the color scheme, the sketch isn’t 100% accurate. But again, it’s all good!
But anyways, the reason I do my sketches in colored pencil is because it doesn’t smudge like graphite does, and it actually blends into the marker. I feel it’s smoother, and it provides some undertones as you start layering with marker.
Step Two: base tones

This is where you wonder if you just destroyed the entire drawing. I promise you that you didn’t! Basically what I do here is I put pinks down wherever I see pinks in the reference and lay down where the skin is the darkest. I find that it blends better when it’s underneath the base layer.
Step Three: the base layer

Here, all you do is throw down the skintone over the entirety of where it goes, in this case the face. I typically try to leave out highlights, but sometimes the marker bleeds and covers things I didn’t ask it to. In this case, that was the eyes. Oh well!
One thing to notice here is how you can still see the colored pencil beneath the sketch. That’s a very useful guide for when you begin detailing.
Step 3.5: uh

This isn’t necessarily a marker step, it’s just me letting the ink dry and working on other spots with pen and colored pencil. Also, I do like to go over the pink areas a few times to make them less stark.
Step Four: beginning detailing

Now, black is a tricky color on the face, because it can either smudge on everything and turn it gray, or work really well. I used a colored pencil here, and began going over the blue colored pencil spots and lines that were visible under the marked, which started to bring out his face. I also covered the highlight on the nose that had been left alone thus far.
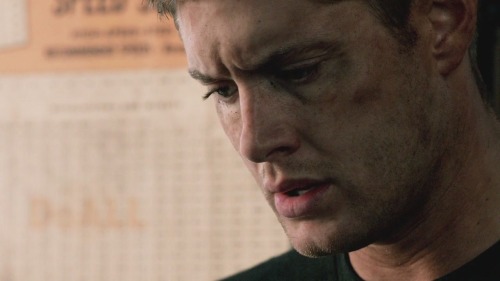
Step Five: THE™️ details

If there’s anything I’ve learned in my five years of drawing, it’s that the highlights and darkest points are what really make the piece. Pure white, bright highlights (like the ones in the eyes) are awesome, but lately I like smudging them out a little bit so that they’re gentler.
If there’s anything you want to hit, it’s the whites of the eyes with the white gel pen, and the pupils + nostrils with the black fineliner.
I have shaky hands, but I use them to my advantage in stippling the darkest part of the eyebrows and in the line of the lips with the fineliner- it just adds a little bit more depth :)
Hair is its own thing, I just sort of wing it. Black hair especially is not the easiest for me, just because I find it difficult to bring out the shades in it. It’s not done at this step as I was trying to figure out how I was going to finish it.
I will also blend things out with both the skintone marker and a pink colored pencil just to get stuff to be smoother. If you’re going for semi realism/realism like me, I highly recommend taking a reddish brown to do some freckles/skin texture with. You can’t see it too much in this picture, and I didn’t want to overdo it since Cas/Misha doesn’t have that many freckles as far as I can see, but it does make a difference.
Step Six: everything else
I did the jacket in colored pencil as well as the fake id!
If you have any questions let me know, I’m happy to help!
Hope this is a decent guide :)


i didn’t mean to make this so long but i wanted to both analyze my own style and give other people a look into it! I hope someone can find some use for it!


Cute, lil' fae girl for the timeline. I actually love this one a lot! Just posted the painting process for this piece on my Youtube Channel, so please don't forget to check it out!
Art by me - @thistle-fae -

DO NOT REPOST. DO NOT REUSE. DO NOT REMOVE WATERMARKS. I have the final say on all my art. Please respect artists and the hours of work they do. See more of my art on my gallery.
What medium do you use to draw? Traditional, tablet, mouse, etc. of course this is if you don't mind me asking!
Uhm… mind if I turn this in a sorta… tutorial thingy? How I kinda like to draw? :”D

I had much problems with sketching digital up to now, so I prefer to draw with pencil on normal paper (the rubber cap on (1) is pretty handy). And that way I can doodle whenever I want and not have to wait until I get home.
I also lineart it along the way because that also works better with traditional for me. The pen in (2) is 0,1 cm and I have one for 0,3. (The one in (4) is just for fancy brush lines :”D ). (And the white gloss paint marker helps great for messed up parts. I love this pen.)
Next is scanning.
Then correcting the lineart and removing dirt.

Setting up the light and shadow values like this greatly helps removing lots of dirt and pencil lines that I forgot to edit. Then I smoothen the lines because over this they get a bit sharper.
And last I set it up in Photoshop for coloring and shading with mah graphic tablet.
Setting the white background to transparent is also pretty handy for colored lineart!
I hope this kinda answered your question! >u
Smooching notes~!
So the people on Twitter seemed to find my notes very useful, So I am sharing them to you guys as well
have fun!

Excellent tutorial to drawing cubby body types
“Some chubby guide for y’all!”
Source: paggiart on twitter
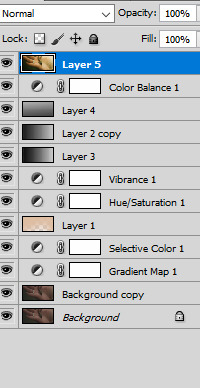
COLOR TUTORIAL GIF #1
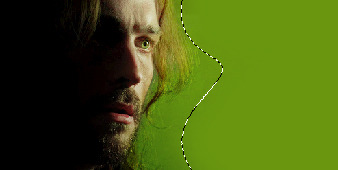
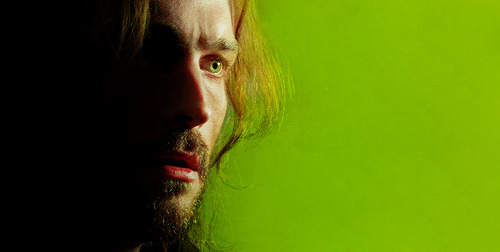
Another tutorial this time for gifs. A really easy guide for dark gifs and color porn backgrounds. This isn’t a beginner tutorial; for how to make gifs and details on masking an image refer to the links in the post.
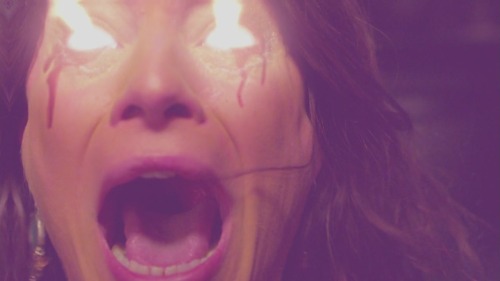
I’m teaching you how to make the background a different color than the rest of the image on a gif:


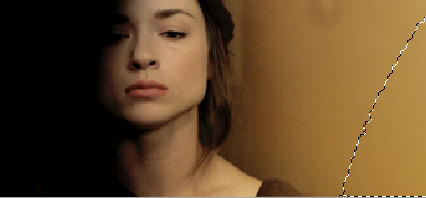
First open up the gif you want to use. I am using this one for this tutorial. I made it myself using this method.
Next some light and color. Make a curves layer output 175, input 77. Levels, 0,1.28, 255, output 0, 206.

Then lots of selective color. I ended with four layers of selective color total.

(blacks: 0,0,0,-13, cyans: +100,-39,-66,0)

(cyans: +100,-36,-30,0; blues: +49,-19,-100,0; yellows: -16,-27,-100,0)
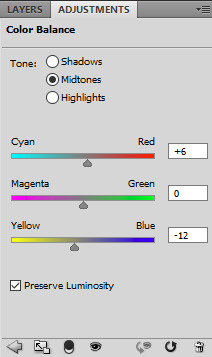
Add a hue/saturation, with saturation set to +12. Then a color balance, midtones: -27,0,+30. Another selective color on top, set for:

(reds: +21,+64,-31,-52; yellows: -50,-34,0,0; cyans: -6,-58,-58,+4)
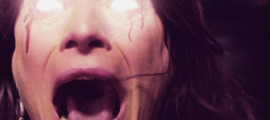
Here it is so far:

Now the hard part, which isn’t really hard just incredibly tedious.
Make another selective layer, make sure it’s all the same selective layer and the coloring is set to ABSOLUTE. Here are the settings:

(yellows: -2,-4,-47,0; cyans: +83,0,0,0; whites: -19,+32,0,0; neutrals: +56,-20,-90,0)

Now we mask it, make sure the selective color layer is selected, then press ctrl+i. Use a black brush, soft round to fill in the parts of the background you want in color. For those of you who don’t know how to use mask, please go here for info.
Here is my first mask:

Make sure that selective layer is visible for animation frame 1. If that was super confusing to you, the look below.

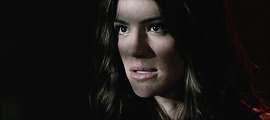
Make sure the selective layer you just masked is hidden for all the other frames. Next click frame 2 and duplicate the selective layer from below and erase the parts that are on Malia’s hair and face.
*The secret to it looking natural at the edges of her hair, is to use lower opacity for the brush when you’re erasing the color on Malia.
Rinse and repeat for all 32 layers. I said it was tedious.

And you know what? That was it. As always, DOWNLOAD THE PSD here. If you were confused at any point then definitely download the PSD.
Also here are two gifs with the same editing style.


COLORFUL GIF TUTORIAL
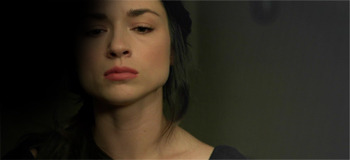
Another tutorial! This time I’m showing people how I make colorful gifs, like the ones in my latest giset of Allison Argent from Teen Wolf. The tutorial is for doing it with gifs, but of course you can also use this as a ref for screencaps too.
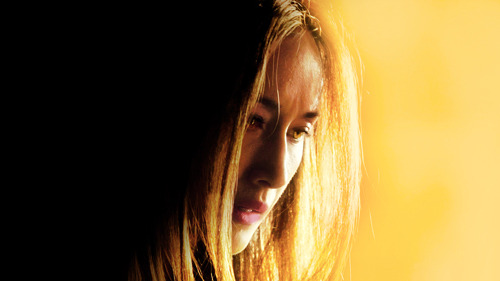
Just to remind you all I do not do beginner tutorials, so you have to have some knowledge of Photoshop before you try this. And this, refers to turning this gif:
Into this:
First off, you’ll need a gif to use. I’d suggest just starting with the one I am using since that’s the best starting point. If you want to make your own and don’t know how, try this tutorial or this one.
Now we edit. First thing I do is make a group called PSD and for this gif I made a few blank layers and colored black on the left side of the picture to erase the window in the background.
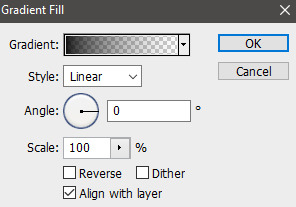
Next a Gradient Fill to add some light on the right side. My ending mask:

Subtle, but important.
Next add a black and white Gradient Map over the top at 35% opacity, set the blend mode to soft light.
Then a Levels adjustment layer, with these settings:
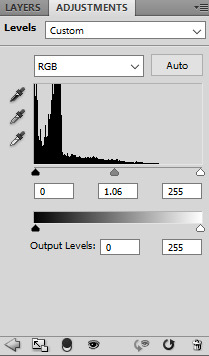
(0,1.06,255 - 0,255)


Download all of those, or just make the gradients yourself. When you add them to the gif make sure to set the blend mode to soft light.
Now make a new blank layer, pick the color you want (I used #c09f5e), and color lightly with a soft round brush on the right side. Here’s my selection:

Make sure to drown the opacity (60-75%) and set the blend mode to soft light.
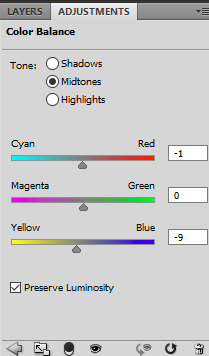
Now either use hue/sat or just a b&w adjustment layer with 12% opacity and soft light blend mode. And add a Color Balance adjustment after that. I only subtly changed the midtones for this one.
This is how it should look so far:
Now enjoy a gif of adjustments:

blacks, 0,0,0,+11 - yellows, -27,+10,-8,0 - vibrance +9, saturation +6 - yellows, -16,-6,+12,0 - blacks, 0,0,0,+17 - reds,+3,0,0,0 - yellows, +5,+7,-31,0
Using this color #cdab64, with a new black layer, paint over some of the image. Lightly near the bottom of Allison’s chest and shoulders. Stay away from the black areas on the left, and make it light! Here is the end result, selection and mask.
This is meant to add more vibrant color to the right side.
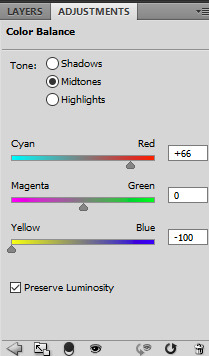
Move on to more color balance, masked and colored like this:
Then I added some Curves, Brightness/Contrast and another Selective Color.
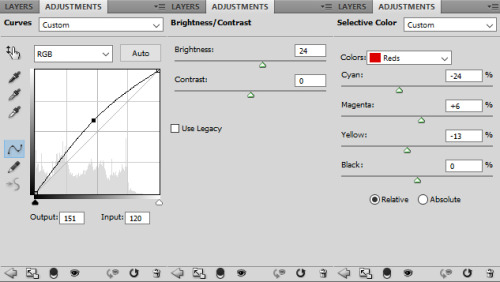
curves, 151,120 - brightness/contrast, 24,0 - reds, -24,+6,-13,0
I also noticed that third black layer from the top of the tutorial was too much black on Allison’s face, so I removed it.
Here’s FINAL GIF!

back and forth preview ↓↓
(I should mention that I added some more shading on the left, specifically around her skull near where the window is, and the difference it subtle, but really great)
And that’s it!
As always, here is the PSD, and another few examples of other colors.
ALPHA STILES GIF TUTORIAL
Another one? So soon? Yeah, well I originally made a werewolf!Allison gif tutorial, and it kind of sucked. So I revamped it for just a color porn gif tutorial and now I am making a much better werewolf eyes tutorial. Featuring the glorious and badass Alpha Stiles. Also, it’s the top gif from my most recent post.
MUST HAVE: knowledge of Photoshop and adjustments and of course know how to make gifs. This isn’t a super difficult tutorial, but it does require a lot of time and patience.
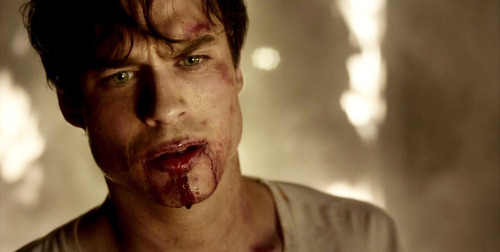
I will be showing all of you non-beginners, how to turn this:

into this:

First step, I extended the background. The end size should be 500 x 220, and you should be cropping to get rid of some of the top and bottom parts.

The white on the right side is blank space because I moved the layers over.
Next I picked a color from the background, for the background. It’s much easier to do it this way and then manipulate the color of the BG later on using adjustment layers. Make a new, blank layer and start filling in the right hand side with a round soft tipped brush. The color I used is #d2ccb4.

Looking good right? I ended up with four layers for the background coloring alone by the way. So don’t be afraid to use a few.
Next some actual toning and coloring. I almost always start with a black and white gradient layer, set to the soft light blend mode. I kept the opacity at 100% for the contrasting.

I actually duplicated that gradient, and put the opacity to 14% on the copy.
Now a curves adjustment, output 143 and input 93. And selective color to mess with the background coloring. Focusing on Whites; the settings are cyan -1, magenta -8, yellow -9, black +15, set to absolute.

More selective color! This time, reds and yellows. Reds, cyan -13, magenta +10, yellow 0, black 0. Yellows, cyan -28, magenta -24, yellow -31, black -52. Set to relative, instead of absolute this time. I also added a black focused selective color, +4 on blacks and nothing else.

I wanted to make the reds pop in this gif, so I made another selective color but this time I masked it only for his shirt. Reds, cyan -100, magenta +100, yellow +100, black +100. Set to absolute.

Yet another, selective color. Yellows, cyan -10, magenta -18, yellow -37, black 0. Relative setting; Cyans, cyan -38, magenta -7, yellow 0, black 0. Neutrals, cyan -8, magenta -12, yellow -12, black 0.

Make another selective color, separate from the last one; again focusing on Whites & Cyans. For the Whites, cyan -8, magenta +3, yellow +10, black 0; absolute setting. Cyans, cyan -100, magenta -100, yellow -100, black 0.
I made another selective for the blacks again and masked it for the left side of his face. Adding deeper shadows and more contrast overall. (Black +12)

Next a vibrance adjustment; vibrance +11, saturation +18. Another selective color; Reds, cyan -12, magenta +15, yellow +17, black -20. Set to absolute. And another curves; output 126, input 109.
A subtle color balance next; 0, -3, +3. Another selective color; Reds, +10,+6,+5,0. Hue and saturation, 0,-7,0.

So far so good!
I love the coloring as is, but now it’s werewolf time. I used this screencap from season 4, because the eyes are perfect for what I was planning. (the link is too a cropped and lighter version of the one below)

Make sure to color the image first, before copying and pasting the part of the eye you need! I used a few layers to do this, some curves and a gradient. After I changed the coloring it looked something like this:

Now using the lasso tool, I circled and copied the left eye and pasted it as a new layer onto the gif of Stiles.

Now select the very first frame of the gif, and make a new group. I just called it EYES. Then paste in the eye layer and transform (ctrl+t) it down until it’s the right shape and size for Stiles’ eye. I started with the right eye, just because it was less shadowed and easier to place.
You may need to erase parts of the eye layer; don’t be afraid to do so, but be careful not to get rid of too much.
DO NOT MERGE THE LEFT AND RIGHT EYE LAYERS! Just don’t, it will make everything so much harder and it won’t look as good in the end either.

Duplicate the layer for the eye and place the other one over the other eye.
Now the first frame is good to go, but if you play the gif you will notice only the first one has the eyes. Or, all of them do, but on the other frames the eyes aren’t where they should be. So the cool and easy thing about this, is that you can go to frame 2, then click the layers and move them how you need them. Then go back to frame 1 and they didn’t move!
Keep doing that until you can’t anymore, which for me was frame 10 when he starts to blink and look down. With that one, go to the eye layers for the red eyes and duplicate them both.
Now, I named the layers, left and right just to make it easier on myself, and I suggest you do the same. So I ended up with 38 eye layers, all duplicates and you will probably end up with about the same amount. There is a method to the madness though.
Basically with the closing eyes parts I needed to duplicate the original layers so I could erase the top parts of the eye layer. That way it’s not overlapping on his lids.

Here is a super slow down to show you just how natural it looks. ^^
If you just tried to move the layers like before it would have worked, but you would try to erase the top parts of the eye to make it look better and it would erase those parts on every frame. Not good. So make sure to duplicate as needed and keep the eyes for the next 30-ish frames as separates so you can and make sure to manipulate the parts you need to without screwing the other frames over.
I always, ALWAYS save the PSD and of course sharpen. Best way to do this, and the fastest way, is to press the three line thing in your frames box (upper right corner, it’s a drop down) and convert to timeline. Then select all your layers, right click and convert to smart object; then filter > smart sharpen. Amount > 500, Radius 0.3, Remove gaussian blur, and make sure the More Accurate box is ticked.

A lot of time and effort later and you’re done! I’d say the end result is worth all that time wouldn’t you? As always, here is the PSD DOWNLOAD, and more examples of the werewolf eyes below:


SCREENCAP PICSPAM TUTORIAL
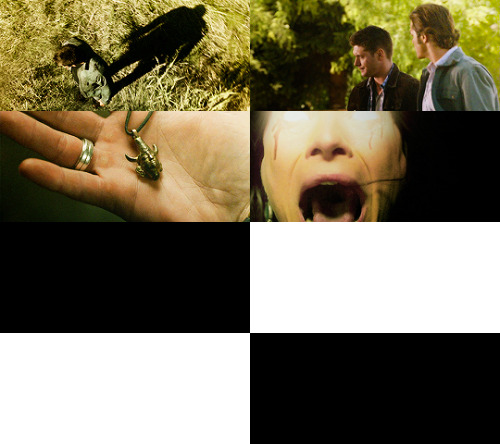
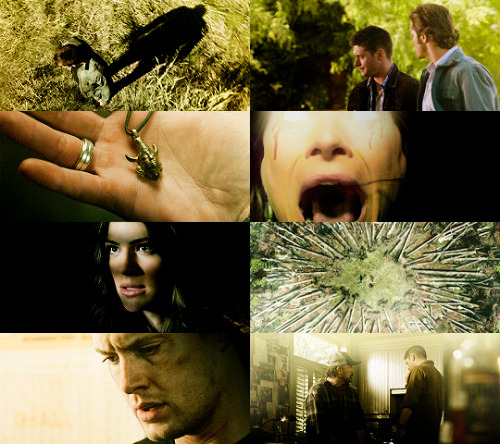
Yes, another tutorial! This was a request from an anon; they wanted a tutorial of how I did this Supernatural Picspam, and I am going to actually do it, because I actually like making tutorials ^_^ So just to be clear, I will not be doing the exact same pictures and color scheme because I didn’t save the PSDs for each of those pictures, but it will be pretty much the same.
I am showing you how to make a color-scheme picspam, made entirely of screencaps from Supernatural:

First thing you need is a template. There are plenty you can find online to download, especially on tumblr; but I am going to give you one for this spam.
I use different templates for each picspam I make, and for the original post I used the picture sizes above and made it for sixteen pics instead of the eight I am doing right now.
For this kind of picspam I usually either cap my own screencaps from HQ videos that I have of episodes, or I get them online. For these caps I used homeofthenutty.com, and the episode I took the caps we are using for the tutorial is season 4, episode 1.
Now, open up the first cap you’re going to use:
First things I usually do are to duplicate the background layer; set the blend mode to screen and mess with the opacity until I find a lightness I like. Then I made a black and white gradient map, set the blend mode to soft light, and the opacity remains at 100% for this one.
Now a selective color, focusing on reds. Cyan -34, Magenta -29, Yellow -12, Black 0. Now make a new layer, blank and pick a round soft brush and a color. This color will define the color scheme for the whole picspam, so pick something good.
I made a duplicate of the layer and erased some of the middle parts I colored before. I used this #e0bea3 for both layers, and set the blend mode to soft light.
Now make a Hue/Saturation adjustment layer, with saturation +24. Then a Vibrance adjustment, vibrance +16 & saturation +11.


Download those and add them on top of the cap. The first one should have a blend mode of soft light, and an opacity of 38%. The second is also soft light, but 100% opacity. Now another black and white gradient map; soft light blend, 95% opacity.
Lastly, I stamped the layers (ctrl+alt+shift+e) and sharpened. Filter > Sharpen > Smart Sharpen, then make sure that More Accurate is ticked, Amount 500, Radius 0.3 and Remove: Gaussian Blur. And then a color balance if you need it, just for more toning. I used midtones only, -9, +22,+22.
Then add it to the template. And rinse and repeat.
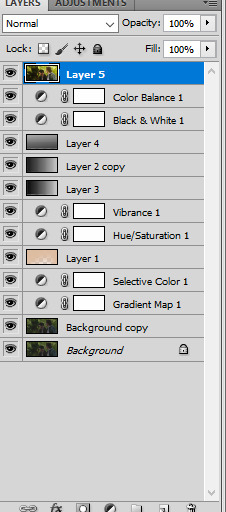
Here are my layers for this cap, and the results:
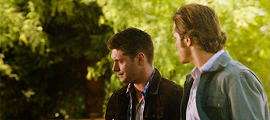
This one ^^ required some more toning and darkening than the others.
I started with the darkening and contrasting. A black and white gradient map set to the soft light blend mode. Then another at a lowered opacity, then a selective color, focusing on reds. -34,-29,-12,0; set to absolute.
Then a new blank layer, the same yellow-orange tone as before (#e0bea3) This was how I colored it:
Then set the blend mode to, guess what? Yeah, soft light. Did a hue/saturation and a vibrance layer, just like on all the other caps. And the gradient layers I told you to download from before. Now it looks like this:
Now for the real trick, making it yellow/green without making it look terrible. Make a color balance adjustment, midtones only; -47, +31, -30. Then another one, only midtones again; -17, +12, -31.
Then I stamped (ctrl+alt+shift+e) and sharpened, same as before. Then I added a blank layer and painted in black on the right side, and added a subtle curves layer on top.
And add it into the template!
Looking good so far ^^
Ruby’s cap was different too; for her I duplicated the background layer and set the new duplicate to the blend mode screen. Then I stamped it and sharpened. Next a gradient map, soft light black and white color scheme.

I wasn’t happy with the contrasting so I duplicated the gradient one more time. And I did some toning; just a vibrance and some selective color.
Next the famed soft light color layer.
And then the same gradients as before and some black for the right side too.
I did another vibrance, (+38,+10) and a color balance (midtones: -17,+15,-10) and a selective color (reds: -32, +36, +35, 0)
Final result ^^
This one I just duplicated the background and set the duplicate to screen. A vibrance layer, a color balance for more green, and then sharpened it.
Follow all steps from the first picture; this time I added a blank layer on top and used a yellow-green color for the top part. I wanted there to be a lot of light; here is my selection for where I put the color (#e2d5a0)
Color balance and gradient maps are your best friends!
Same steps as before! Only this time, I used an extra color layer (#e17813) I placed the coloring like so:
Blend mode = screen, Opacity = 44%.
Hue and saturation, vibrance then the same gradient layers we’ve been using all along.
I added another gradient map on top for some more contrasting; soft light blend mode and 43% opacity. Then I used blank layers, a soft brush and absolute black to add some darkness to the right side. Then a color balance on top of everything for the green-yellow tones of the picspam’s color scheme.
That’s it! Now add them to the template if you haven’t already and save it.
At the very end, I did add a vibrance and a selective color on top of all of the layers on the template. Vibrance +11, +3; Selective Color, blacks +5.
No PSDs this time, but for more screencap editing help check out my other tutorials. Especially the one I did for Sam.
ICON TUTORIAL #1
I decided to show you how I make some of my icons; most of the time I make them by just cropping my own edits. But sometimes I make colorful icons for no reason, so, that’s what we’re doing.
PROGRAM: Photoshop CS6, DIFFICULTY: Medium
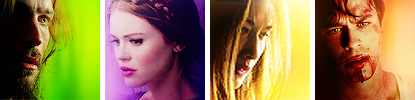
To be clear, I am showing you how to make icons like these:
First things first, open up your screencap your turning into an icon.
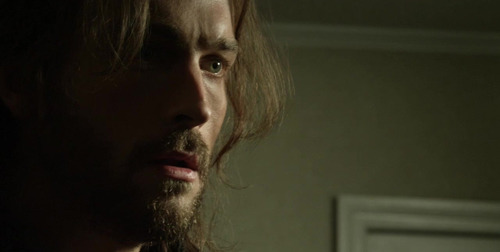
I am starting with Ichabod from Sleepy Hollow.
Duplicate the background layer and sharpen the image. I always use Filter > Sharpen > Smart Sharpen, with the Amount set to 500, the Radius as 0.3, More Accurate and Remove Gaussian Blur.
Add a Brightness/Contrast adjustment, with the brightness as 43 and contrast 16. Then a Curves; 152, 140. I added a Levels just to dull the brightness a little; 0, 1.00, 255 then output levels 0, 229. Lastly, for more contrasting I went with a Selective Color adjustment blacks +8.
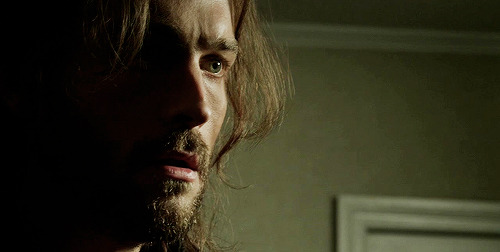
Now I focus on his eyes. I wanted the colors be more vibrant and noticeable; so I created a new blank layer and grabbed a pale green color (#746e48), set the blend mode to soft light and painted in his iris. I selected the layer and right clicked to ‘select pixels’ and added a Curves; 150, 105.
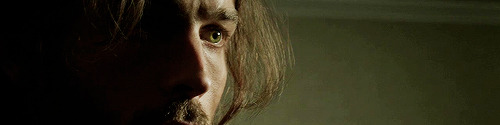
Now make another blank layer and with a soft round brush, use a brown color to paint his hair (#78613d).
Paint where I did ^^^
Then set the layer to soft light blend mode, at 74% opacity.
Next I do some toning for the entire image. Color Balance, midtones only: +10, +13, +1. Selective Color; REDS, -39, +54, -11, 0. Then make a whole new Selective Color and mask it so this one doesn’t touch his face and barely grazes his hair. YELLOWS, -23, -42, +57, -10.
Make another Selective Color that is not attached to the one you just did. This time I colored the whole image and then went back over with a lower opacity brush and got rid of SOME of the coloring on his face. Just some of it.

Above is what my selection looked like, and here are the Selective Color settings: YELLOWS, +42, -40, +85, 0. Then another Selective Color, for more YELLOWS, -8, -42, +38 with the selection of the previous selective color. Also on this one you want to do these GREENS, -55, -37, +100, 0.
Next, make a new blank layer; using this color #d1c39b color like so:
Soft light blend mode, 71% opacity.
Another Selective Color, YELLOWS, +31, +31, -26, 0; make sure it’s masked only for his face! It shouldn’t touch the background this time.
Next I wanted to shade the left side, so I used a black brush on a new blank layer; then a gradient fill and painted in more on the side.
Next another Curves, 138, 112. Vibrance, +16, +5.
Add both of these:

Blend modes should both be soft light!
Next we edit the background! Make a new layer, and get a nice vibrant green color (#6e9700) then use a soft brush to color the right side of the image.
Above is my selection. Keep the blend mode and opacity at default for this one.
Rinse and repeat, only this time use this color #93be1e; and make sure the blend mode is soft light and the opacity is 70-76%. I duplicated the layer and erased a lot of the color near Ichabod; keeping the more vibrant greens near the edges of the image.
Lastly, I stamped the layers (ctrl+alt+shift+e) and added one more Selective Color. REDS, -28, +29, +30, 0; and another Vibrance, +10, +2.
Then crop it! I make my icons 100x100, and then usually sharpen the image again. For the final step I did add a texture:
I set it to soft light, and lowered the opacity to about 80%. I also erased the parts of the texture that overlapped on Ichabod’s face and hair.
See how the texture adds some definition to the background, and makes everything pop? If you have trouble finding good light leaks and icon textures, I definitely recommend midnight_road.
++
Now onto the Lydia icon, open up this cap:

Start with a duplication of the background layer, and set the duplicated layer to screen for the the blend mode. Then add a Brightness/Contrast adjustment; brightness 24, contrast 16. Then another of the same adjustment, this time brightness at 34, no change in contrast.
Now a Curves, output at 152, input at 140. And a Levels, top row 0, 1.00, 255; output levels, 0, 229. And a Selective Color, BLACKS +32.
Next some toning; Color Balance (midtones), +10, +13, +1. Selective Color next, REDS -39, +54, -11, 0. And a Vibrance; vibrance +16, saturation +5.
Now add in the gradients! Save the two images below:


And add them onto the cap. I did duplicate the first one three times; and of course all of them are on soft light blend mode 100% opacity!

Next I started on the coloring; first make a blank layer and grab a brush. I used a round brush at 50% hardness and a nice deep purple color to paint in the left side background (#5c3955). Then I set the blend mode to color; after that make another layer and do the same for the other half of the image.
I made another blank layer, blend mode normal, opacity 65%. And I used a very soft round brush at about 40% painting opacity to add in some more purple on the left side.
Add yet another blank layer, this time set the blend to soft light, 55% opacity and paint with a soft brush on both sides of the image. (#a45494). One more blank layer using the same color, normal blend mode 72% opacity and very lightly paint some on the left side again.
Now a Selective Color, REDS +26, +12, -1, 0. YELLOWS -79, -19, -55, 0. MAGENTAS -75, +11, -50, 0. This really brings out the pinks and purples, and tones her skin some more.
Now a Vibrance, +24, +12. For this vibrance adjustment layer, I masked it so it didn’t touch most of Lydia’s face. I kept the vibrance for her hair, lips, eyes and blush.
I added another BLACK focused Selective Color (+9), and messed with her lips too. MAGENTA +68, +73, +54, +51. Then another Selective Color, BLACKS +18, and I masked it for just her eyes, and only colored the lashes and eyelids.
I did add a blank layer, blend mode overlay at full opacity and used a light green to color her irises. (#919952). Then a Curves; output 130, input 99, and masked for her irises only. Then another Curves; 144, 79, this one for the reflections in the eyes. And lastly a Hue/Saturation, -31, for the whites of her eyes.
Last for the toning, hair! New blank layer again, soft light blend mode, 79% opacity. Use this color #d4a783, and color her hair with a soft round brush.
Now make an icon; just make a new canvas sized 100x100. Then stamp the Lydia cap (ctrl+alt+shift+e) and move it over to the small canvas. Use Ctrl+T to transform the image so you can resize it how you want. This is how I did mine:
Add a Selective Color, BLACKS +42 to deepen the blacks. I also added a gradient map (black and white) at a soft light blend mode and 27% opacity. Just for simple blending/contrasting.
Save this image texture:
And add it to the icon. I set the blend mode to soft light, opacity 40%; and then I flipped it vertically.
For this one, screen blend mode, 61% opacity. I flipped it horizontally and erased most of the middle part of the texture using a soft round brush at a lowered opacity.
This one, set the blend mode to screen, 80% opacity. I flipped it horizontally and used ctrl+t to move the lightest part of the texture into the bottom left corner angled upward at Lydia’s jaw.
I also added another Vibrance, +7 and +12. Then stamped the layers and sharpened with the same settings as the Ichabod icon above. Filter > Sharpen > Smart Sharpen, with the Amount set to 500, the Radius as 0.3, More Accurate and Remove Gaussian Blur.

++
Open up this cap of Nikita:
I liked the brightness and contrast of the cap already, so I started by making a new blank layer and taking a light yellow color to paint in the right side background. (#dfc83b) I used a soft round brush, at varying opacities to color that side in.
I then made another blank layer and colored the left side background in with absolute black.
Next add a Gradient Map (black to white) with the blend mode set to soft light, and the opacity at 73%. Then a Curves adjustment, output 150, input 103. And a Levels, 0, 1.42, 255; output levels 0, 255.
Now some more toning; Selective Color, REDS -52, -40, +62, +43. Absolute not relative; also make sure to mask the adjustment so it doesn’t touch Niki’s face. Make another Selective Color, also masked so it only effects the background. These settings: YELLOWS +6, +68, +57, -17. Also set to absolute.
I also added a Vibrance adjustment; vibrance +27, saturation +26.
Now add a blank new layer, this color #dfc83b and set the blend mode for the layer to soft light. I used a soft brush to paint her lips. Then a Curves, 160, 94; and masked it to color her irises. I did the same thing for the reflections in her eyes.
I also added another Selective Color, REDS -18, +40, -12, -38 (absolute). BLACKS 0, 0, 0, +100. Another Selective Color, YELLOWS -18, -5, -40, 0 (absolute).
My final touches were to add two Gradient Fills; the first is black angled from the left to the right. These are my settings:
I masked this for only the left side.
The second one is for the entire image; and the blend mode is soft light, 100% opacity. And finally, stamp and sharpen.
Great cap edit for a picspam, but this is an icon tutorial. So make a new canvas like before, 100x100 and add the stamped Nikita image. All I did with the icon was add a blank layer and some light in a soft yellow color with a light opacity brush.
I also sharpened it again!
++
First duplicate the cap of Damon, set the blend mode to screen. Now a Brightness/Contrast, 24 and 16. Another Brightness/Contrast, brightness at 34. Now a Curves, 152 and 140. Levels, top row all default and the output levels, 0, 229.
I added a Selective Color too, BLACKS 0, 0, 0, +8.
Now some toning; Color Balance (midtones), +10, +13, +1. Selective Color, REDS -39, +54, -11, 0.
Now the background! Make a Selective Color, REDS -70, +100, -56, 0. YELLOWS -100, +100, -9, +98. And mask the adjustment to only effect the background. Use the same masking selection to create another Selective Color, REDS -59, +19, +65, +56. YELLOWS -19, -100, -96, 0. MAGENTA -79, -25, 0, 0. One more time, same selection and another Selective Color; REDS -47, -9, +40, 0. YELLOWS -8, -42, +38, 0. GREENS -55, -37, +100, 0.
I made another Selective Color to maximize the oranges; REDS +1, -8, +66, 0 (absolute). I masked it to color basically everything, but erased some color from Damon’s face and neck.
Now add a Curves 138, 112; and a Vibrance +16, +5.

Use the same two Gradients as before:


Both set to soft light blend mode and 100% opacity. And the first image needs to be reversed, the light on the right and the dark of the left.
I made a bunch of blank layers and used them to make some changed to the background. I used this color on the first two #f0a334, and colored the right side in.
Then mask a Color Balance to only effect the right side: settings for midtones (only) +22, 0, +73. I then made more blank layers and used this orange #eea036, to color in the background the rest of the way on the right side.
I did add a black and white Gradient Map, soft light blends mode at 20% opacity.
I then stamped the image (ctrl+shift+e+alt) and moved the stamped image over to the left.
I made a new blank layer, used a very soft round brush and filled in the left side of the background that remained (#000000).
Now a few more things for toning; Selective Color, REDS -14, -6, -10, 0. YELLOWS -4, -20, -48, +14. Then another Selective Color, YELLOWS -17, +30, -45, 0. And one last Vibrance, +27 and +10. Now Sharpen!
Now make the canvas, 100x100 and drag the stamped Damon layer over. Add this texture:
Blend mode to soft light, opacity at 100%. I also erased the middle section of the texture, to avoid overlapping Damon’s face.

This one, I flipped around a bit to find the right angle, and set the blend mode to screen and the opacity to 63%. Then erased the middle parts again.
And finished; wow that was a long tutorial. Hopefully it helps you create cool icons!
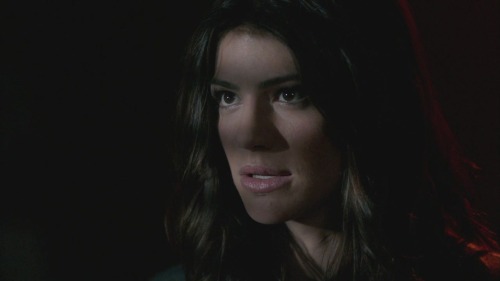
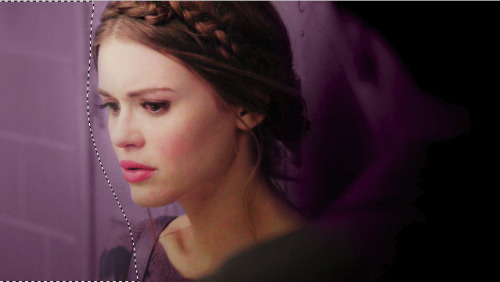
COLORFUL CAP TUTORIAL
Showing you how to make a colorful pastel-ish cap for use in graphics and picspams.


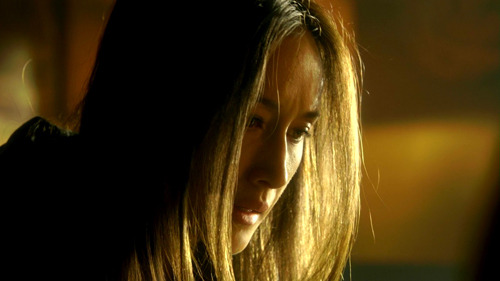
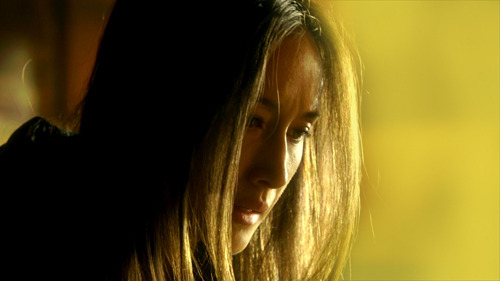
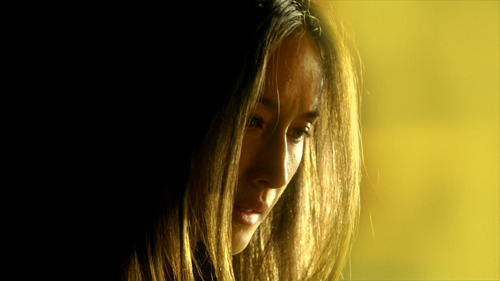
First download or pick a cap that you want to use. Here is mine of the beautiful crying Malia:

I would suggest picking a cap with light base coloring and blurred or simply-colored background. After you pick your cap, duplicate the background layer and Filter > Smart Sharpen using these settings:

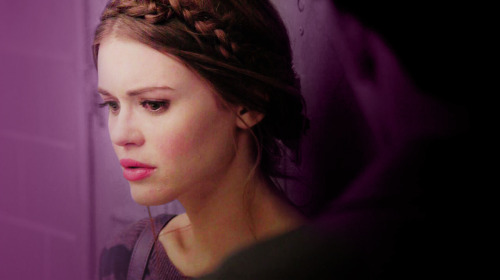
Now a Color Balance layer to tone down the redness in the cap, it’s a correctional layer for the PSD I am about to add. I used midtones only with the settings as -6, 0, +9.

Next download and load in this gorgeous psd by Mila. I adjusted the Curves layer a little for the first cap in this tutorial, tones it down to these settings 114, 83.

I also masked the SECOND Color Balance layer to mostly miss her face since the psd white-washed Malia’s beautiful tan skintone. I dropped the opacity of the layer to 47%, and here’s the mask.

And use the same mask for the THIRD Selective Color layer. Here’s how the cap looks right now:

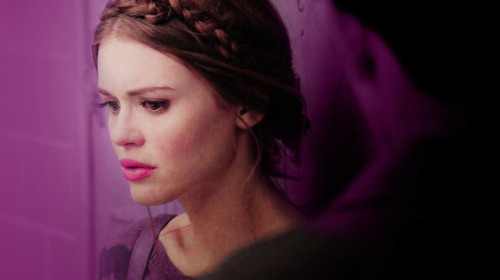
I also masked the final Selective Color layer for the eyes, I wanted to take the layer’s shadow from the eyes so they’d stand out a little more. So mask it to only effect the rest of the layer and not the eyes.
Next make a new layer, set it to Soft Light and grab a nice peach-pink color (#b65a5b) and paint her lips. I then selected the mask for the layer and added a Levels (0, 0.86, 255) and a Color Balance, midtones (-10, 0, -2).

I made another new blank layer and used a brown-blonde tone (#9f724d) and colored her hair. I then duplicated the hair layer and realized I wasn’t totally happy with the color I chose, so I added a Color Balance midtones (-48, 0, +17).
I added a Vibrance layer next (+25, +17). Next a new blank layer set to Soft Light again, this time with an off white color. I use this one to paint lightly over the parts of the face and hair that the natural light of the image hits.
In this case I touched on her cheek, forehead, nose, the corner of her mouth, ears and her hair. I dropped the opacity of the layer to 66%, and I duplicated this process on another layer, but this time focused on lighting the background like so:

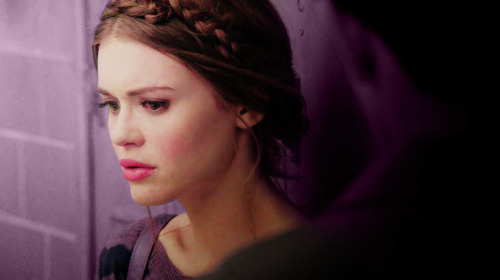
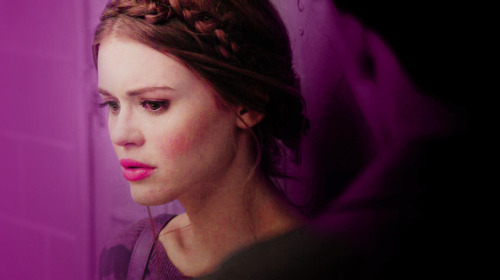
So far so good! Next we focus on color. Make a new blank layer again, Soft Light blend mode again. I colored the background and some of her sweater with this purple tone #b87fab. Next I added a Selective Color and used this to eliminate the yellow and green tones in the background.
Next another blank layer this time with the blend mode set to Color, using this tone #be7caf and masked to the background selection. Now another one this time with a Normal blend mode and using this color #fddcf5 to color only the right side of the image like so:

(This eliminates the stuff blurred in the background on that right side)
Add another blank layer, #e8a7d9, this one set to Color and use it on both sides of the background. Yet another blank layer, set this one to Color Burn and use this color #b856a1. I used this very lightly in the corners.
Add another Vibrance (+10, +3) and a Color Balance midtones (+9, 0, -6) and mask it to only effect her face. Then another blank layer with the Soft Light blend mode with this color #b856a1 and color only the sweatshirt on the left.

This will lighten the right side and darken some of the left. Add another Vibrance (+11, +7), then a Selective Color reds (-5, +4, 0, 0) and second to last I added another Selective Color to drown some of the over-saturation and pastel the colors. Magenta -13, -100, -7, 0.
Lastly I stamped the layers, shift+alt+ctrl+e, and Smart Sharpened again.

And that’s it! As always here is the PSD, and a cap using the same methods as above, and the PSD for the second one too while I’m at it.

How do you color in your traditional pieces? I love how you do it!
I'm not sure if I can explain this well, but I'll try!
1. What i first do is line it in two shades of brown, then I'll put the base colours down. Why I do this is because the brown would give it a softer look and putting down your base colours are well, its ment to be a base.
2. For shading I'd use any colour exept gray! Using different colours would make it more interesting to look at but gray is still an option if that's what you're going for, I'd usually use pink or purple for most of my art when I don't have the character in a specific setting. There are additional things you could add, like putting orange to make the pink shading more warm toned or putting blue to make it more cooler , I like to add green sometimes in highlighted areas for extra detail.
A good way to learn how to shade is to use a gray scale, its when you only use black and white. It helps teach you to know where to put the shading and highlights.
3. I use a white gel pen to highlight and separate areas to help make them stand out when they blend into eachother.
Sometimes you'll see me use textures in my art, you'd only want to use textures when you use very simple shading or no shading at all. If you do use textures on detailed shading then it'll clash together to Much and give you a headache (i know this from experience.)


Here's an example with a bad drawing.
Some smaller things I do is go over it again after the base with the same colour to where I want the shaded areas to be. You can see this a lot on the green. I slowly build up the shading to lightest to dark.
I hope this was helpful for you, sorry if your unclear on some parts. I'm not best at explaining things.


Manual Wheelchair Tutorial by Fade31415
So... I technically drew this 3 years ago but forgot to post it. I think I was going to clean up the end and make a nice recap, but I ran out of steam and then just left it as a wip for years. I got reminded of it because I was talking to a friend about how to draw wheelchairs today.
This covers most of what I view as the most common errors when it comes to drawing characters who use manual wheelchairs. I hope it helps you a lot.
Image description is in alt text, but there is a back up image description under the cut in case that does not work for some reason
[image description: a 4 picture long wheelchair tutorial. the background is white and the text, when it appears, is black and in calibri. each step will be labeled with "Step #" and a description of the drawing next to it, and "text" and then the text that is written to explain it to follow.
Step one text: So, you want to draw a character who uses a manual wheelchair? Awesome! I can't approve more. Drawing characters who use wheelchairs is a bit different than drawing standing characters, because of obvious posing differences. But to start, you need to know what parts of a wheelchair you will draw. So, without further ado, here are 3 wheelchairs!
Step one image: a simplified drawing of a chubby woman sitting in a quickie GPV manual wheelchair and resting her hand on the handrim of one of the wheels. this is labeled "the artist"
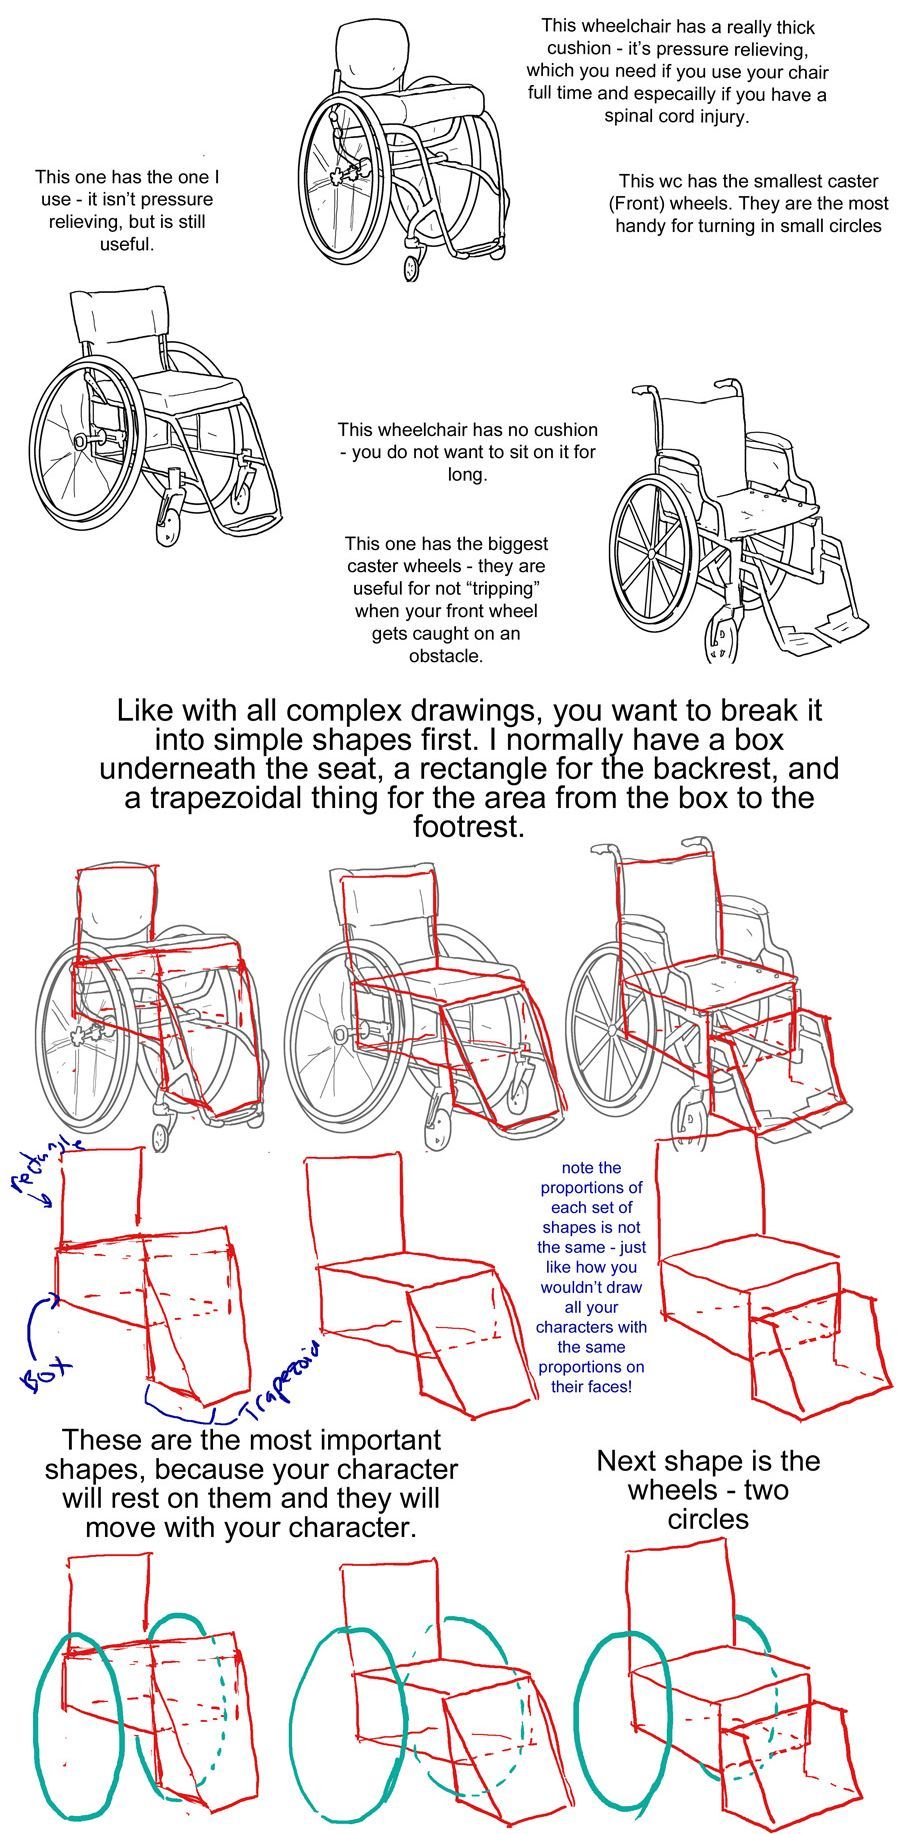
step two: next there is a lineart drawing of three wheelchairs. one is a tilite TR series 3. this is an ultralight wheelchair with a bucket seat (the back is lower than the front), a big cushion and a short backrest that kind of contours to the back of the person who would sit in it. the caster wheels (front wheels) are very small and the footrest is just two little metal bars. next image is a quickie GPV. this is also an ultralight wheelchair with a low back, but its caster wheels are slightly larger, the back has regular upholstery (it does not look like it was made to conform to the back of the person who sits there) and the frame is boxier -- there is no bar underneath the seat where the wheels would attach, rather each wheel is attached to the side of the chair. the next wheelchair is an invacare tracer. it is how most people imagine wheelchairs when they hear 'wheelchair'. it has no cushion and it has a high backrest with handles. it has high armrests that would be comfortable to rest your elbows on if you were just sitting. the wheels are not bicycle wheels like the previous two but are rather plastic. it has big footrests and big caster wheels.
text: the wheelchairs on the left are the ultralight, sporty kind. I have one of them (the quickie). the one on the right is a more standard one you might find in hospitals or as the public wheelchair in grocery stores or the mall.
step three: first is text to accompany the tilite. "This wheelchair has a really thick cushion - it's pressure relieving, which you need if you use your chair ufll tiem and especially if you have a spinal cord injury. This wc has the smallest caster (front) wheels. They are hte most handy for turning in small circles." next there is text to accompany the quickie gpv: "This one has the one I use -- it isn't pressure relieving, but is still useful." next is text to accompany the invacare: "this wheelchair has no cushion - you do not want to sit on it for long. This one has the biggest caster wheels - they are useful for not 'tripping' when your front wheel gets caught on an obstacle.”
step four text: like with all complex drawings, you want to break it into simple shapes first. I normally have a box underneath the seat, a rectangle for the backrest, and a trapezoidal thing for hte area from the box to the footrest. these are the most important shapes, because your character will rest on them and they will move with your character.
step four image: the lineart of each wheelchair has been put on reduced opacity, so we can see the square representing the backrest of each seat (the square is the smallest for the tilite and biggest for the invacare), the box for each seat and area underneath it, and the trapezoid for the footrests. the next step labels the images of these simplified shapes as the lineart is removed. "Note the proportions of each set of shapes is not the same - just like how you wouldn't draw all your characters with the same proportions on their faces!"
step 5: we see the same shapes to form the wheelchair, but now with blue circles drawn where the back wheels would be.
text: next shape is the wheels - two circles
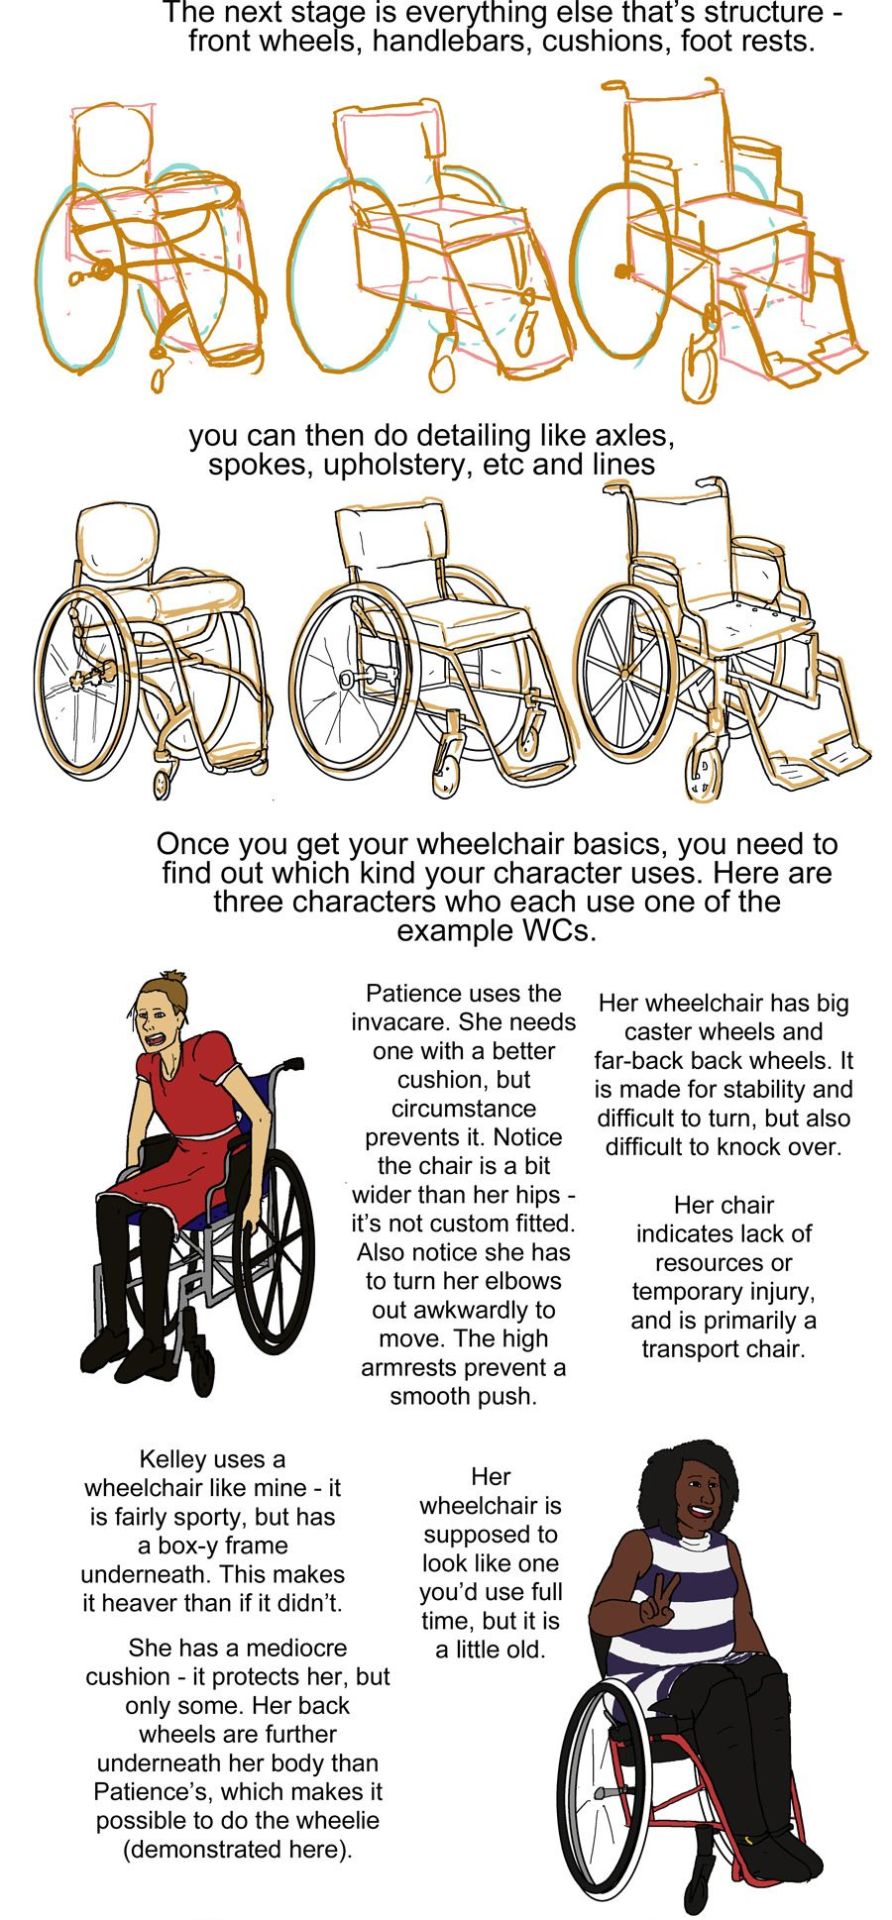
step six: next we see the wheels and shapes have been reduced in opacity and the basic structure of everything about each wheelchair: footrests, caster wheels, upholstery details, axles has been drawn on in orange.
text: the next stage is everything else that's structure - front wheels, handlebars, cushions, footrests.
Step seven: we see the lineart on top of the lowered opacity sketch.
text: you can then do detailing like axles, spokes, upholstery, etc and lines
step eight: next we see three drawings of different characters. there is patience, a skinny white woman sitting in a blue invacare wheelchair. kelley, a slightly chubby black woman wearing a stripey dress sitting in a red quickie gpv wheelchair and doing a wheelie while smiling. then luke, a white man with short blond hair wearing khaki pants. he is sitting in a tilite chair.
text: once you get your wheelchair basics, you need to find out which kind your character uses. here are three characters who each use one of the example WCs. patience uses the invacare. she needs one with a better cushion, but circumstance prevents it. Notice the chair is a bit wider than her hips - it's not custom fitted. Also notice she has to turn her elbows out awkwardly to move. the high armrests prevent a smooth push. her wheelchair has big caster wheels and far-back back wheels. it is made for stability and difficult to turn,but also difficult to knock over. Her chair indicates a lack of resources or temporary injury, and is primarily a transport chair
kelley uses a wheelchair like mine - it is fairly sporty, but has a box-y frame underneath. this makes it heaver than if it didn't.she has a mediocre cushion - it protects her, but only some. her back wheels are further underneath her body than Patience's, which makes it possible to do the wheelie (demonstrated here). her wheelchair is supposed to look line one you'd use full time, but it is a little old.
luke has a spinal cord injury. he has a very thick pressure relieving cushion for medical reasons. his chair is also ultralight, with no boxyness under the frame. his chair is the newest and lightest - it indicates his wealth/resources, but also that he needs to use on full time.
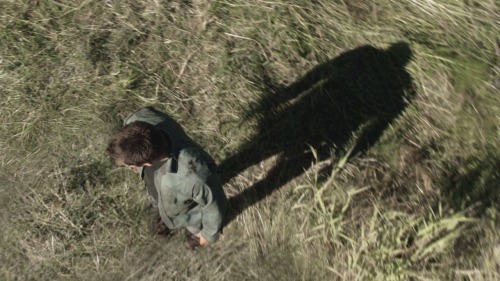
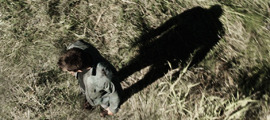
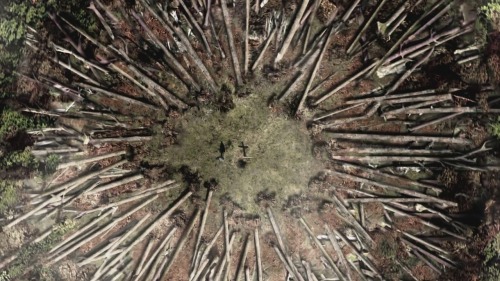
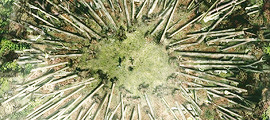
step nine: just a drawing of me sitting in my wheelchair holding my hands up to show fingerless wheelchair gloves. we're looking at me from above.
text: when you're choosing what wheelchair to give your character, think of both their disability and their resources and go from there. questions to ask yourself: is it made specifically for them or is it mass-produced or a hand-me-down (if it's custom, the seat will not be too wide or narrow in comparison to their body and their feet will rest on the footplate naturally). do they want more stability (further back back wheels, big caster wheels) or maneuverability (the inverse). do they need a pressure relieving cushion? how long are they using their wheelchair per day? how long have they needed a wheelchair? Do they have health insurance? do they have access to a lot of spending money? How much can they spend on their wheelchair? are they athletic etc etc
posing steps:
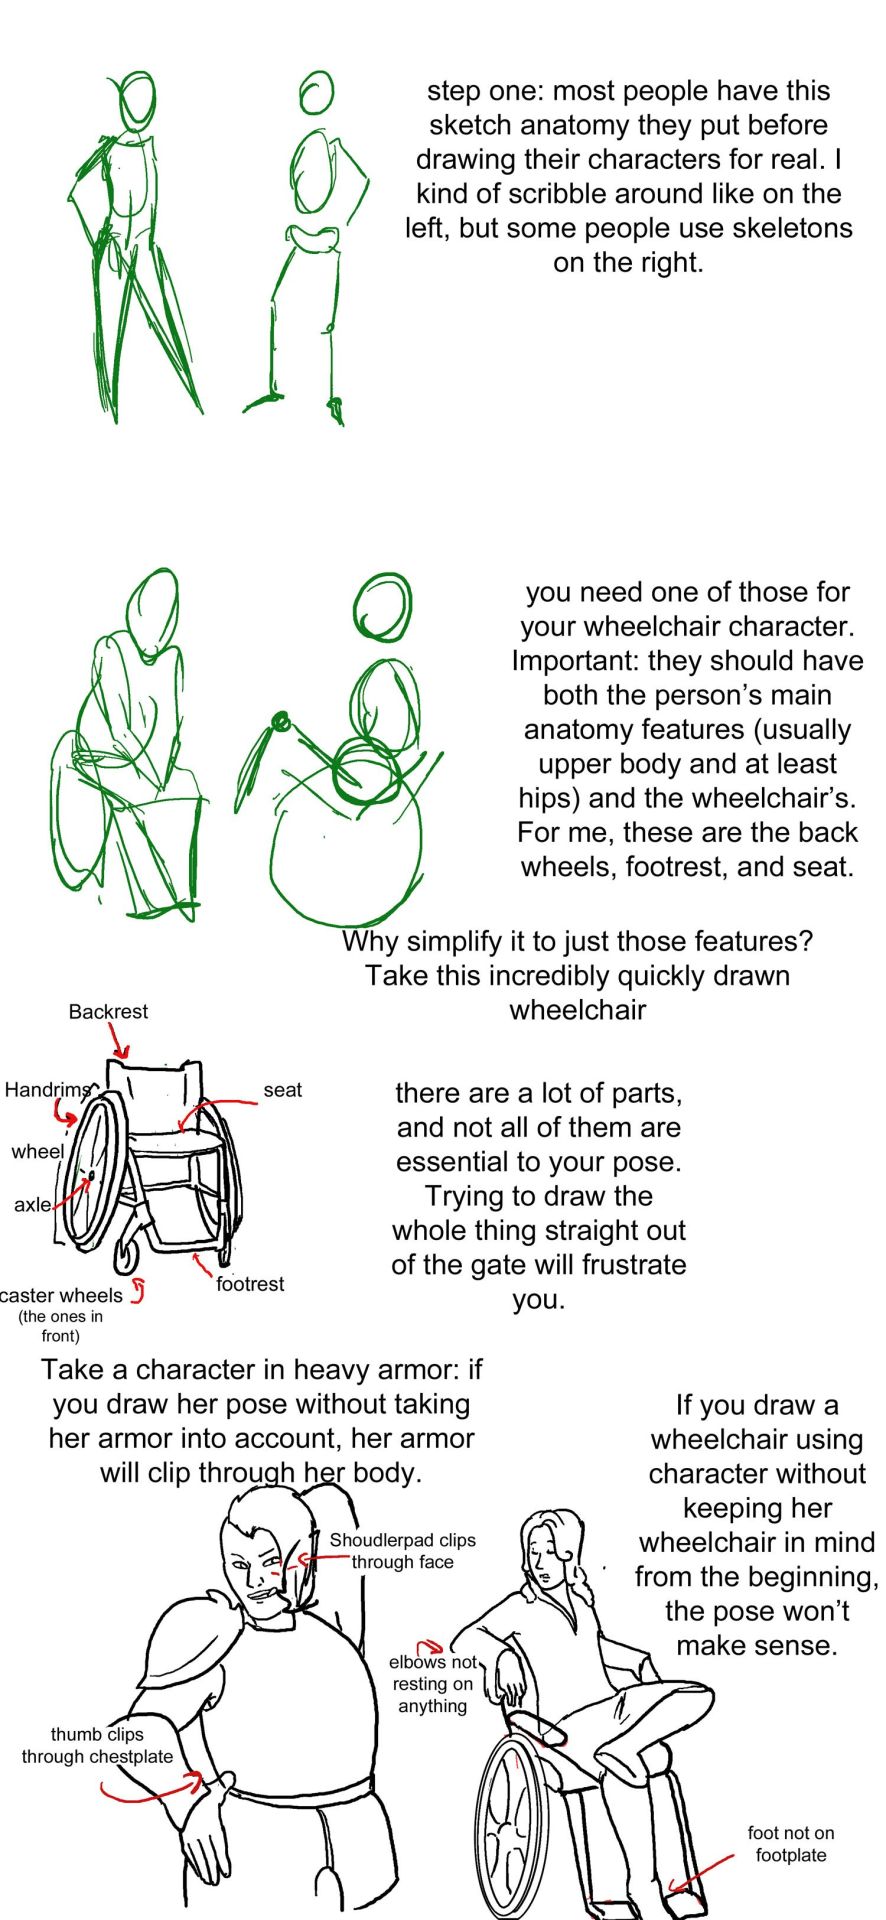
step one: a sketch of two people standing up. one just shows the outline of a person's body, with legs that are ind of triangle shaped, the other shows a sketched pelvis and rib cage to go along with the bones of the legs and arm. text: step one: Most people have this sketch anatomy they put before drawing their characters for real. I kind of scribble around like on the left, but some people use skeletons on the right.
step two: there are now too sketched pictures of people in wheelchairs. one shows lightly traced human form (arms articulated, curve for a stomach, legs that are kind of triangle shaped and pointing down) sitting in a wheelchair that is just the sketch of footrests and wheels. the other sketch shows the sketch of a body with a circle for hips and an oval for a rib cage and the person doing a wheelie (lifting the front end of the wheelchair off the ground and leaning back). their wheelchair is also sketched out and defined by a circle for their wheels and 2 lines, 1 of the seat and 1 for the backrest. text: you need one of those for your wheelchair character. important: they should have both the person's main anatomy features (Usually upper body and at least hips) and the wheelchair's. for me, these are the back wheels, footrest, and seat. why simplify to just those features? Take a look at this incredibly quickly drawn wheelchair.
step three: there is a lineart drawing of a manual wheelchair with slightly cambered (angled towards the seat) wheels, a backrest, and a footrest. the frame is light and there are no handlebars. there are labels pointing to different parts of the wheelchair: Backrest, handrims, wheel, axle, seat, footrest, and caster wheels (the ones in front). text: there are a lot of parts, and not all of them are essential to your pose. trying to draw the whole thing straight out of the gate will frustrate you.'
step four text: take a character in heavy armor: if you draw her pose without taking her armor into account, her armor will clip through her body. if you draw a wheelchair using character without keeping her wheelchair in mind from the beginning, the pose won't make sense.
step four image: next we see two lineart drawings of different characters. one is a bulky woman wearing plate armor. her hand is on her hip and she is trying to scratch her back with the other hand. there is the label "shoudlerpad clips through face" and "thumb clips through chestplate." the next drawing shows a woman in a wheelchair with one foot rested on her knee and her arms rested back, such that they would be rested on the back of a regular chair, but the back of her wheelchair is not wide enough for them to actually be resting on anything. the text here reads "elbows not resting on anything" and "foot not on footplate"
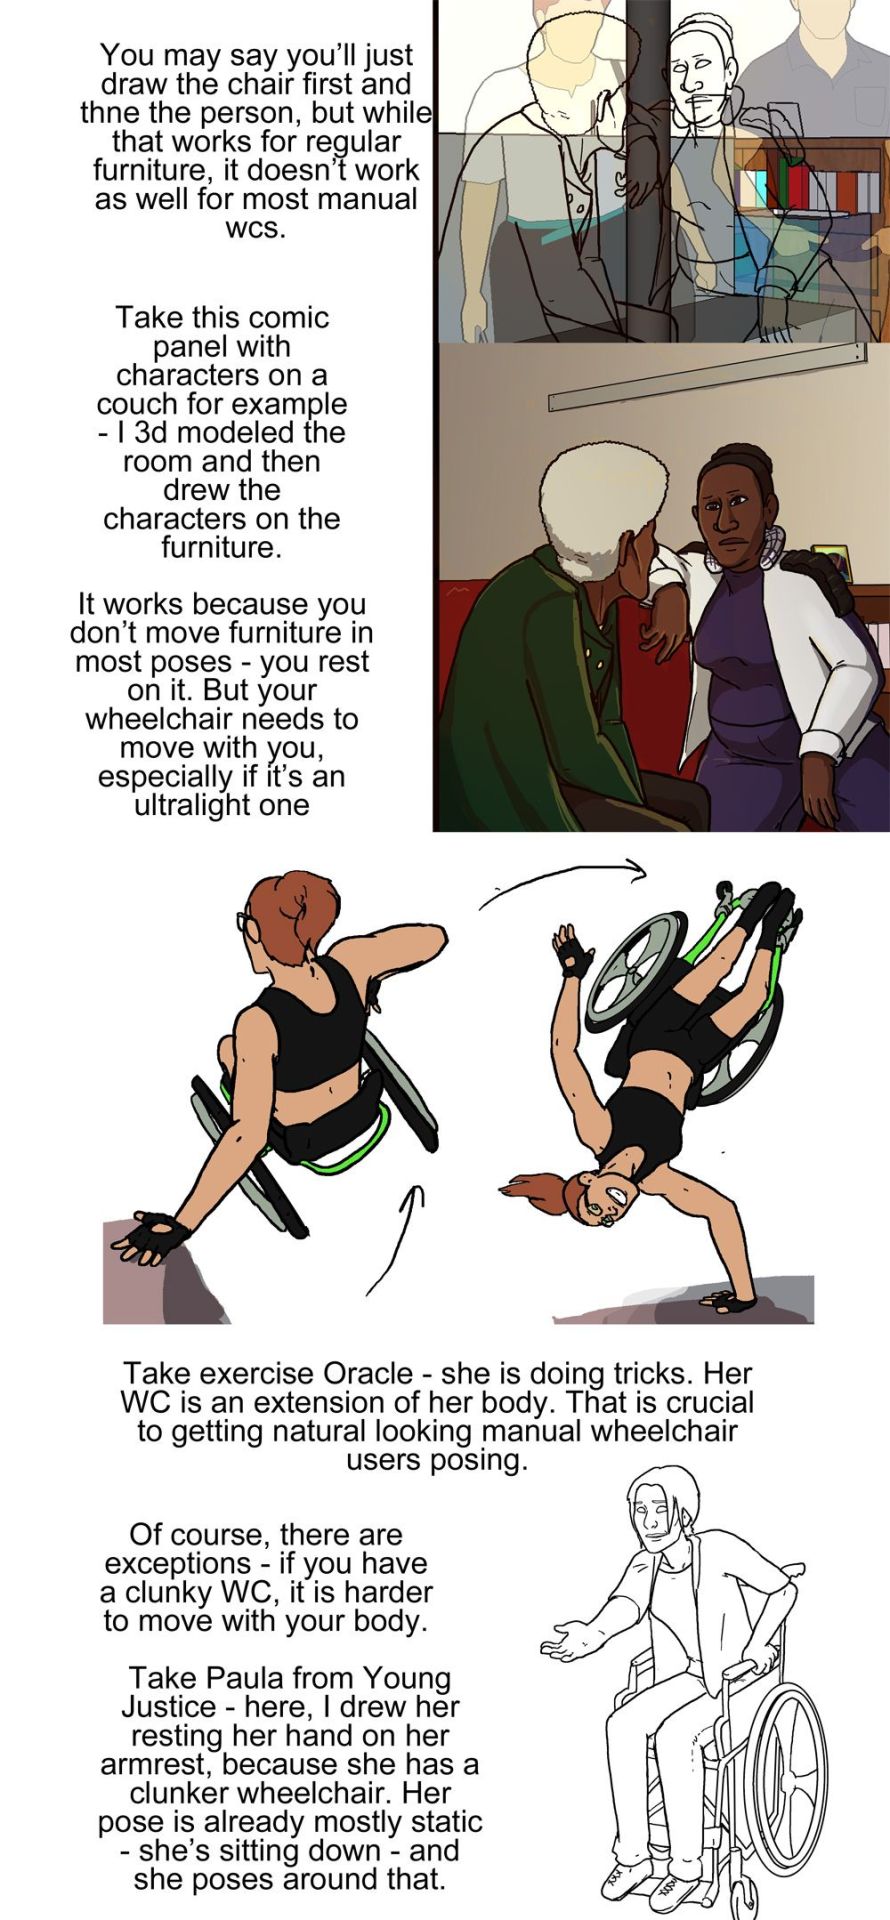
step five: there are two images, one is lineart on top of a 3d modelled apartment with sketchup, the other is a colored in version of that lineart with the background also colored in and no longer a 3d modelled screencap two characters, one old woman wearing a green jacket and one younger woman wearing a white shirt and blue undershirt, are sitting on a couch. the old woman is leaning forward and the young woman is resting her arm on the couch. behind the young woman is a bookshelf.
step five text: you may say you'll just draw the chair first and then the person, but while that works for regular furniture, it doesn't work as well for most manual wcs. take this comic panel with characters on a couch for example - I 3d modeled the room and then drew the characters on the furniture. it works because you don't move furniture in most poses - you rest on it. but your wheelchair needs to move with you, especially if it's an ultralight one.
step six image: there is a flat color drawing of barbara gordon in her wheelchair. she is wearing a black sportsbra and black shorts. in the first image we see she is doing tricks in her chair, zooming through the air (as if she has just launched herself off the ground in a skater park or somethign) while her left hand is resting on a structure and her right hand is heading towards the right handrim. the next image shows her right hand planted on the ground and her chair and body above her, such that she is briefly doing a one-handed handstand, but the motion line indicates that she is moving and this will not last. her left arm is near the handrim of her left wheel.
text: take exercise Oracle - she is doing tricks. Her WC is an extension of her body. That is crucial to getting natural looking manual wheelchair users after posing.
step seven: we see a lineart drawing of paula from young justice. she is sitting in a standard manual wheelchair with high armrests (goes up to the bottom of her ribs probably) and a high backrest (goes up to just below her shoulderblades). she is setting her hand on the armrest, leaning forward, and holding her other hand out.
text: of course, there are exceptions - if you have a clunky WC, it is harder to move with your body. Take Paula from young Justice - here, i drew her resting her hand on her armrest, because she has a clunker wheelchair. her pose is already mostly static - she's sitting down - and she poses around that.
How to come untouched, a tutorial:
So, after I shared with a couple of friends that I had the ability to masturbate with my mind, a tutorial was requested, and I figured this was the best place to share.
You will need:
-Your imagination (as vivid as possible, and try to train it to be as sense-integrative as possible: imagery, sound, touch, smell, anything you like, make it a full embodiment experience)
-Thighs you can press together tightly (friction might not be needed but if there is no pressure this will not work, there has to be a base physical element to ground yourself in your body)
Where you can do this:
-your bedroom
-the sofa in the living room of your parents' house (as long as nobody is in the room)
-your local/high school library (even if there are people around)
-anywhere as long as you dare tbh
Step 1: You need to go into this headspace where you let go of common inhibitions, not in a "drunk and excited" way, but in a "tired of all the pressure of the daily life" way. Maybe medidate, have a good cry, idk what works for you.
Step 2: choose a bunch of your deepest fantasms. The more intense the better. Now you're going to want to sink into that headspace further in order to explore the parts of your fantasm that are usually too dark for you, not because they scare you off, but because you're afraid. You need to let go of that fear.
Pro tip: for beginners, you might want to start with erotica/fanfic works for that fits those fantasm you want to explore. As you grow into your abilities, you will probably not need it anymore, but fiction is a good starting point, especially if you're not very aware/used to thinking about your most intimate kinks.
Step 3: clench your thighs close together, either close your eyes or focus all your attention on what you're reading, remember to bite your lip and hold it down if there are people around, and shove complete, razor-sharp focus (this is a skill you can train) on that story/fantasm you're working with. And then all that's left is having fun!!! This can also be a good occasion to practice your poker face ;)
Warning: as a beginner, this might take a lot of time. Do not be discouraged! The more you do it, the quicker you'll be able to get it/control how quickly you wanna cum if you're strapped for time or you really wanna enjoy it, and the lighter the fantasm is going to need to be.
Limits/restrictions : You may have noticed I'm not a vanilla person, so I have no idea how that would work for vanilla people, please address all reclamations at @shesthere .
Enjoy, have fun, and be responsible! Remember all skills take time to cultivate
✨✨Batdr ink tutorial!✨✨
I have been drawing alot of #batdr stuff for twitter and insta and thought I should post this here too.


Looking for Something? (Mobile)
Anatomy:
Arms
Breasts
Body Types
Feet
Female
Hands
Heads -Ears -Expressions -Eyes -Facial -Hair -Mouths and Lips -Noses -Tears
Humans
Legs
Male
Muscles
Pelvis
Proportions
Shoulders
Torso
Animals:
Anatomy
Antlers
Beaks
Behaviour
Ears
Facial
Feathers
Fur
Hooves
Horns
Insects
Legs
Paws
Talons
Teeth
Wings
Backgrounds:
Cityscape
Indoors
Organic
Perspective
Quick BGs
Simplistic
Brushes:
Photoshop
Paint tool SAI
Design:
Buildings
Character Design
Clothing
Environments
Folds
Heights
Maps
Names
Sketching
Skin Tones
Drawing and Colouring:
Canvas Size
Colour Palettes
Colour Theory
Comics
Composition
Lighting
Lineart
Painting
Quick Tricks
Shading
Traditional
Fantasy:
Armor
Archery
Horns
Mythical Animals
Mythology
Power Ups
Weapons
Wings
For the Artist:
Copyright
File Types
Exercises
Portfolio
Reminders
Tablets
Tips and Advice
Tools
Languages:
ASL
Ancient
French
German
Grammar
Italian
Japanese
Korean
Morse
Spanish
Misc:
Animation
Commissions
Cosplay
Crafts
Life
Master Lists
Psychological
Resources
School
Writing
Nature:
Blood
Clouds
Fire
Flowers
Grass
Landscapes
Lightning
Metal
Plants
Rocks
Space
Trees
Water
Wood
Poses:
Angles
Animals
Draw Your X
Humans
Movement
Multiple Persons
Programs:
Clip Studio Paint
Krita
Paint Tool SAI
Photoshop
Etc
World Building:
Buildings
Culture
History
Historical Clothing
Video
Links
wondering what program you use to animate? i saw your minish cap link gif on youtube and the quality looks SO CLEAN! ive been animating in photoshop (lol) but i have looking for a new program to use and potentially buy.
Hey, I have no clue how long this ask has been here becausetumblr never notified me! Thank you for the kind words though! :))
The short answer is I use Paint Tool Sai for drawing framesand backgrounds, photoshop CS6 for additional effects or color corrections, anda site called gifmaker.me which puts together your frames at the speed you wantwith extremely minimal quality loss (unlike Photoshop CS6 even at its highestexport settings >.>)
I’ll add more specifics of how I animate below if needed! (Thoughgoing in full detail might require a more in-depth tutorial with pictures)
If I’m going to use a gif as a base to animate like the MinishCap one, I’ll open the gif up in CS6 which splits it into frames- then I’ll copythose frames into sai.
Since Sai isn’t made specifically for animation it’s a bitof a hassle to set up but if you choose to use it my method is:
Make a folder for each animation frame containing: A layerfor your lineart, a layer for the animation base if using, your background, andone blank layer filled in with white so your lineart frames don’t all show onthe canvas at the same time. I can mimic onion skin mode to check betweenlayers by lowering the opacity of the current folder I’m working with, and alsochange the color of the lineart by selecting “Preserve Opacity” andcoloring/filling the lineart with the color I want.
When I’m done making frames, I export the file into CS6 andplay with the colors if I need to. One effect I always use is making a copy ofthe frame I want, giving it an overlay and Gaussian Blur effect with 20-30%opacity, and merge than with the original layer.
It’s tedious, butonce I do that with every single frame, I save each frame as its own image (basicallyjust pasting in MSPaint and saving as 1, 2, 3, etc.). I go to a site that putstogether frames without compressing them (or very small compression) like GifMaker.me,choose the speed I want the gif to play at, and save the gif! An alternative to gifmaker is EZgif, though I prefer the former.
A thing to keep in mind is that tumblr (at least the lasttime I checked) will NOT play gifs that are over 3MB, so if it goes above that,you may have to risk a bit of quality compressing your gif (I use EZgif forthat because I can choose the compression level I want!).